<?xml version="1.0" encoding="utf-8"?><feed xmlns="http://www.w3.org/2005/Atom" xml:lang="en"><generator uri="https://jekyllrb.com/" version="3.10.0">Jekyll</generator><link href="https://www.bretty.me.uk/feed.xml" rel="self" type="application/atom+xml" /><link href="https://www.bretty.me.uk/" rel="alternate" type="text/html" hreflang="en" /><updated>2025-02-11T15:22:46+00:00</updated><id>https://www.bretty.me.uk/feed.xml</id><title type="html">Dave Brett</title><subtitle>bretty.me.uk is an EUC Geek and Ultra Runner. You will find a bunch of blog posts, scripts and tips that will help you with your EUC journey.
</subtitle><author><name>Dave Brett</name><email>dave@bretty.me.uk</email></author><entry><title type="html">Foundation a Nutanix Cluster with Ansible</title><link href="https://www.bretty.me.uk/2023-12-12-automate-foundation-nutanix-cluster/" rel="alternate" type="text/html" title="Foundation a Nutanix Cluster with Ansible" /><published>2023-12-12T00:00:00+00:00</published><updated>2023-12-12T00:00:00+00:00</updated><id>https://www.bretty.me.uk/automate-foundation-nutanix-cluster</id><content type="html" xml:base="https://www.bretty.me.uk/2023-12-12-automate-foundation-nutanix-cluster/"><![CDATA[<ul id="markdown-toc">
  <li><a href="#overview" id="markdown-toc-overview">Overview</a></li>
  <li><a href="#required-components" id="markdown-toc-required-components">Required Components</a>    <ul>
      <li><a href="#foundation-virtual-machine" id="markdown-toc-foundation-virtual-machine">Foundation Virtual Machine</a></li>
      <li><a href="#container-platform" id="markdown-toc-container-platform">Container Platform</a></li>
      <li><a href="#visual-studio-code-extension" id="markdown-toc-visual-studio-code-extension">Visual Studio Code Extension</a></li>
    </ul>
  </li>
  <li><a href="#foundation-your-cluster" id="markdown-toc-foundation-your-cluster">Foundation Your Cluster</a>    <ul>
      <li><a href="#build-the-container" id="markdown-toc-build-the-container">Build The Container</a></li>
      <li><a href="#install-nutanix-ansible-module" id="markdown-toc-install-nutanix-ansible-module">Install Nutanix Ansible Module</a></li>
      <li><a href="#define-foundation-playbook" id="markdown-toc-define-foundation-playbook">Define Foundation Playbook</a></li>
      <li><a href="#running-the-playbook" id="markdown-toc-running-the-playbook">Running The Playbook</a></li>
    </ul>
  </li>
  <li><a href="#taking-it-further" id="markdown-toc-taking-it-further">Taking It Further</a>    <ul>
      <li><a href="#powershell-for-the-win" id="markdown-toc-powershell-for-the-win">PowerShell For The Win</a></li>
      <li><a href="#the-nutanix-installer-file" id="markdown-toc-the-nutanix-installer-file">The Nutanix Installer File</a></li>
      <li><a href="#going-even-further" id="markdown-toc-going-even-further">Going Even Further</a></li>
    </ul>
  </li>
  <li><a href="#conclusion" id="markdown-toc-conclusion">Conclusion</a></li>
</ul>

<h3 id="overview">Overview</h3>

<p>In my role as a Senior Solutions Architect in Performance Engineering at Nutanix our team does a lot of testing with various configurations of Nutanix AOS, AHV, and different EUC endpoint options. Part of this requires us to re-image our testing clusters to ensure that they are in a clean and standard state ready for us to test on.</p>

<p>This post will walk you through one of the ways you can achieve that using Containers and Ansible enabling you to execute an Ansible Playbook from your local Visual Studio Code IDE and watch as the magic happens!</p>

<h3 id="required-components">Required Components</h3>

<h4 id="foundation-virtual-machine">Foundation Virtual Machine</h4>

<p>First, you will need a Foundation VM in place. The reason for this is that the Foundation VM is what, well, drives the foundation of the cluster.</p>

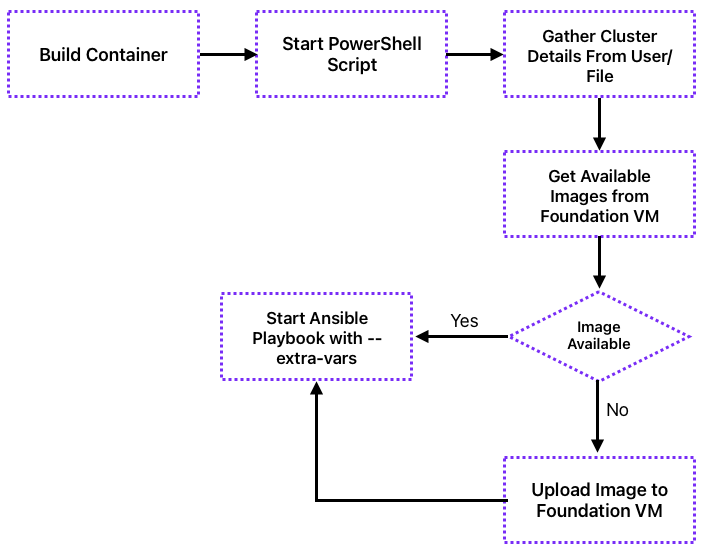
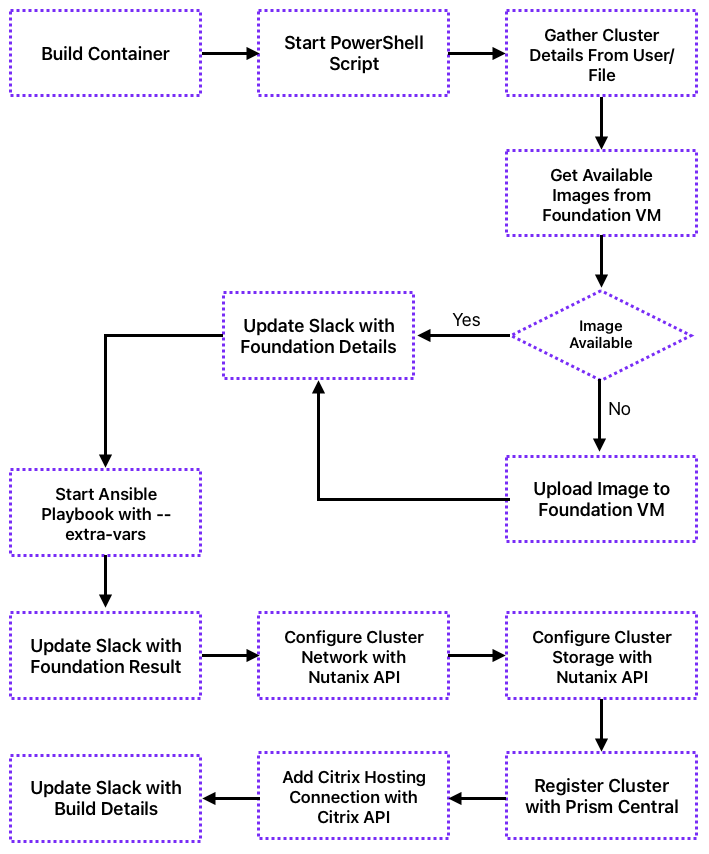
<p>What we will be doing with the workflow is shown below.</p>

<p><img src="/assets/img/posts/2023-12-12-foundation-nutanix-cluster-with-ansible-and-powershell/image_01.png" alt="Ansible Flow" /></p>

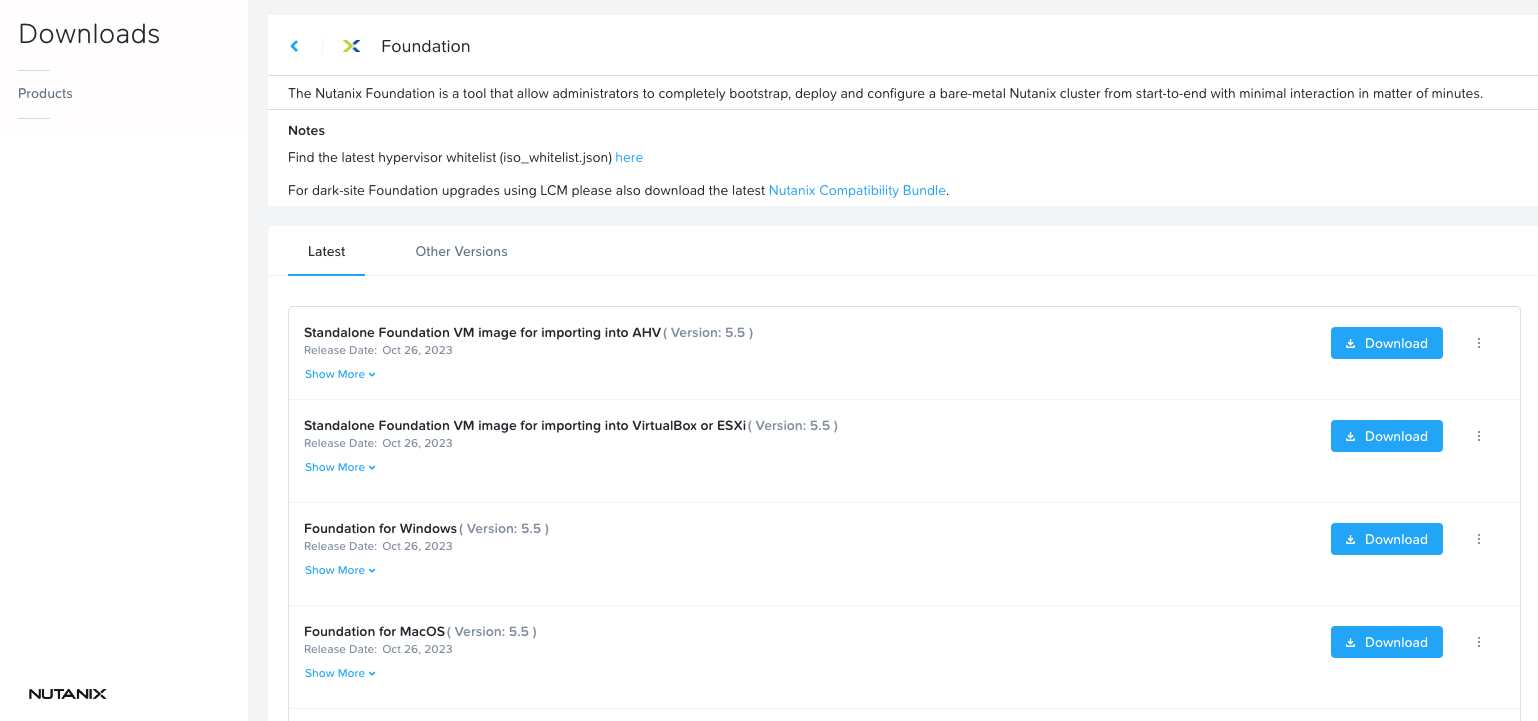
<p>To install a Foundation VM head over to the <strong><a href="https://my.nutanix.com/">My Nutanix</a></strong> portal and open up the <strong>Support and Insights</strong> page. Then select <strong>Downloads</strong> and finally <strong>Foundation</strong>. Here you will see various options for downloading a standalone Foundation VM image. Pick the option that suits the hypervisor you wish to run the VM on, download and set up the appliance following the Nutanix documentation.</p>

<p><img src="/assets/img/posts/2023-12-12-foundation-nutanix-cluster-with-ansible-and-powershell/image_02.png" alt="Foundation Downloads" /></p>

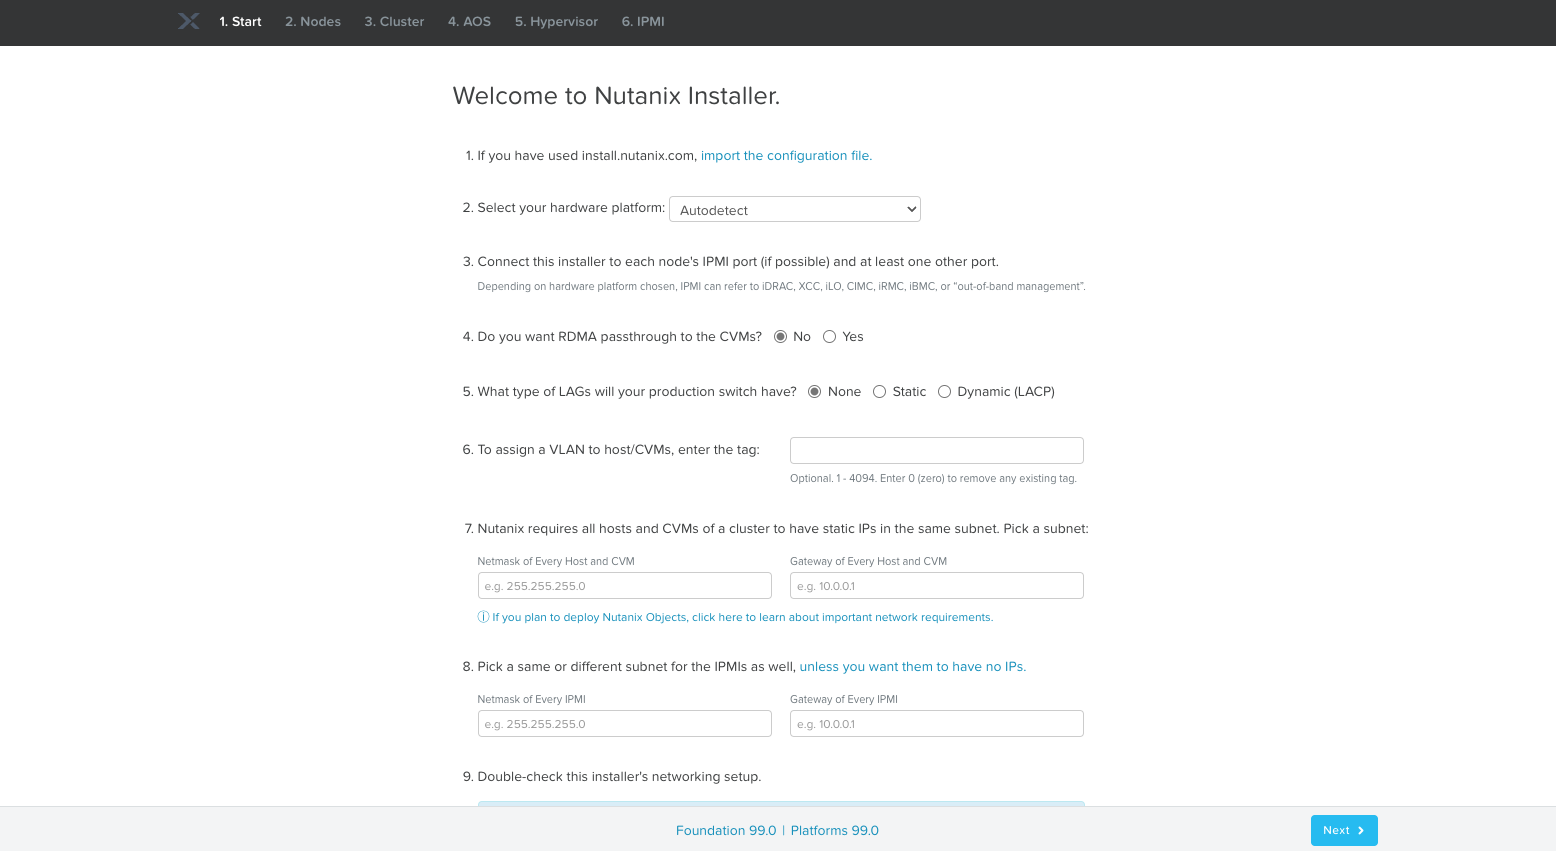
<p>Once done you should be able to connect to your new Foundation VM on port 8000 <code class="language-plaintext highlighter-rouge">http://foundation_vm_ip:8000</code>.</p>

<p><img src="/assets/img/posts/2023-12-12-foundation-nutanix-cluster-with-ansible-and-powershell/image_03.png" alt="Foundation Ready" /></p>

<p>Now, at this point you could manually go through the steps of filling out the UI and re-imaging your cluster but where’s the fun in that!</p>

<h4 id="container-platform">Container Platform</h4>

<p>You will also need a container platform on your laptop in order for VS Code to be able to open your code in a re-usable and consistent container. Doing this will enable you to automatically download and install the required components to build and configure your clusters.</p>

<p>I use a MacBook but Rancher supports MacOS, Windows and Linux making it a good option. Head over to <a href="https://rancherdesktop.io/">the Rancher download page</a> and go ahead and install it.</p>

<h4 id="visual-studio-code-extension">Visual Studio Code Extension</h4>

<p>The last thing you will need is the <strong>Dev Containers</strong> Visual Studio Code extension.</p>

<p>Click the extensions icon in VS Code, search for Dev Containers and install it.</p>

<p><img src="/assets/img/posts/2023-12-12-foundation-nutanix-cluster-with-ansible-and-powershell/image_04.png" alt="Dev Containers Extension" /></p>

<h2 id="foundation-your-cluster">Foundation Your Cluster</h2>

<p>With all the pre-reqs in place let’s go ahead and start to have some VS Code fun!</p>

<h3 id="build-the-container">Build The Container</h3>

<p>Open up a new folder in VS Code and create a top level folder called <code class="language-plaintext highlighter-rouge">.devcontainer</code>. When you instruct VSCode to open your folder in a container it will use the definitions scoped out here to build your container for you automatically.</p>

<p>Within the folder you will create 2 files detailed below.</p>

<table>
  <thead>
    <tr>
      <th style="text-align: left">File</th>
      <th style="text-align: left">Description</th>
    </tr>
  </thead>
  <tbody>
    <tr>
      <td style="text-align: left">devcontainer.json</td>
      <td style="text-align: left">Tells VS Code how to access (or create) a development container with a well-defined tool and runtime stack</td>
    </tr>
    <tr>
      <td style="text-align: left">DockerFile</td>
      <td style="text-align: left">Changes made in the Dockerfile will persist even upon a rebuild of the dev container</td>
    </tr>
  </tbody>
</table>

<p>More information on these file definitions can be found <a href="https://code.visualstudio.com/docs/devcontainers/create-dev-container">here</a></p>

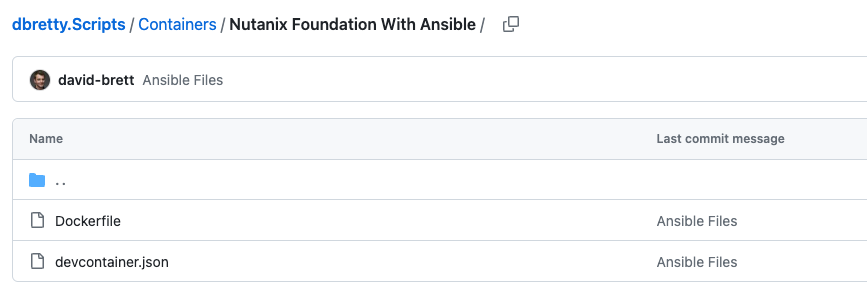
<p>In these files you will need to define what Docker Container variant you want to install as well as the version of Ansible and any other tools you want in your Container. Microsoft have some good documentation on creating Dev Containers <a href="https://code.visualstudio.com/docs/devcontainers/create-dev-container">here</a> but if you want a quick start set of files I have created both in my GitHub Repo <a href="https://github.com/dbretty/dbretty.Scripts/tree/master/Containers/Nutanix%20Foundation%20With%20Ansible">here</a> that you can download and use.</p>

<p><img src="/assets/img/posts/2023-12-12-foundation-nutanix-cluster-with-ansible-and-powershell/image_05.png" alt="Dev Container Files" /></p>

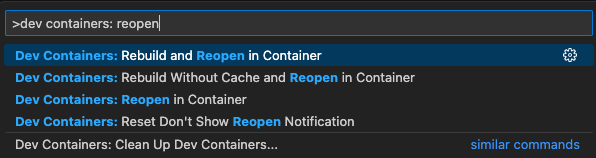
<p>Once you have these in place you can test your new container by using the command <strong>Dev Containers: Rebuild and Reopen in Container</strong> from VS Code.</p>

<p><img src="/assets/img/posts/2023-12-12-foundation-nutanix-cluster-with-ansible-and-powershell/image_06.png" alt="Dev Container Open" /></p>

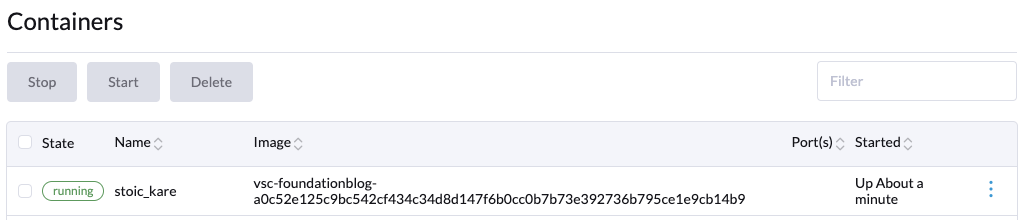
<p>This will build and open your code in a new container and allow you to open a bash terminal within VS Code directly in the container. You can check the container is built and running by looking in Rancher Desktop.</p>

<p><img src="/assets/img/posts/2023-12-12-foundation-nutanix-cluster-with-ansible-and-powershell/image_07.png" alt="Dev Container Running" /></p>

<p>You will also see that Ansible is installed within the container as part of the build.</p>

<p><img src="/assets/img/posts/2023-12-12-foundation-nutanix-cluster-with-ansible-and-powershell/image_08.png" alt="Ansible Running" /></p>

<h3 id="install-nutanix-ansible-module">Install Nutanix Ansible Module</h3>

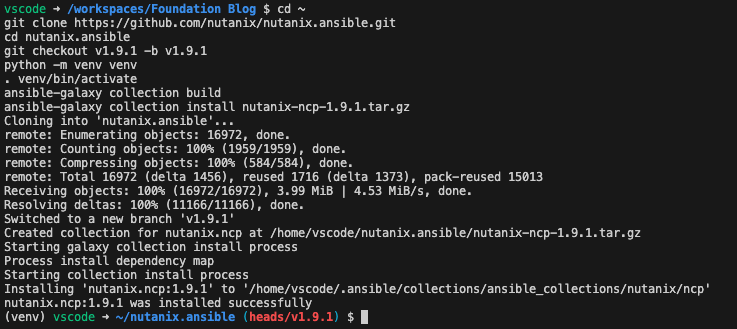
<p>Next you will want to install the Nutanix Ansible Module into your container. This will presist unless you rebuild your container (change the DockerFile or devcontainer.json) so you should only need to do this once.</p>

<p>Open a <code class="language-plaintext highlighter-rouge">bash</code> terminal in your container and enter the following commands:</p>

<div class="language-bash highlighter-rouge"><div class="highlight"><pre class="highlight"><code><span class="nb">cd</span> ~
git clone https://github.com/nutanix/nutanix.ansible.git
<span class="nb">cd </span>nutanix.ansible
git checkout v1.9.1 <span class="nt">-b</span> v1.9.1
python <span class="nt">-m</span> venv venv
<span class="nb">.</span> venv/bin/activate
ansible-galaxy collection build
ansible-galaxy collection <span class="nb">install </span>nutanix-ncp-1.9.1.tar.gz
</code></pre></div></div>
<p><img src="/assets/img/posts/2023-12-12-foundation-nutanix-cluster-with-ansible-and-powershell/image_09.png" alt="Nutanix Ansible Installed" /></p>

<h3 id="define-foundation-playbook">Define Foundation Playbook</h3>

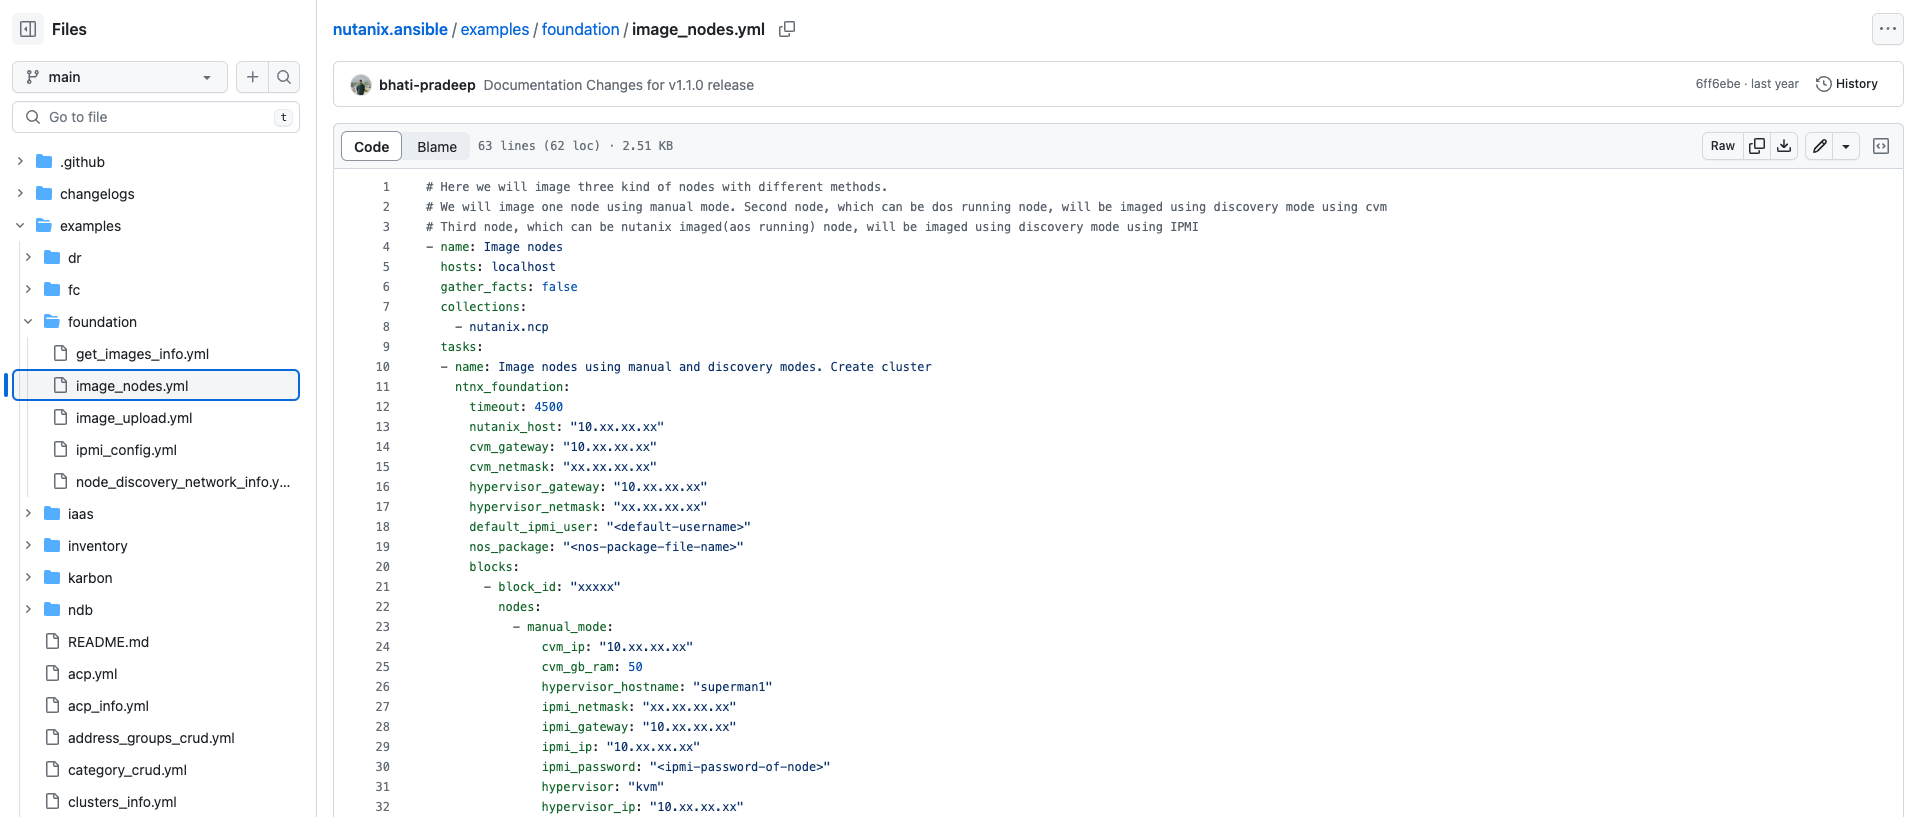
<p>Next you want to define a Playbook that Ansible will use to Foundation your cluster. Luckily for us the kind folk at Nutanix have given us a bunch of examples to use <a href="https://github.com/nutanix/nutanix.ansible/blob/main/examples/foundation/image_nodes.yml">here</a></p>

<p><img src="/assets/img/posts/2023-12-12-foundation-nutanix-cluster-with-ansible-and-powershell/image_10.png" alt="Nutanix Ansible Playbook Examples" /></p>

<p>Create a file in your container called <code class="language-plaintext highlighter-rouge">filename.yml</code> and copy the contents of this file into it substituting the values for those of your environment. Duplicate the <code class="language-plaintext highlighter-rouge">blocks</code> and <code class="language-plaintext highlighter-rouge">nodes</code> sections to mirror what you are going to be re-imaging.</p>

<p>Most of the details in the yml file are self-explanatory but a couple of key fields I would like to point out are below.</p>

<table>
  <thead>
    <tr>
      <th style="text-align: left">Field</th>
      <th style="text-align: left">Description</th>
    </tr>
  </thead>
  <tbody>
    <tr>
      <td style="text-align: left">nutanix_host</td>
      <td style="text-align: left">This is the IP Address of your Foundation VM</td>
    </tr>
    <tr>
      <td style="text-align: left">nos_package</td>
      <td style="text-align: left">This is the Nutanix Installer tar file that you will have uploaded to the Foundation VM as part of the install process</td>
    </tr>
  </tbody>
</table>

<h3 id="running-the-playbook">Running The Playbook</h3>

<p>Ok, so you have everything defined, and you are ready to Foundation your new cluster. It’s as simple as running the following command.</p>

<div class="language-bash highlighter-rouge"><div class="highlight"><pre class="highlight"><code>ansible-playbook playbook_file_name.yml
</code></pre></div></div>

<p>That’s it, Ansible will take the contents of your playbook, connect to the Foundation VM, pass all that content over and start the process of re-imaging your new cluster.</p>

<h2 id="taking-it-further">Taking It Further</h2>

<p>Whilst this is great and a nice way to be able to automate the imaging of your Nutanix clusters if you think a little broader there are a number of ways to make this process slicker by introducing more tools into the mix. Some of my thoughts on this are below.</p>

<h3 id="powershell-for-the-win">PowerShell For The Win</h3>

<p>If you put PowerShell into your container you are able to use this to automatically build and execute the yml files as well as integrate the script into your reporting tool set (think slack for build notifications). To get PowerShell into your container you can create a bash script to execute on container build with the following content.</p>

<div class="language-sh highlighter-rouge"><div class="highlight"><pre class="highlight"><code><span class="nv">architecture</span><span class="o">=</span><span class="s2">"</span><span class="si">$(</span><span class="nb">uname</span> <span class="nt">-m</span><span class="si">)</span><span class="s2">"</span>
<span class="k">case</span> <span class="k">${</span><span class="nv">architecture</span><span class="k">}</span> <span class="k">in
    </span>x86_64<span class="p">)</span> <span class="nv">architecture</span><span class="o">=</span><span class="s2">"amd64"</span><span class="p">;;</span>
    aarch64 <span class="p">|</span> armv8<span class="k">*</span><span class="p">)</span> <span class="nv">architecture</span><span class="o">=</span><span class="s2">"arm64"</span><span class="p">;;</span>
<span class="k">esac</span>

<span class="k">if</span> <span class="o">[</span> <span class="s2">"</span><span class="k">${</span><span class="nv">architecture</span><span class="k">}</span><span class="s2">"</span> <span class="o">=</span> <span class="s2">"arm64"</span> <span class="o">]</span><span class="p">;</span> <span class="k">then
    </span><span class="nb">echo</span> <span class="s2">"Architecture is ARM"</span>
    <span class="nv">posh</span><span class="o">=</span><span class="s2">"https://github.com/PowerShell/PowerShell/releases/download/v7.3.0/powershell-7.3.0-linux-arm64.tar.gz"</span>
<span class="k">else
    </span><span class="nb">echo</span> <span class="s2">"Architecture is X86_64"</span>
    <span class="nv">posh</span><span class="o">=</span><span class="s2">"https://github.com/PowerShell/PowerShell/releases/download/v7.3.0/powershell-7.3.0-linux-x64.tar.gz"</span>
<span class="k">fi

</span><span class="nb">echo</span> <span class="s2">"Downloading PowerShell from </span><span class="nv">$posh</span><span class="s2">"</span>
curl <span class="nt">-L</span> <span class="nt">-o</span> /tmp/powershell.tar.gz <span class="nv">$posh</span>

<span class="nb">echo</span> <span class="s2">"Installing PowerShell"</span>
<span class="nb">sudo mkdir</span> <span class="nt">-p</span> /opt/microsoft/powershell/7
<span class="nb">sudo tar </span>zxf /tmp/powershell.tar.gz <span class="nt">-C</span> /opt/microsoft/powershell/7
<span class="nb">sudo chmod</span> +x /opt/microsoft/powershell/7/pwsh
<span class="nb">sudo ln</span> <span class="nt">-s</span> /opt/microsoft/powershell/7/pwsh /usr/bin/pwsh
</code></pre></div></div>

<p>Once you have this you can use the <code class="language-plaintext highlighter-rouge">Invoke-RestMethod</code> Cmdlet to pull data back from foundation before starting the Ansible playbook and use the <code class="language-plaintext highlighter-rouge">extra-vars</code> parameter to pass in data you have gathered from PowerShell.</p>

<h3 id="the-nutanix-installer-file">The Nutanix Installer File</h3>

<p>One of the obvious things with the above process is that you are hard coding a Nutanix Installer into the yml file. However, if you look at the Foundation API Reference <a href="https://www.nutanix.dev/api_references/foundation/#/ZG9jOjQ1Mg-foundation">here</a> you can see there are options for getting available images or even uploading them.</p>

<p>If you think about this with PowerShell you could take the process further and achieve something like the below.</p>

<p><img src="/assets/img/posts/2023-12-12-foundation-nutanix-cluster-with-ansible-and-powershell/image_11.png" alt="Nutanix Ansible Playbook Decision" /></p>

<p>This gives you the ability to have a single script that will gather information at runtime for the entire build process ensuring that your automation work is re-usable and consistent.</p>

<h3 id="going-even-further">Going Even Further</h3>

<p>One of the issues with running this type of thing in a container is the additional tasks you have to perform once the cluster is initially built. Some typical tasks would be</p>

<ul>
  <li>Register the cluster with Prism Central</li>
  <li>Create Storage Containers</li>
  <li>Create Networking</li>
  <li>Connect to Citrix with Hosting Connection</li>
</ul>

<p>With the new API driven Citrix Configuration ability as well as the Nutanix APIs you can now do all of this from within a simple container fully automated. The below is just one way you could do this with PowerShell, Ansible and a Container.</p>

<p><img src="/assets/img/posts/2023-12-12-foundation-nutanix-cluster-with-ansible-and-powershell/image_12.png" alt="Nutanix Ansible Playbook Full Run" /></p>

<p>With the above you can see that it is possible to build an automation wrapper to use with any cluster and achieve an end-to-end automated build from zero to a Citrix ready cluster, all is takes is a little time and some imagination!</p>

<h2 id="conclusion">Conclusion</h2>

<p>The above may not be perfect. My Ansible skills are slim to say the least as are my PowerShell coding skills, but I have found that this is a good balance of easy to manage code and getting things done in an automated and consistent manner.</p>

<p>Please, if you have a better way to do this I am all ears, feel free to get in touch.</p>

<p>Thanks to “The Doc” <a href="https://twitter.com/svenh">Sven</a> for all his help in getting this working!</p>]]></content><author><name>Dave Brett</name><email>dave@bretty.me.uk</email></author><category term="blog" /><category term="Nutanix" /><category term="Ansible" /><category term="Automation" /><summary type="html"><![CDATA[This post will show you how you foundation your Nutanix Clusters with Ansible to automate the build of your Nutanix assets.]]></summary><media:thumbnail xmlns:media="http://search.yahoo.com/mrss/" url="https://www.bretty.me.uk/assets/img/posts/2023-12-12-foundation-nutanix-cluster-with-ansible-and-powershell/header_image.png" /><media:content medium="image" url="https://www.bretty.me.uk/assets/img/posts/2023-12-12-foundation-nutanix-cluster-with-ansible-and-powershell/header_image.png" xmlns:media="http://search.yahoo.com/mrss/" /></entry><entry><title type="html">Nutanix Flow Network Security with Citrix Virtual Apps and Desktops</title><link href="https://www.bretty.me.uk/2023-04-28-nutanix-flow-network-security/" rel="alternate" type="text/html" title="Nutanix Flow Network Security with Citrix Virtual Apps and Desktops" /><published>2023-04-28T00:00:00+00:00</published><updated>2023-04-28T00:00:00+00:00</updated><id>https://www.bretty.me.uk/nutanix-flow-network-security</id><content type="html" xml:base="https://www.bretty.me.uk/2023-04-28-nutanix-flow-network-security/"><![CDATA[<ul id="markdown-toc">
  <li><a href="#overview" id="markdown-toc-overview">Overview</a></li>
  <li><a href="#network-segmentation" id="markdown-toc-network-segmentation">Network Segmentation</a></li>
  <li><a href="#nutanix-flow-network-security" id="markdown-toc-nutanix-flow-network-security">Nutanix Flow Network Security</a></li>
  <li><a href="#implementing-nutanix-flow-network-security-for-citrix-virtual-apps-and-desktops" id="markdown-toc-implementing-nutanix-flow-network-security-for-citrix-virtual-apps-and-desktops">Implementing Nutanix Flow Network Security for Citrix Virtual Apps and Desktops</a></li>
  <li><a href="#conclusion" id="markdown-toc-conclusion">Conclusion</a></li>
</ul>

<h3 id="overview">Overview</h3>

<p>Security is a big thing, always has been and always will be but when you tie security with a Citrix environment things get a little tougher. By nature, Citrix environments are typically an easy target for attackers, and they will try to get a foot hold in your environment and then spread out from there to the rest of your network. This is called Lateral Movement and is a common technique used my many attackers to get deeper and deeper into your world.</p>

<p>I have written about how to prevent lateral movement before, and you can read that <a href="[LINK](https://bretty.me.uk/blog/security/vda/citrix/2022-07-19-secure-lateral-movement/)">here</a> but what if you want to go a step further. Enter <strong>Network Segmentation</strong>.</p>

<p>What the hell is that you might ask, and why would I need to know about that in a Citrix Environment?</p>

<p>Wikipedia to the rescue, you can find a pretty decent starting point on network segmentation (NetSeg) <a href="https://en.wikipedia.org/wiki/Network_segmentation">here</a>, so I would suggest reading that before you carry on with this post, so you have a basic understanding of what we are trying to achieve with this.</p>

<h3 id="network-segmentation">Network Segmentation</h3>

<p>In essence, Network Segmentation does exactly what it says on the tin. You want to be able to split your network (or in this case your Citrix environment) into segments then define rules regarding the network traffic you want to allow in and out of that “segment” whilst blocking everything else.</p>

<p>Think about Citrix StoreFront as an example. You will want to allow port 443 into the servers from your defined user networks but not much else. The StoreFront servers will need to be able to talk to each other for subscription replication but outbound they may only want to be able to talk to the domain as an example. Now this is not an exhaustive list of the networking requirements but just an example to get the idea over.</p>

<p>What you want to be able to do is define all these rules so that you are only allowing the required traffic to move across your network and blocking everything else. This will stop attackers moving about your environment and taking advantage of a weak security posture.</p>

<p>This is easier said that done, I get that but implementing this will go a long way in making your platform more secure.</p>

<p>Citrix provides an <a href="https://docs.citrix.com/en-us/tech-zone/build/tech-papers/citrix-communication-ports.html">exhaustive list of ports and protocols</a> associated with all CVAD components. This document is regularly updated as component changes are implemented and is a good reference guide. Make sure that you map out your network requirements before starting out down this road as it will help reduce the chance of you pushing a policy that will break your environment.</p>

<h3 id="nutanix-flow-network-security">Nutanix Flow Network Security</h3>

<p>Since joining Nutanix as a Senior Solutions Architect I have been fortunate enough to get to play around with pretty much all the awesome technology that the engineers here come up with. One of these products is Nutanix Flow Network Security.</p>

<p>Here is the low down on what Flow Network Security is.</p>

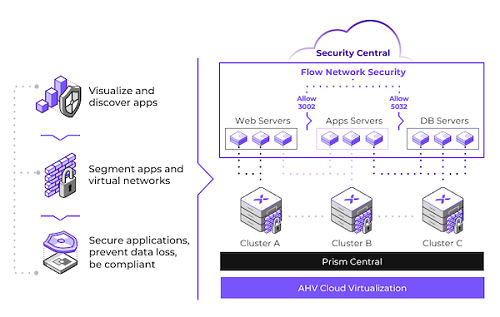
<p>Flow Network Security delivers advanced networking and security services for AHV VMs, providing visibility into the virtual network, application-centric protection from network threats, and automation of common networking operations.</p>

<p><img src="/assets/img/posts/2023-04-28-nutanix-flow-network-security/01.png" alt="" /></p>

<p>Fully integrated into AHV virtualization and the Nutanix Cloud Platform, Flow Network Security allows organizations to deploy software-defined virtual networking without installing additional products that have separate management and independent software maintenance requirements.</p>

<p>Flow Network Security provides application-centric policies that enable complete visibility and traffic control. This policy model allows administrators to implement fine-grained rules regarding traffic sources and destinations, or microsegmentation. These same policies make it possible to visualize traffic flowing within and between VMs. This granular level of control is an important part of a defense-in-depth strategy against modern datacenter threats.</p>

<p>Flow Network Security protects against new threats designed to spread laterally from one system to another in the same datacenter. Because perimeter-based firewalls traditionally only protect the environment from external threats, it can be difficult to repurpose them to protect internal traffic. Flow Network Security applies security rules between all applications and VMs in the datacenter, adding internal protection behind your perimeter firewall.</p>

<h3 id="implementing-nutanix-flow-network-security-for-citrix-virtual-apps-and-desktops">Implementing Nutanix Flow Network Security for Citrix Virtual Apps and Desktops</h3>

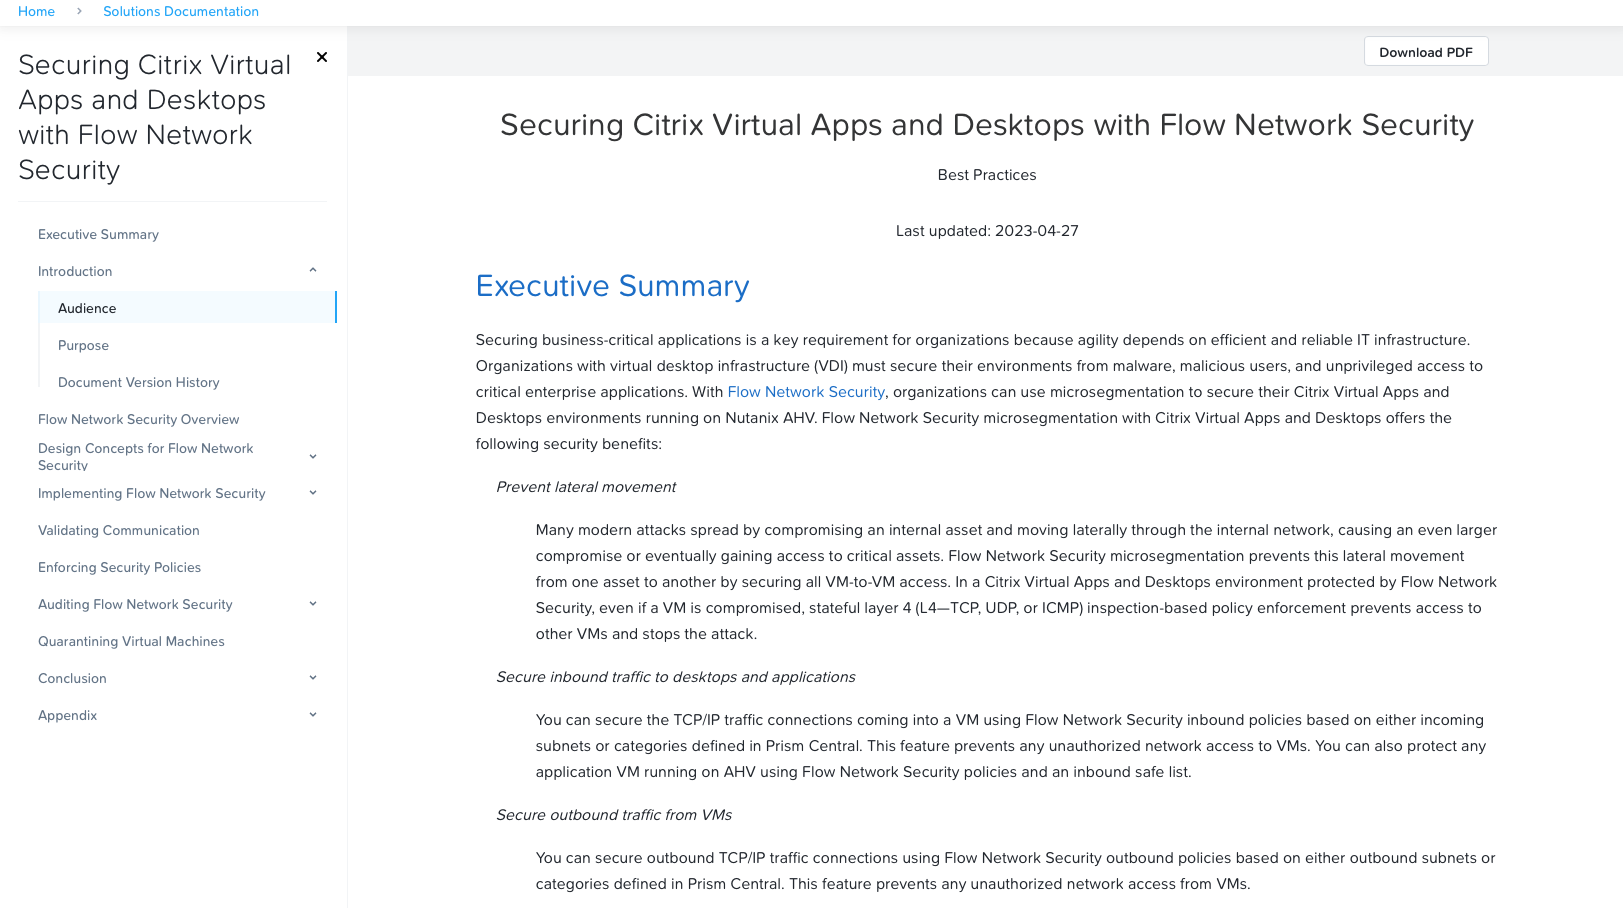
<p>There is a great guide on the Nutanix documentation portal that will get you going with setting up Flow Network Security.</p>

<p><img src="/assets/img/posts/2023-04-28-nutanix-flow-network-security/02.png" alt="" /></p>

<p>You can find the link to it <a href="https://portal.nutanix.com/page/documents/solutions/details?targetId=BP-2125-Citrix-Virtual-Apps-and-Desktops-with-Flow:BP-2125-Citrix-Virtual-Apps-and-Desktops-with-Flow">here</a> and the best thing is you can download it as a PDF and take it offline for some bedtime reading!!</p>

<h3 id="conclusion">Conclusion</h3>

<p>Securing your Citrix Virtual Apps and Desktops environment is tough but by using products like Nutanix Flow Network Segmentation you can make things a little easier.  I have found the configuration and implementation of the product really easy and intuitive and very good at improving your security posture right from the Prism Central interface.</p>

<p>Word of warning though, <strong>MAKE SURE YOU MAP THINGS OUT FIRST!</strong> Whilst implementing this I got bitten a few times by missing a port or protocol from the allow list so double-check your network diagram before applying the policies to ensure no downtime!</p>

<p>Thanks for reading.</p>]]></content><author><name>Dave Brett</name><email>dave@bretty.me.uk</email></author><category term="blog" /><category term="Security" /><category term="Nutanix" /><category term="Citrix" /><summary type="html"><![CDATA[This post will run through what Nutanix Flow Network Security is as well as steps that you could take to secure your Citrix Virtual Apps and Desktops environment using network segmentation.]]></summary><media:thumbnail xmlns:media="http://search.yahoo.com/mrss/" url="https://www.bretty.me.uk/assets/img/posts/2023-04-28-nutanix-flow-network-security/2023-04-28-nutanix-flow-network-security.png" /><media:content medium="image" url="https://www.bretty.me.uk/assets/img/posts/2023-04-28-nutanix-flow-network-security/2023-04-28-nutanix-flow-network-security.png" xmlns:media="http://search.yahoo.com/mrss/" /></entry><entry><title type="html">Using CIS in your End User Computing Environment</title><link href="https://www.bretty.me.uk/2023-02-07-using-cis-in-your-euc-environment/" rel="alternate" type="text/html" title="Using CIS in your End User Computing Environment" /><published>2023-02-07T00:00:00+00:00</published><updated>2023-02-07T00:00:00+00:00</updated><id>https://www.bretty.me.uk/using-cis-in-your-euc-environment</id><content type="html" xml:base="https://www.bretty.me.uk/2023-02-07-using-cis-in-your-euc-environment/"><![CDATA[<ul id="markdown-toc">
  <li><a href="#overview" id="markdown-toc-overview">Overview</a></li>
  <li><a href="#what-is-the-center-for-internet-security" id="markdown-toc-what-is-the-center-for-internet-security">What is the Center for Internet Security</a></li>
  <li><a href="#what-cis-covers" id="markdown-toc-what-cis-covers">What CIS Covers</a></li>
  <li><a href="#cis-levels" id="markdown-toc-cis-levels">CIS Levels</a></li>
  <li><a href="#end-user-computing-and-cis-risk" id="markdown-toc-end-user-computing-and-cis-risk">End User Computing and CIS Risk</a></li>
  <li><a href="#cis-hardened-images" id="markdown-toc-cis-hardened-images">CIS Hardened Images</a></li>
  <li><a href="#secure-by-design---cis-group-policy-layout" id="markdown-toc-secure-by-design---cis-group-policy-layout">Secure By Design - CIS Group Policy Layout</a></li>
  <li><a href="#building-cis-policies" id="markdown-toc-building-cis-policies">Building CIS Policies</a></li>
  <li><a href="#what-about-apps" id="markdown-toc-what-about-apps">What About Apps</a></li>
  <li><a href="#the-easy-but-expensive-path" id="markdown-toc-the-easy-but-expensive-path">The Easy (But Expensive) Path</a></li>
  <li><a href="#conclusion" id="markdown-toc-conclusion">Conclusion</a></li>
</ul>

<h3 id="overview">Overview</h3>

<p>Over the past few years security is becoming more and more of an issue to us as professionals who maintain and manage End User Computing Environments. This can often be over whelming and fast become like your chasing your tail as threats never seem to end.</p>

<p>There are, however, some excellent resources out there that can help you with this quest and one of them is the Center for Internet Security (CIS).</p>

<p>During the rest of this post I will explain what the CIS is, how to implement some of their guidelines (both free and paid for) and try to explain how this will help you to make your EUC environment more secure.</p>

<h3 id="what-is-the-center-for-internet-security">What is the Center for Internet Security</h3>

<p>First and foremost, you can find their site <a href="https://www.cisecurity.org">here</a>. This is what they say about themselves:</p>

<p class="note" title="CIS Statement">The Center for Internet Security, Inc. (CIS®) makes the connected world a safer place for people, businesses, and governments through our core competencies of collaboration and innovation.
We are a community-driven nonprofit, responsible for the CIS Controls® and CIS Benchmarks™, globally recognized best practices for securing IT systems and data. We lead a global community of IT professionals to continuously evolve these standards and provide products and services to proactively safeguard against emerging threats. Our CIS Hardened Images® provide secure, on-demand, scalable computing environments in the cloud.</p>

<p>In essence, they are a community driven project that will give you configuration settings to make your platforms more secure, be warned however, there are <strong>A LOT</strong> of them (settings I mean).</p>

<h3 id="what-cis-covers">What CIS Covers</h3>

<p>The CIS Benchmarks there currently cover pretty much everything you will touch from an EUC perspective, from the Operating Systems your users land on to the applications they consume. It’s about finding what’s right for your business needs.</p>

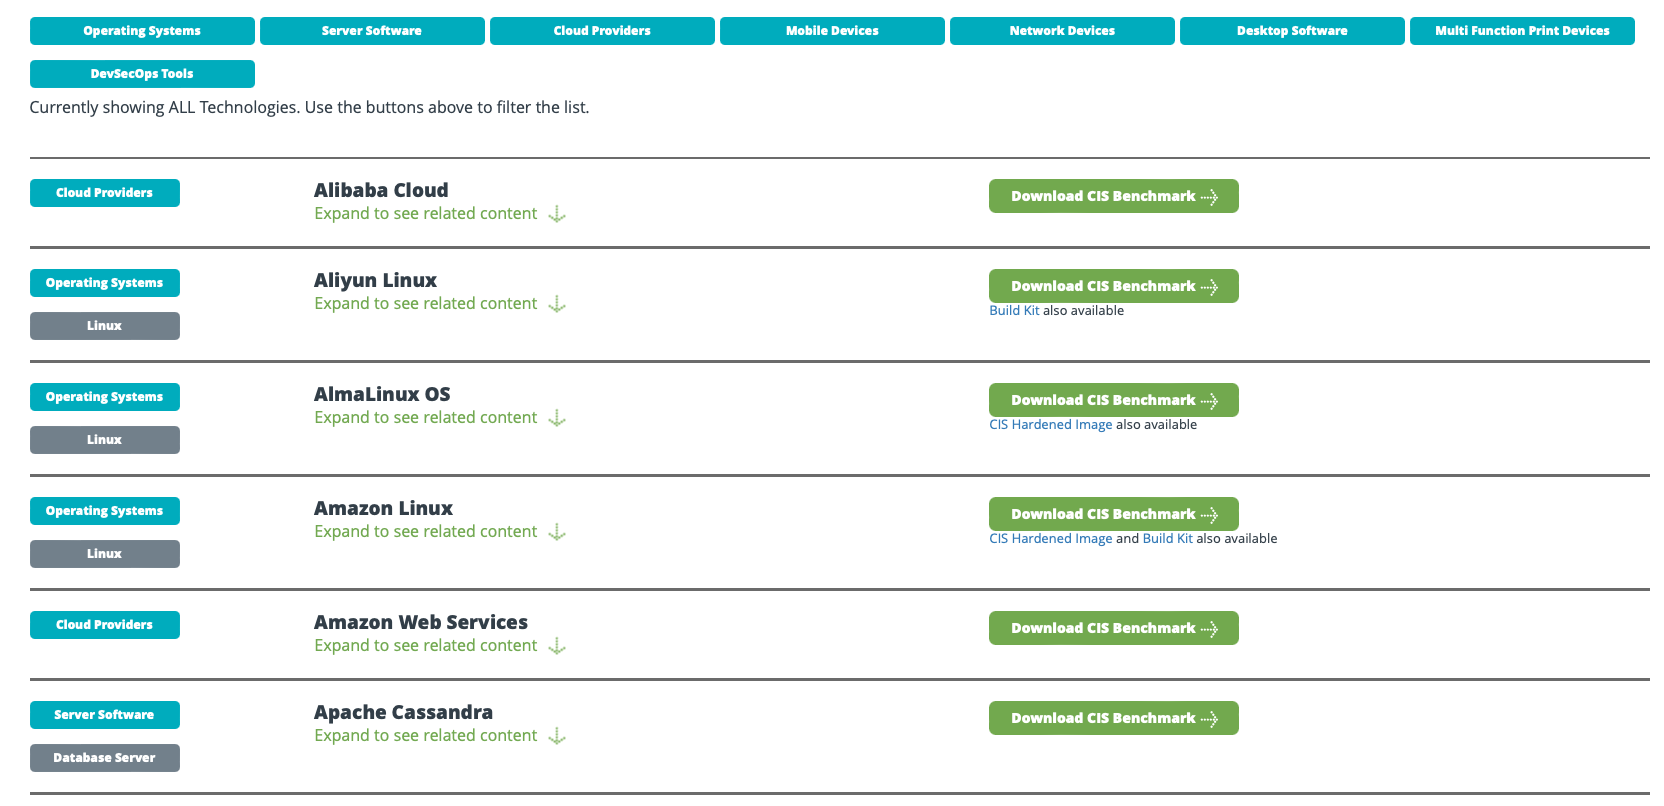
<p>An overview of the benchmarks available can be found <a href="https://www.cisecurity.org/cis-benchmarks/">here</a></p>

<p><img src="/assets/img/posts/2023-02-07-using-cis-in-your-euc-environment/01.png" alt="" /></p>

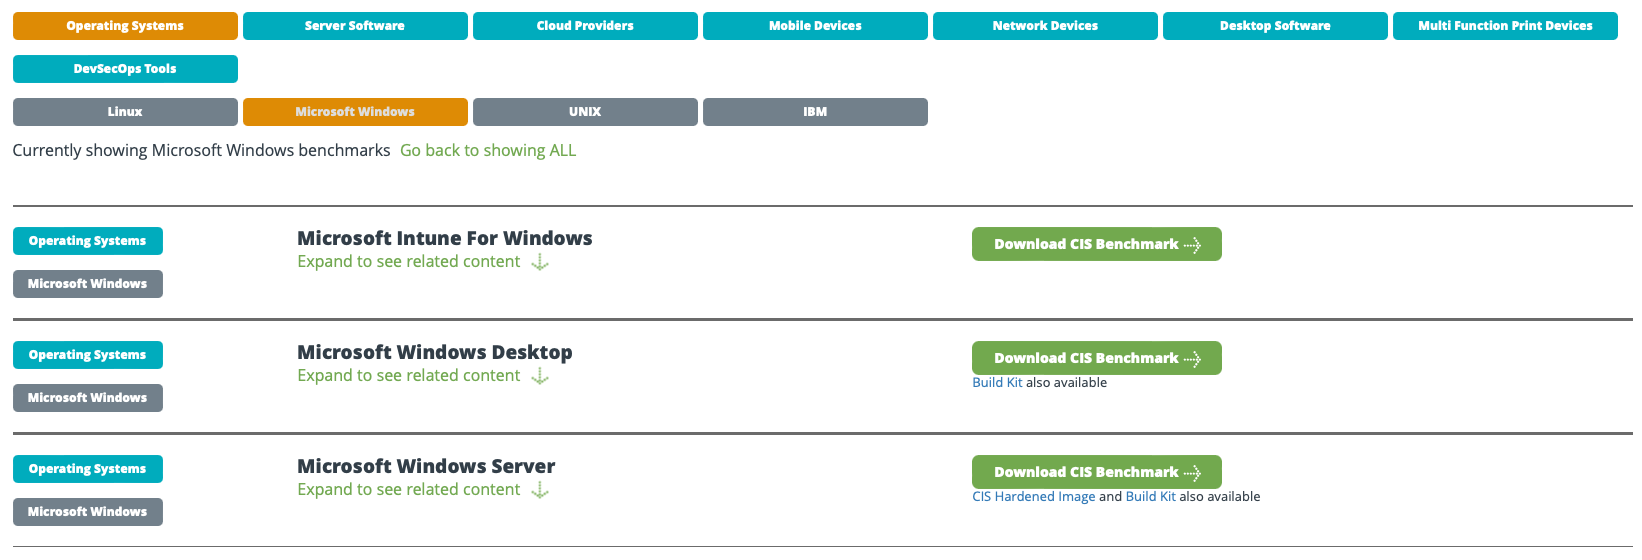
<p>and here is that list filtered on <code class="language-plaintext highlighter-rouge">Operating Systems</code> then <code class="language-plaintext highlighter-rouge">Microsoft Windows</code></p>

<p><img src="/assets/img/posts/2023-02-07-using-cis-in-your-euc-environment/02.png" alt="" /></p>

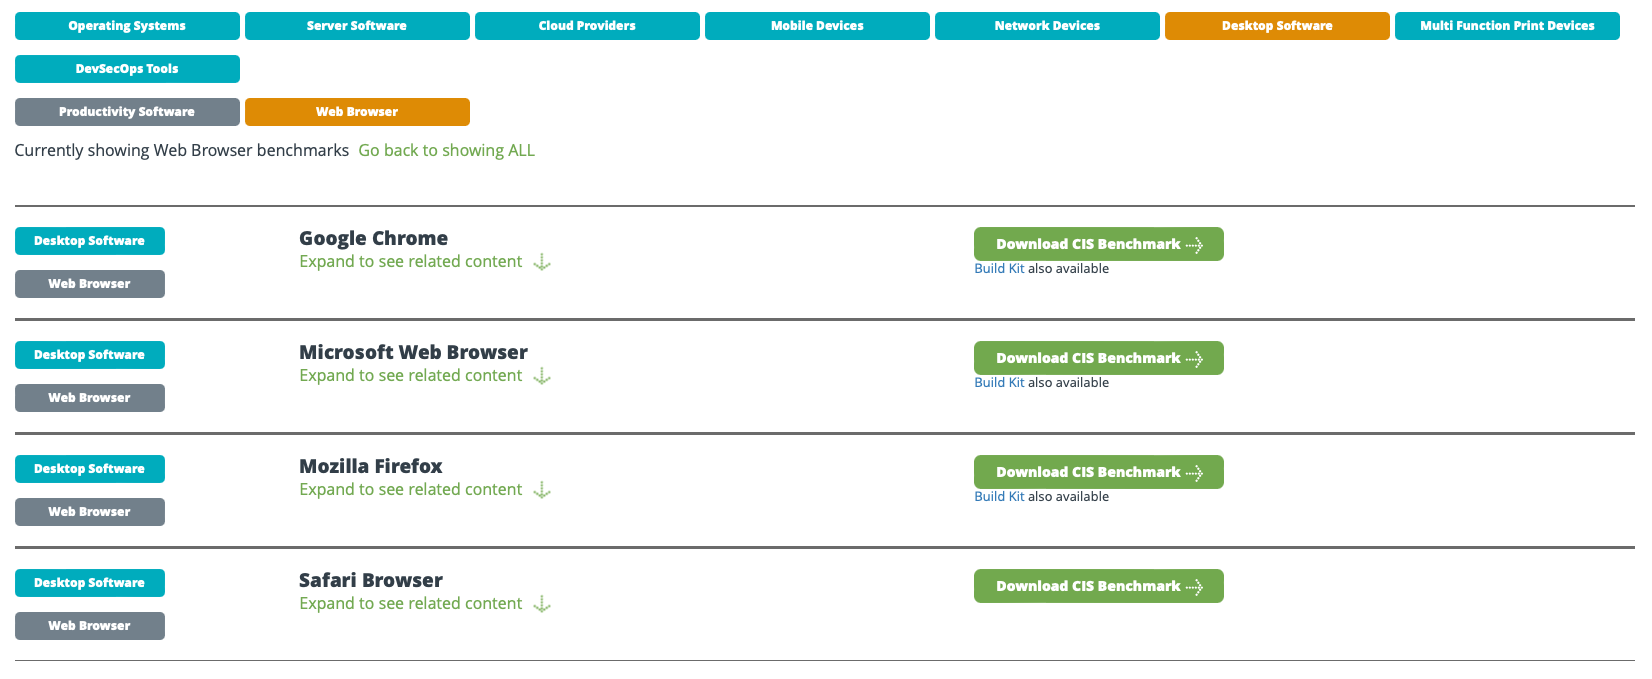
<p>Finally, here is the above list filtered on <code class="language-plaintext highlighter-rouge">Desktop Software</code> then <code class="language-plaintext highlighter-rouge">Web Browser</code></p>

<p><img src="/assets/img/posts/2023-02-07-using-cis-in-your-euc-environment/03.png" alt="" /></p>

<p>As you can see there are lots of options available to you, and It’s really down to you how far you wish to dive into this rabbit hole.</p>

<h3 id="cis-levels">CIS Levels</h3>

<p>The CIS benchmarks are broken down into 2 levels (1 and 2) designed to give you the flexibility to secure parts, or all of your environment to the different security requirements of your business.</p>

<p>The details of what the levels cover is shown in the table below.</p>

<table>
  <thead>
    <tr>
      <th style="text-align: left">Level</th>
      <th style="text-align: left">Description</th>
    </tr>
  </thead>
  <tbody>
    <tr>
      <td style="text-align: left">1</td>
      <td style="text-align: left">Recommends essential basic security requirements that can be configured on any system and should cause little or no interruption of service or reduced functionality.</td>
    </tr>
    <tr>
      <td style="text-align: left">2</td>
      <td style="text-align: left">Recommends security settings for environments requiring greater security that could result in some reduced functionality.</td>
    </tr>
  </tbody>
</table>

<h3 id="end-user-computing-and-cis-risk">End User Computing and CIS Risk</h3>

<p>Reading the above you probably think, great, we can just put all these Level 1 CIS policies in and we are secure.</p>

<p>Not the case, This is (as with everything security related) just one tool in your belt, but, it will help.</p>

<p>There is also the risk of failure. Some of the settings you will define in your base policies are intrusive and can break End User Computing environments very quickly so make sure you <strong>TEST, TEST and TEST again</strong> before putting these into production. That said, once you have everything defined and tested it does give you a good policy set for security in your environment that’s easy(ish) to manage.</p>

<h3 id="cis-hardened-images">CIS Hardened Images</h3>

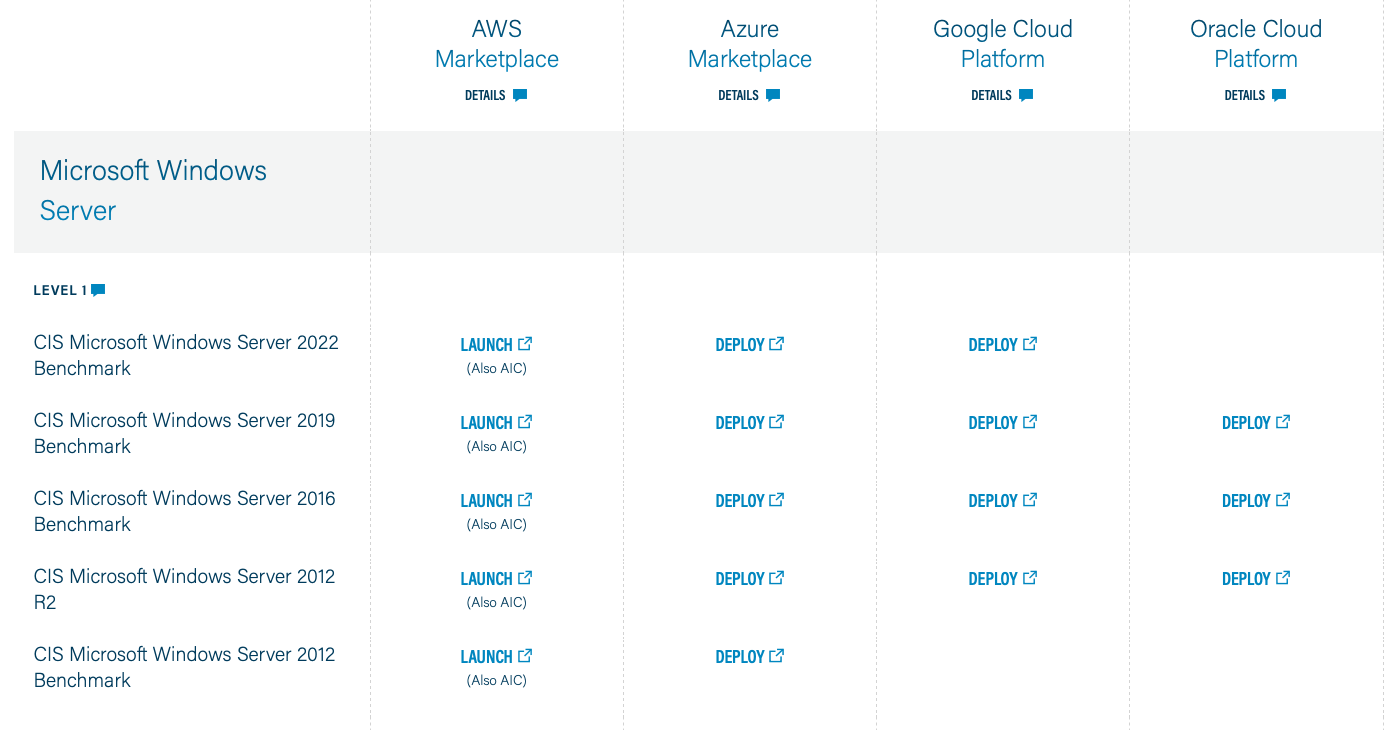
<p>What if you are running operating systems in the Public Cloud. Well thankfully rather than applying a bunch of GPO’s to them and breaking something fundamental, most of the providers have given you access to CIS Hardened Images available directly from them.  To find a list of these look <a href="https://www.cisecurity.org/cis-hardened-image-list">here</a></p>

<p><img src="/assets/img/posts/2023-02-07-using-cis-in-your-euc-environment/04.png" alt="" /></p>

<p>These gives you a great starting point for deploying a secure image straight from your Cloud Provider and testing from there.</p>

<h3 id="secure-by-design---cis-group-policy-layout">Secure By Design - CIS Group Policy Layout</h3>

<p>This is important to understand before you begin actually configuring and new CIS Group Policies as understanding this will provide you a really easy way to manage your policies over time and will also allow you to be very granular in how you apply your exceptions.</p>

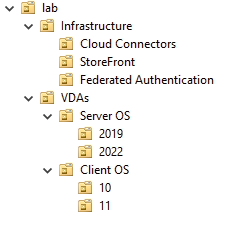
<p>Let’s look at a typical Organizational Unit layout for a Citrix Cloud DaaS deployment</p>

<p><img src="/assets/img/posts/2023-02-07-using-cis-in-your-euc-environment/05.png" alt="" /></p>

<p>Now if we look at how CIS is generally deployed (using Server OS as an example) you will see the following</p>

<ul>
  <li>MemberServer_2022_CIS_Policy_Exceptions_v1</li>
  <li>MemberServer_2022_CIS_Preference_Exceptions_v1</li>
  <li>MemberServer_2022_CIS_Policy_Level1_v1</li>
  <li>MemberServer_2022_CIS_Preference_Level1_v1</li>
</ul>

<p>So, looking at the above list (they will apply bottom up) you can see that CIS Level 1 Preferences and Policies will apply first. These will have <strong>ALL</strong> the recommended CIS settings configured should they break the platform or not (read note below for reasoning).</p>

<p>The 2 GPO’s above that for Preference and Policy Exceptions will specifically unpick and CIS setting that breaks your environment and/or will be added to the default CIS policy for specific business needs.</p>

<p class="note" title="ATTENTION">The reason for putting <strong>ALL</strong> the CIS configuration into the base policy is that you are trying to <strong>design secure</strong> by default. If one of these settings breaks something then you will have to justify that back to the business and get them to accept the risk of undoing a secure setting. Along with this it will not break ALL the servers, only those that use that specific setting. This way you can have a secure baseline GPO applied across your estate and only unpick security where it is absolutely necessary</p>

<p>Another point worth mentioning is that generally the CIS Baseline GPO’s are filtered against the specific Operating System or role they are targeting. This means you can have the baseline GPO’s assigned at a higher level in your Active Directory giving you a broader security posture and be sure that they will apply only to those operating systems specifically targeted.</p>

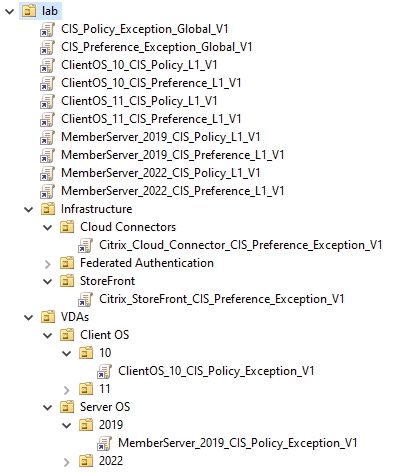
<p>With that in mind let’s have a look at how we could potentially lay out CIS GPO’s for the above OU structure</p>

<p><img src="/assets/img/posts/2023-02-07-using-cis-in-your-euc-environment/06.png" alt="" /></p>

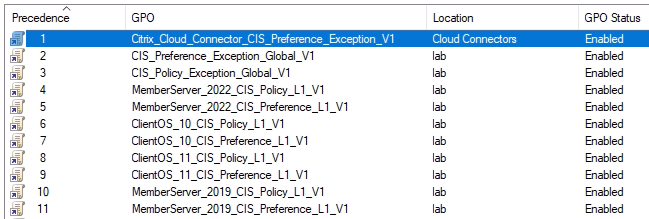
<p>Looking at the inheritance on the Cloud Connectors for example</p>

<p><img src="/assets/img/posts/2023-02-07-using-cis-in-your-euc-environment/07.png" alt="" /></p>

<p>You can see that <strong>ALL</strong> the default security settings are applied then we apply the <code class="language-plaintext highlighter-rouge">Global Exceptions</code> we have deemed fit for any domain joined machine, then finally just the exceptions for the <code class="language-plaintext highlighter-rouge">Cloud Connectors</code></p>

<p>This is a good win as you are securing everything by default then only unpicking what’s required to make your platform component work.</p>

<h3 id="building-cis-policies">Building CIS Policies</h3>

<p class="note" title="ATTENTION">This is that time-consuming part, believe me, I have done this before.</p>

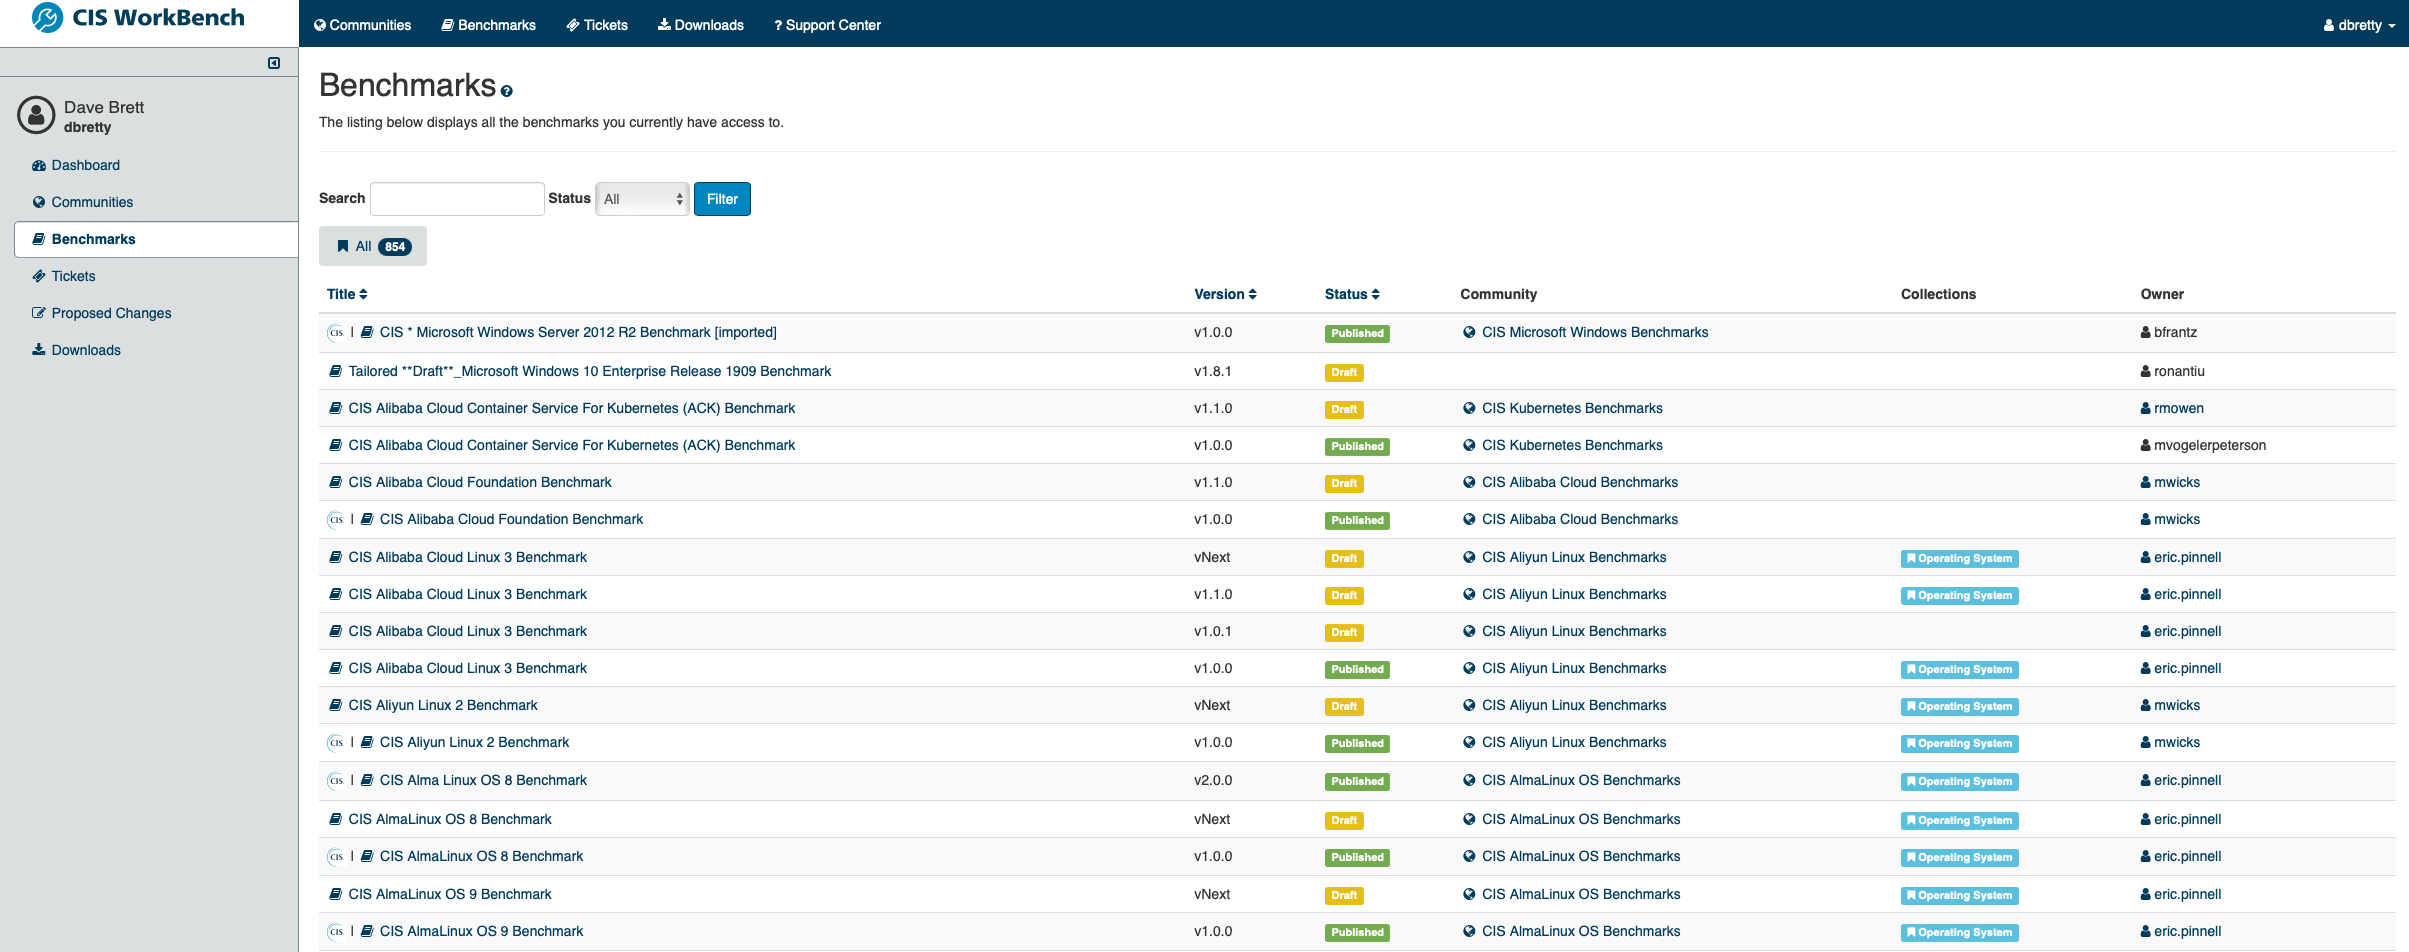
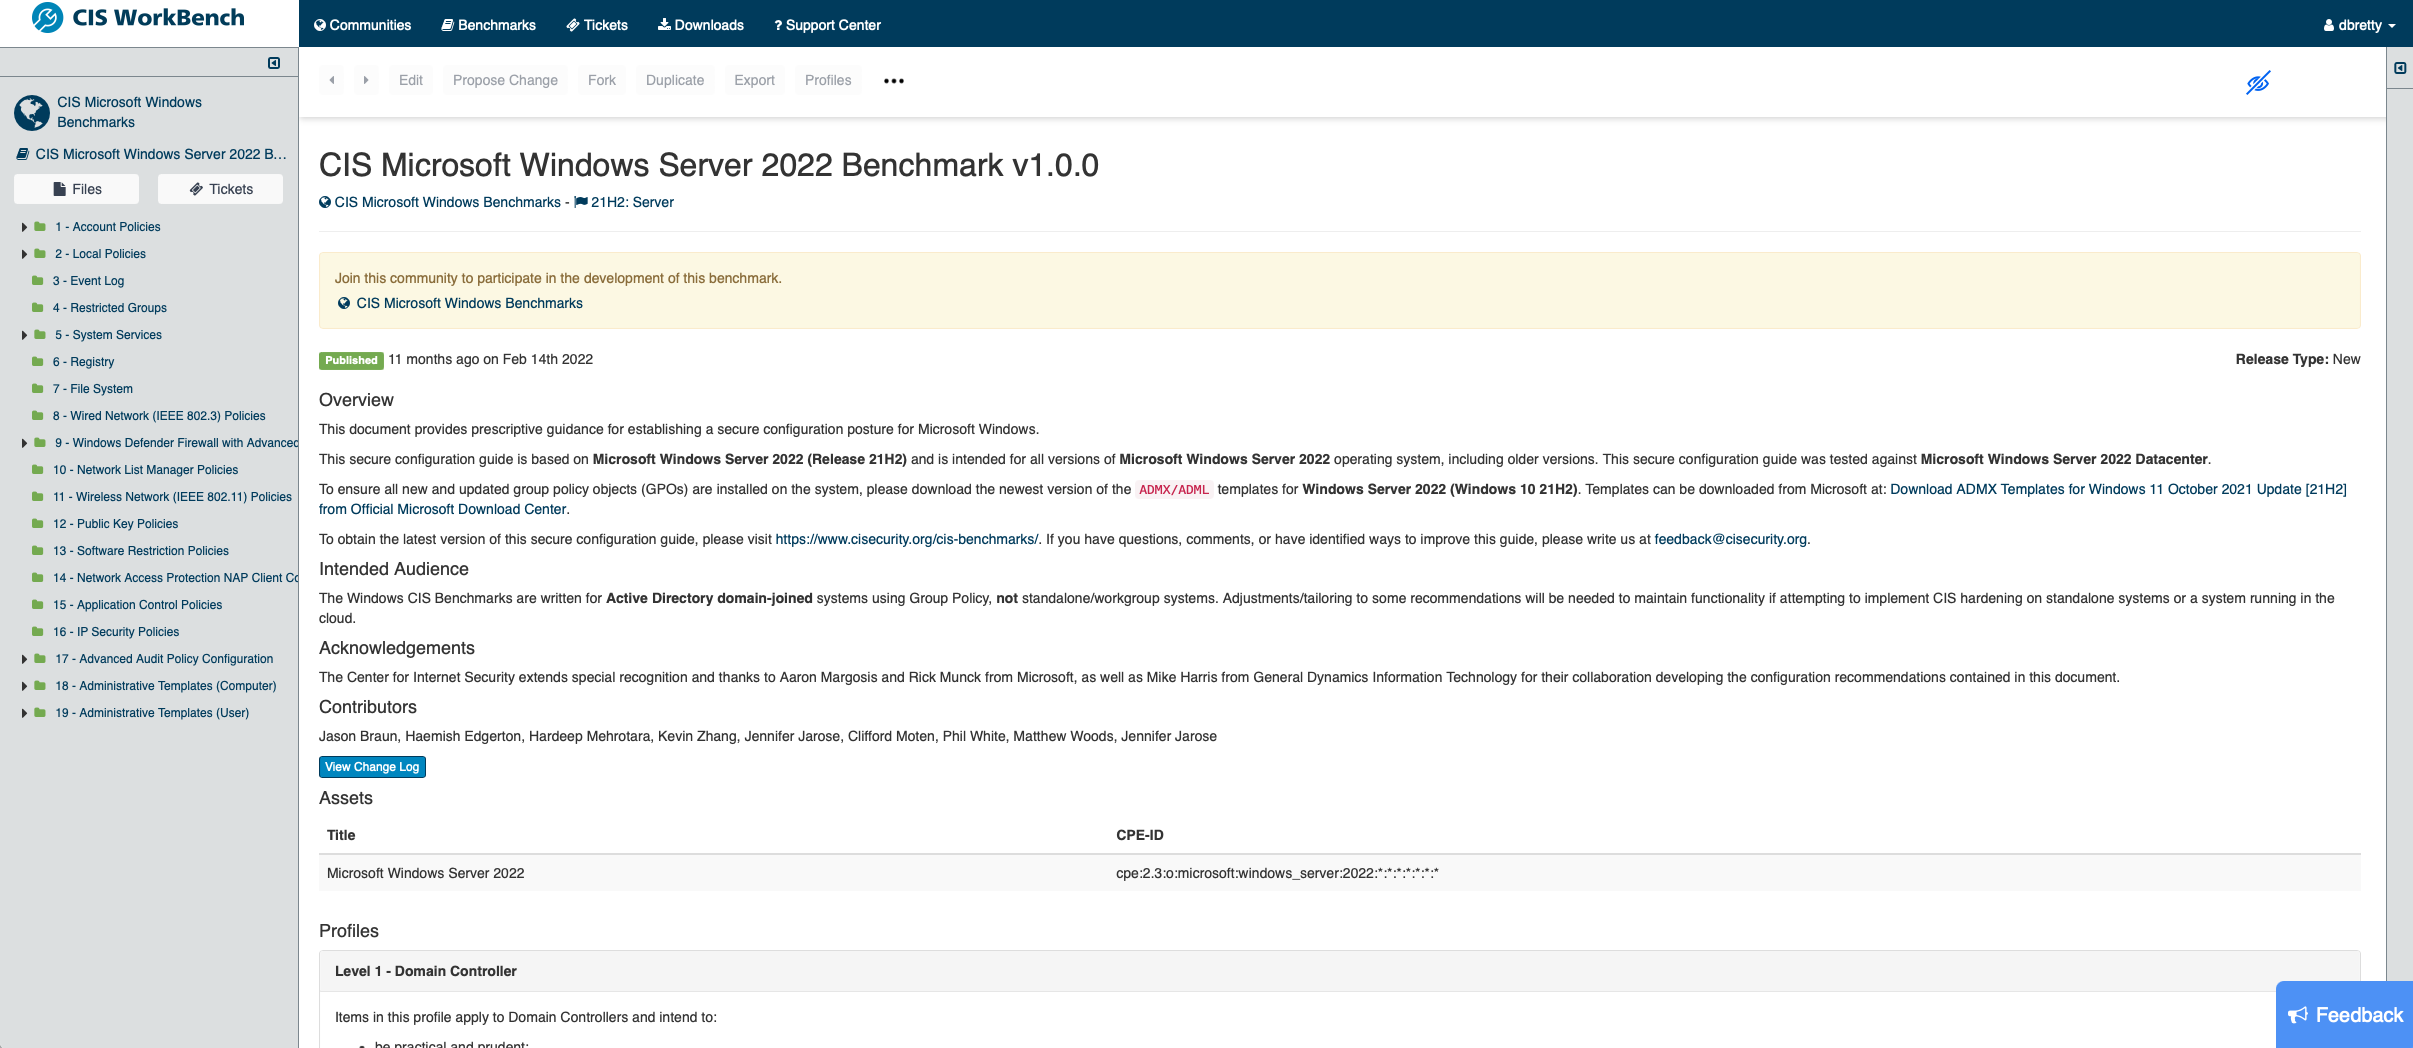
<p>The first thing you want to do is head over to the CIS WorkBench and register for a free account <a href="https://workbench.cisecurity.org/benchmarks">here</a>. Once you have that set up and logged in you will see all the available benchmarks available.</p>

<p><img src="/assets/img/posts/2023-02-07-using-cis-in-your-euc-environment/08.png" alt="" /></p>

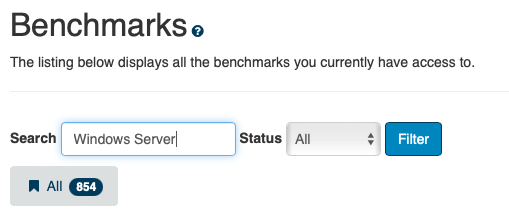
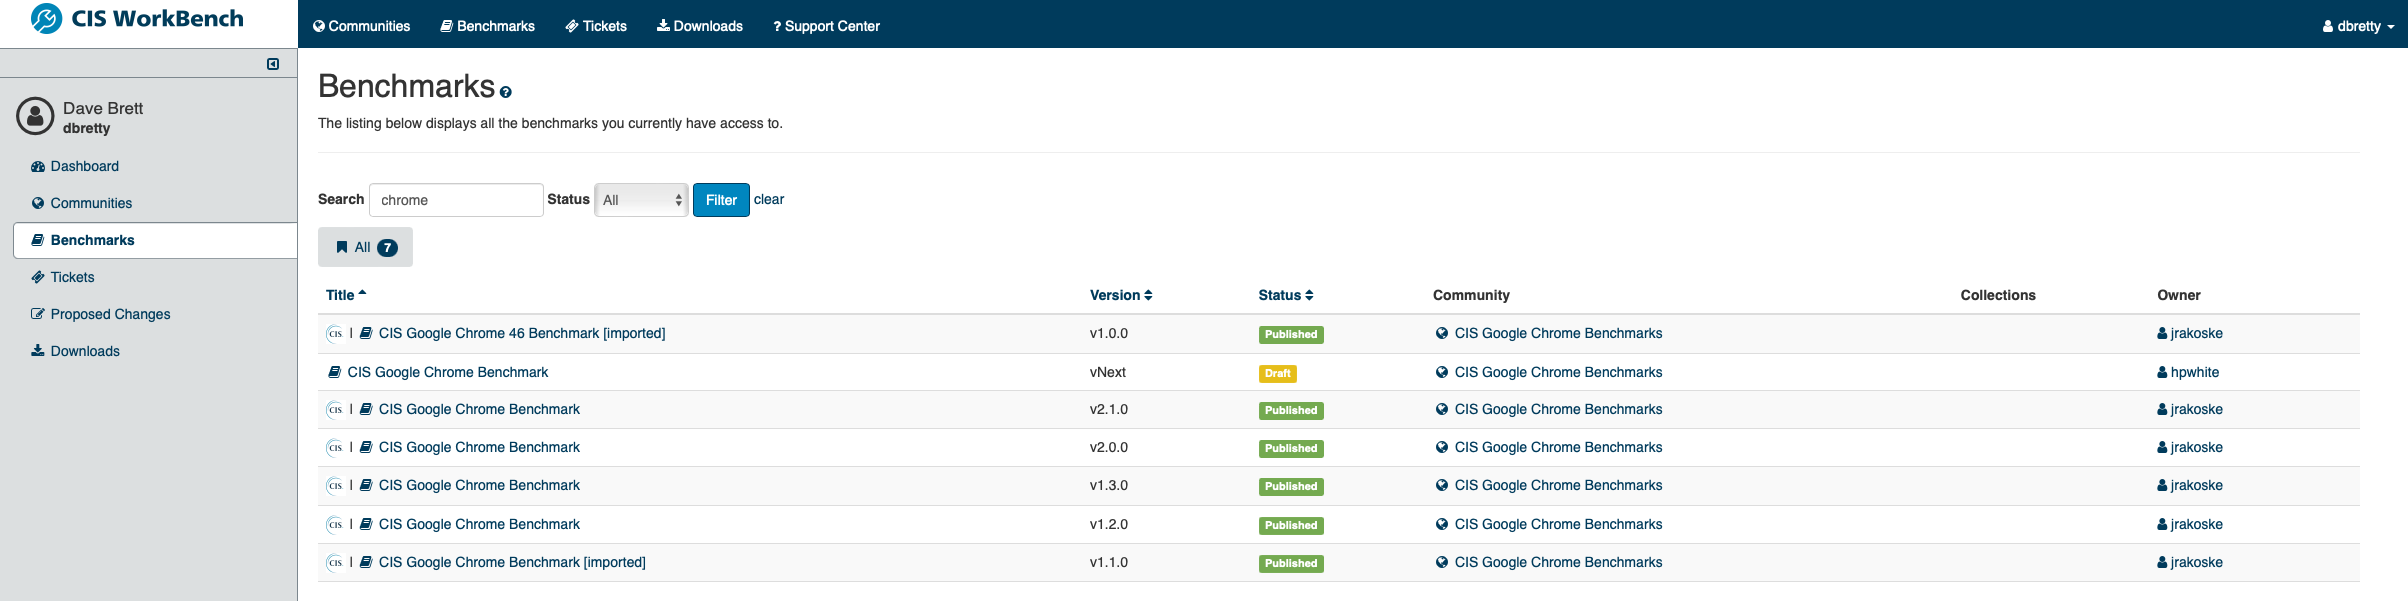
<p>Filter the list using the search box</p>

<p><img src="/assets/img/posts/2023-02-07-using-cis-in-your-euc-environment/09.png" alt="" /></p>

<p>Then click on the benchmark you wish to view</p>

<p><img src="/assets/img/posts/2023-02-07-using-cis-in-your-euc-environment/10.png" alt="" /></p>

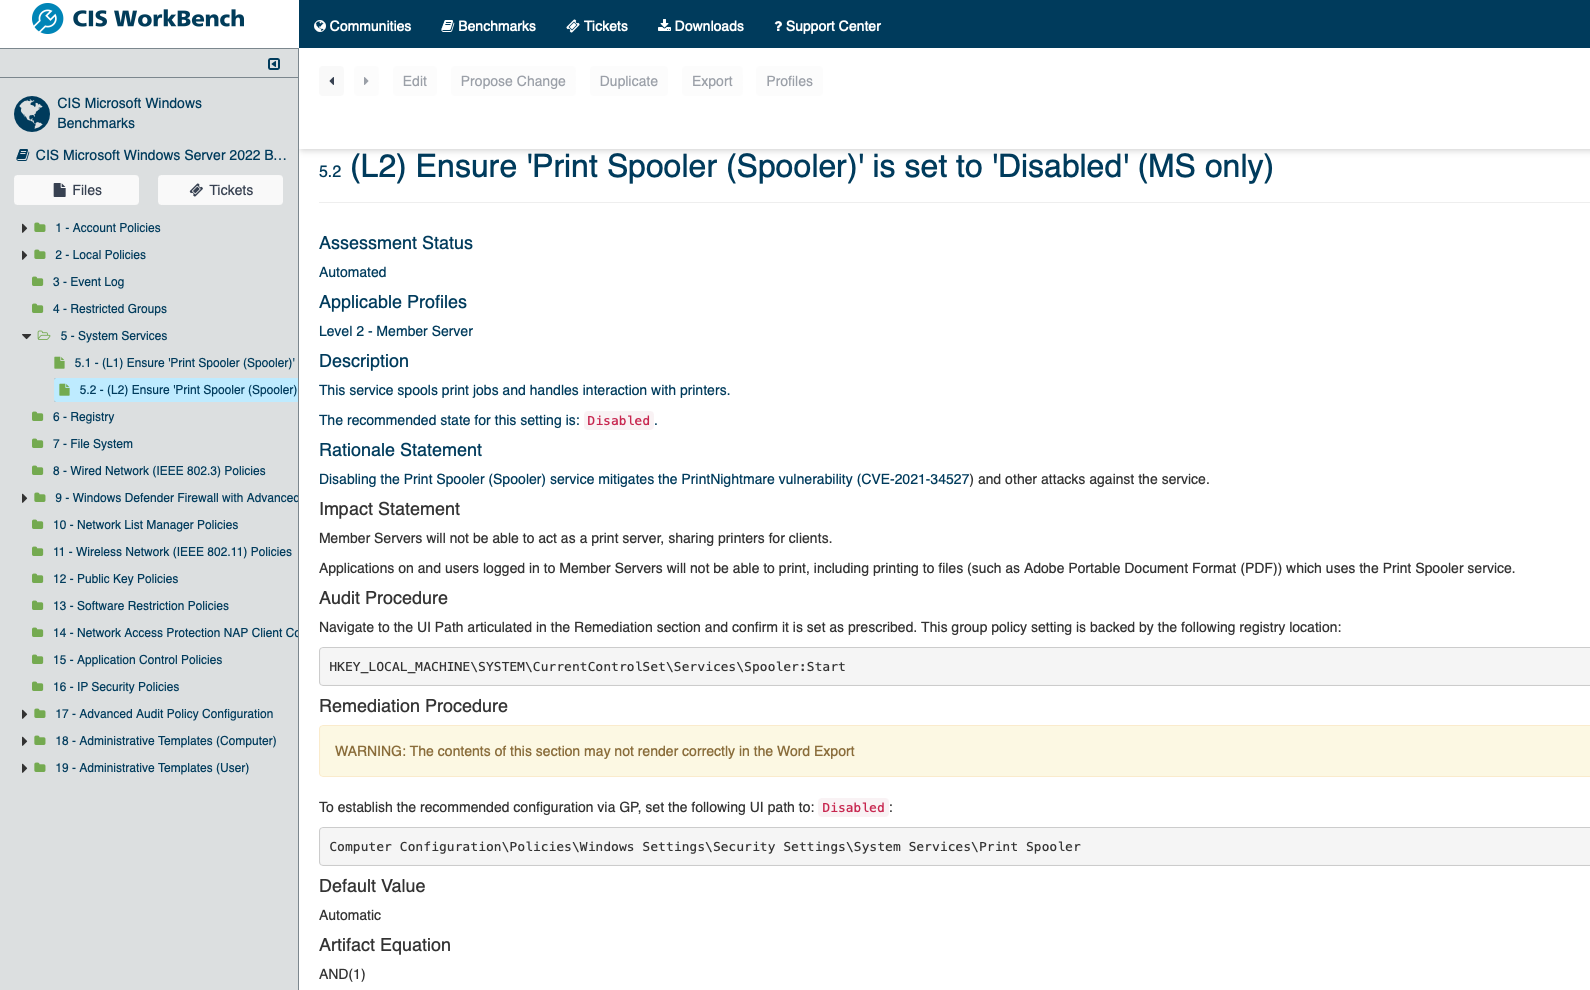
<p>On the left you can see a tree view of every setting that’s defined in the benchmark (yes, there are loads!) but from here you can drill down and start to configure these in Group Policy</p>

<p><img src="/assets/img/posts/2023-02-07-using-cis-in-your-euc-environment/11.png" alt="" /></p>

<p class="note" title="ATTENTION">The benchmark setting will normally give you the Group Policy location for the setting as well as the registry path, so you can use GPO or another tool to configure these.</p>

<p>This is the part that will take the time as you will have a ton of settings to configure, but it will give you a good secure baseline for your images that (once configured) can easily be applied to other servers in your estate.</p>

<p>Once you have your baseline settings done go ahead and set up your exception policies for each of your relevant OU’s and bind them as shown above, reboot the machines and get testing.</p>

<h3 id="what-about-apps">What About Apps</h3>

<p>All I have talked about so far is Server and Client Operating Systems, what about the apps that our users run.</p>

<p>The same approach can be taken with those in that you define your secure baseline then add exceptions to suit your business needs over the top. This will go along with the Secure By Design reasoning and provide you with a solid, manageable set of policies in the long term.</p>

<p>You will be able to find benchmarks for most of the common applications your users consume in the same location linked to above.</p>

<p><img src="/assets/img/posts/2023-02-07-using-cis-in-your-euc-environment/12.png" alt="" /></p>

<h3 id="the-easy-but-expensive-path">The Easy (But Expensive) Path</h3>

<p>The above is pretty straight forward from a configuration perspective, but <strong>IT TAKES TIME</strong> to get up and running.</p>

<p>There is an easier way but it is expensive. That said, what price would your company pay to be secure compared to the cost of a breach, if you compare the 2 It’s not really too much to ask!</p>

<p>If you join the CIS Secure Suite <a href="https://www.cisecurity.org/cis-securesuite">here</a> you can download the base configurations already configured that you can just import into your existing GPO infrastructure then all you have to do is define the exceptions, and you are good to go!</p>

<p>Told you, easy but not cheap!</p>

<p><img src="/assets/img/posts/2023-02-07-using-cis-in-your-euc-environment/13.png" alt="" /></p>

<h3 id="conclusion">Conclusion</h3>

<p>In conclusion, do I think its worth the investment in time, YES!</p>

<p>This will take a long time to set up, test and get into production but the advantage it will give you from a security standpoint cannot be underestimated.</p>

<p>There are people out there that want to damage your infrastructure, as an owner of an EUC environment you are already a target. For the sake of spending some time setting up Group Policy at no cost, why would you not do it.</p>]]></content><author><name>Dave Brett</name><email>dave@bretty.me.uk</email></author><category term="blog" /><category term="EUC" /><category term="Security" /><summary type="html"><![CDATA[This post will describe the process of using reviewing, configuring and implementing CIS controls in your End User Computing Environment.]]></summary><media:thumbnail xmlns:media="http://search.yahoo.com/mrss/" url="https://www.bretty.me.uk/assets/img/posts/2023-02-07-using-cis-in-your-euc-environment/using-cis.png" /><media:content medium="image" url="https://www.bretty.me.uk/assets/img/posts/2023-02-07-using-cis-in-your-euc-environment/using-cis.png" xmlns:media="http://search.yahoo.com/mrss/" /></entry><entry><title type="html">Masking Your Base Image With FSLogix</title><link href="https://www.bretty.me.uk/2023-01-31-masking-your-base-image-with-fslogix/" rel="alternate" type="text/html" title="Masking Your Base Image With FSLogix" /><published>2023-01-31T00:00:00+00:00</published><updated>2023-01-31T00:00:00+00:00</updated><id>https://www.bretty.me.uk/masking-your-base-image-with-fslogix</id><content type="html" xml:base="https://www.bretty.me.uk/2023-01-31-masking-your-base-image-with-fslogix/"><![CDATA[<ul id="markdown-toc">
  <li><a href="#overview" id="markdown-toc-overview">Overview</a></li>
  <li><a href="#what-is-app-masking" id="markdown-toc-what-is-app-masking">What Is App Masking?</a></li>
  <li><a href="#installation" id="markdown-toc-installation">Installation</a>    <ul>
      <li><a href="#fslogix-apps" id="markdown-toc-fslogix-apps">FSLogix Apps</a></li>
      <li><a href="#fslogix-apps-rule-editor" id="markdown-toc-fslogix-apps-rule-editor">FSLogix Apps Rule Editor</a></li>
    </ul>
  </li>
  <li><a href="#rule-configuration" id="markdown-toc-rule-configuration">Rule Configuration</a>    <ul>
      <li><a href="#hiding-rules-i-add" id="markdown-toc-hiding-rules-i-add">Hiding Rules I Add</a></li>
      <li><a href="#hiding-rules-as-per-microsoft" id="markdown-toc-hiding-rules-as-per-microsoft">Hiding Rules As Per Microsoft</a></li>
    </ul>
  </li>
  <li><a href="#deployment" id="markdown-toc-deployment">Deployment</a></li>
  <li><a href="#testing" id="markdown-toc-testing">Testing</a></li>
  <li><a href="#conclusion" id="markdown-toc-conclusion">Conclusion</a></li>
</ul>

<h3 id="overview">Overview</h3>

<p>I presented at the <a href="https://www.citrixug.org.uk">UK Citrix User Group</a> recently on <strong>10 Quick Wins for Red Team Testing</strong> and one of the subjects I covered was hiding base applications from the users when they do not need access to them.</p>

<p>Now, I know there are a host of tools to do this and that some are better than others (think application whitelisting) but what if there was a quick win? One that may not stop all attacks but will prevent the majority of internal users (yes, not all attacks are external) from even seeing PowerShell, Ping, FTP and a whole host of applications even being installed on your platform.</p>

<p>Enter FSLogix, specifically FSLogix App Masking.</p>

<p>When many hear FSLogix, they immediately think “ahh, yeah the profile tool” but there is another tool in your arsenal, Application Masking.</p>

<p>This post is not intended to give you an “all-in” look at App Masking and what it can do, if you want that then look <a href="https://learn.microsoft.com/en-us/fslogix/implement-application-masking-tutorial">here</a> but what this will do is show you how to hide common apps that are not required from your standard users to enable a more secure platform.</p>

<h3 id="what-is-app-masking">What Is App Masking?</h3>

<p>According to Microsoft Application Masking manages access to an application, font, printer, or other items. Access can be controlled by user, IP Address range, and other criteria. Application Masking significantly decreases the complexity of managing large numbers of gold images.</p>

<p>Normally this is what it is used for, a group of users “Word Users” for example get access to the installed copy of Word. If you are not in that group then FSLogix App Masking “hides” that application. That’s it, gone, like It’s not even installed.</p>

<p>I am not going to claim to be clever enough to understand how all of this works under the hood, but, if we applied the same principle to a master image then we could in theory “hide” system applications we don’t want users to have access to but leave them there for the Administrators. This can be done at image creation or even applied to an existing image making retro fitting this easy!</p>

<h3 id="installation">Installation</h3>

<p>The first thing you will want to do is install the FSLogix product set onto your master image. You can download FSLogix from <a href="https://learn.microsoft.com/en-us/fslogix/install-ht">here</a> and just extract the ZIP file onto your master image.</p>

<h4 id="fslogix-apps">FSLogix Apps</h4>

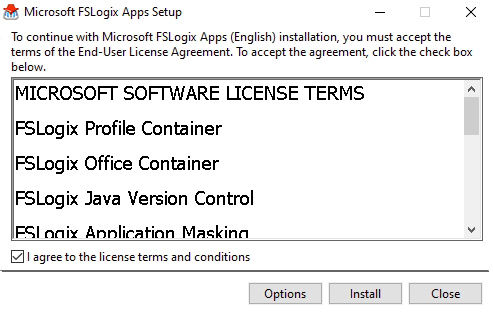
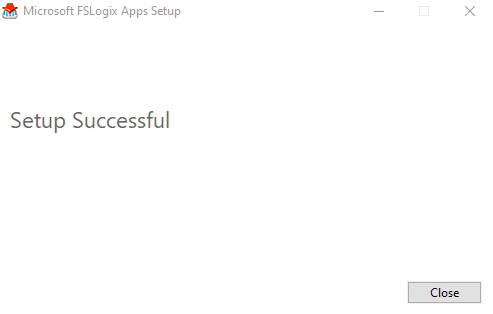
<p>Run the <code class="language-plaintext highlighter-rouge">FSLogixAppsSetup.exe</code> file</p>

<p><img src="/assets/img/posts/2023-01-31-masking-your-base-image-with-fslogix/01.png" alt="" /></p>

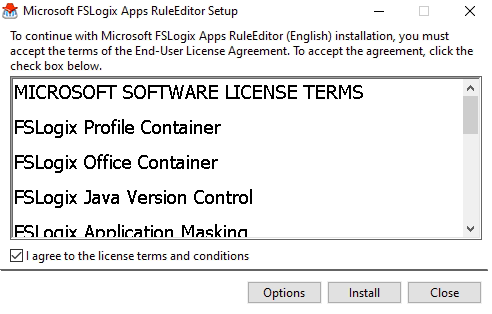
<p>Click to agree to the licensing and click <code class="language-plaintext highlighter-rouge">install</code></p>

<p><img src="/assets/img/posts/2023-01-31-masking-your-base-image-with-fslogix/02.png" alt="" /></p>

<h4 id="fslogix-apps-rule-editor">FSLogix Apps Rule Editor</h4>

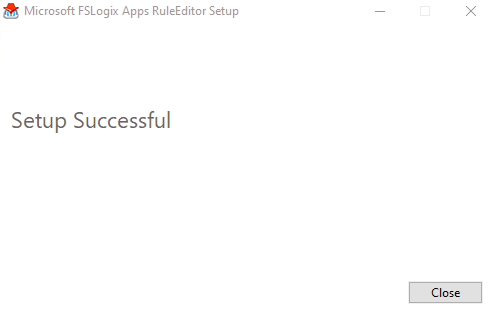
<p>Run the <code class="language-plaintext highlighter-rouge">FSLogixAppsRuleEditorSetup.exe</code> file</p>

<p><img src="/assets/img/posts/2023-01-31-masking-your-base-image-with-fslogix/03.png" alt="" /></p>

<p>Click to agree to the licensing and click <code class="language-plaintext highlighter-rouge">install</code></p>

<p><img src="/assets/img/posts/2023-01-31-masking-your-base-image-with-fslogix/04.png" alt="" /></p>

<p class="note" title="Attention">I normally install the Rule Editor onto the master image in order to be able to select files, folders and registry keys from the platform that the users will be operating from. You can remove this if required once the rules are set up</p>

<h3 id="rule-configuration">Rule Configuration</h3>

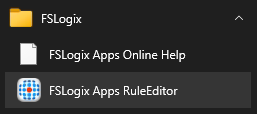
<p>Once the software is installed on your master image open up <code class="language-plaintext highlighter-rouge">FSLogix Apps RuleEditor</code> from the Start Menu</p>

<p><img src="/assets/img/posts/2023-01-31-masking-your-base-image-with-fslogix/05.png" alt="" /></p>

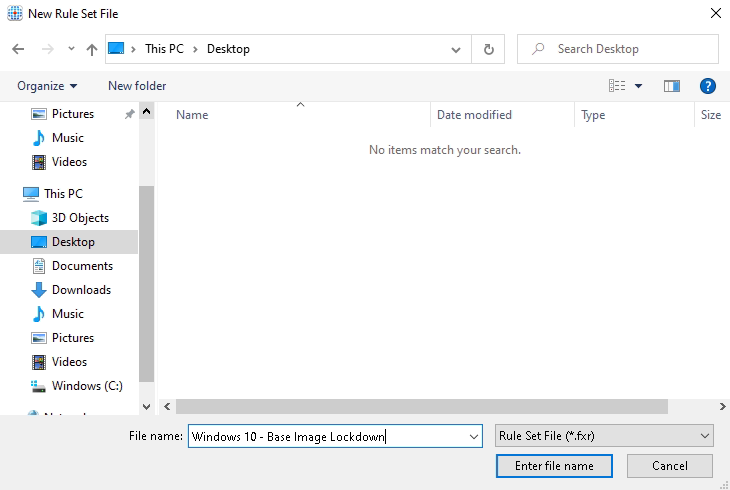
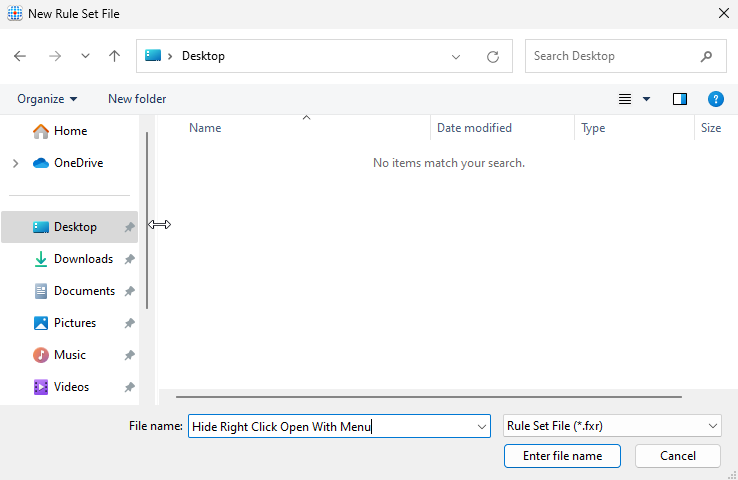
<p>Click on <code class="language-plaintext highlighter-rouge">New</code> to create a new rule and save it to a location you can copy the 2 files from later (in my case I am putting it on the desktop)</p>

<p><img src="/assets/img/posts/2023-01-31-masking-your-base-image-with-fslogix/06.png" alt="" /></p>

<p>You will notice 2 files get created, you will need both of these to implement the rule later. One is the rule definition and the other is the assignments.</p>

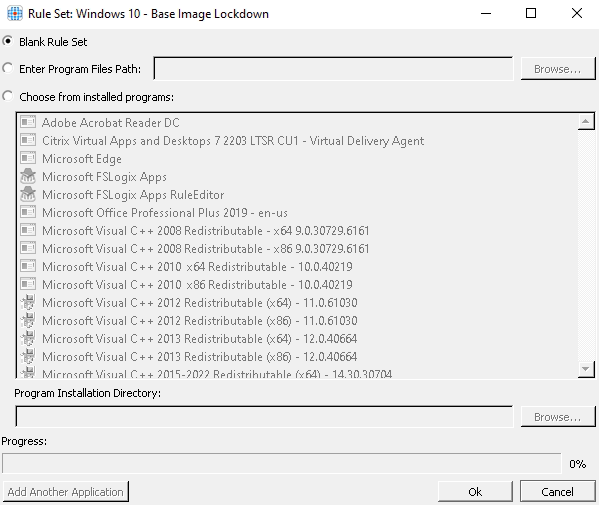
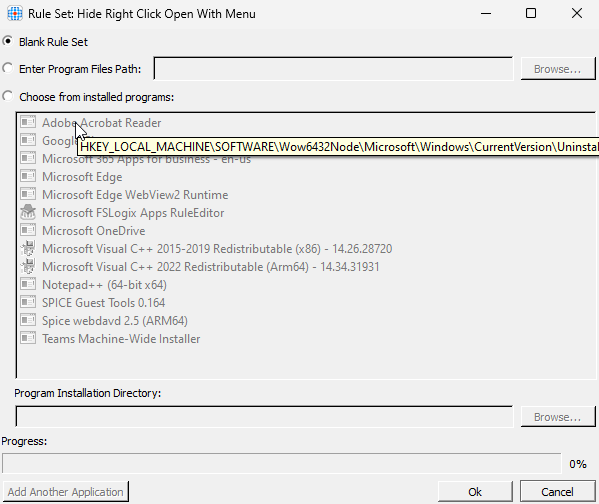
<p>Select to create a <code class="language-plaintext highlighter-rouge">Blank Rule Set</code> and click OK</p>

<p><img src="/assets/img/posts/2023-01-31-masking-your-base-image-with-fslogix/07.png" alt="" /></p>

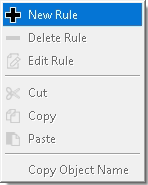
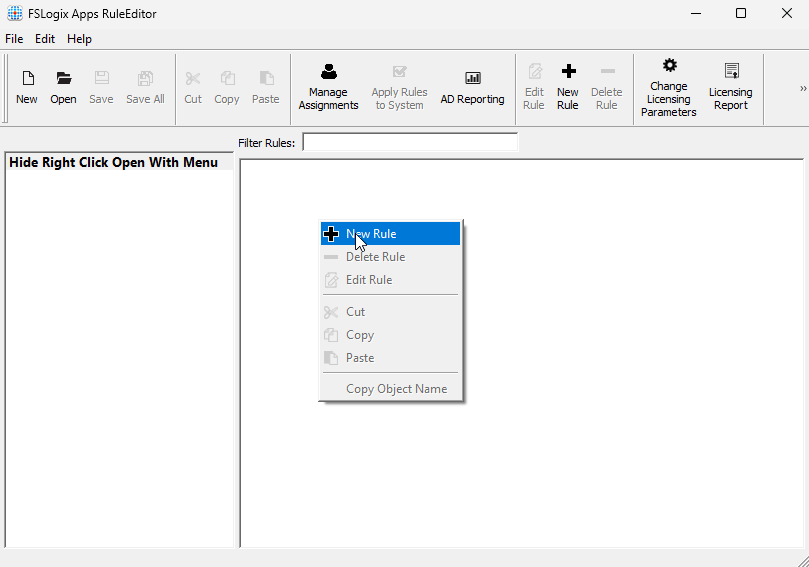
<p>Right click in the right-hand pain and select <code class="language-plaintext highlighter-rouge">New Rule</code></p>

<p><img src="/assets/img/posts/2023-01-31-masking-your-base-image-with-fslogix/08.png" alt="" /></p>

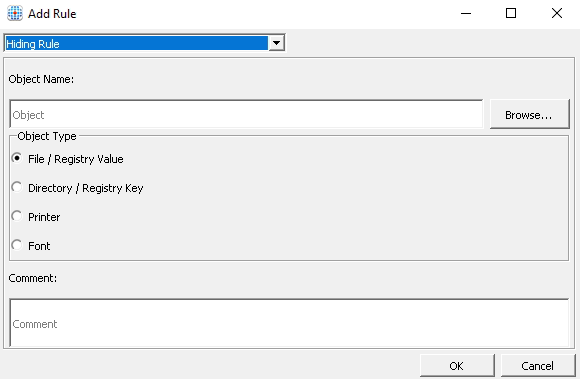
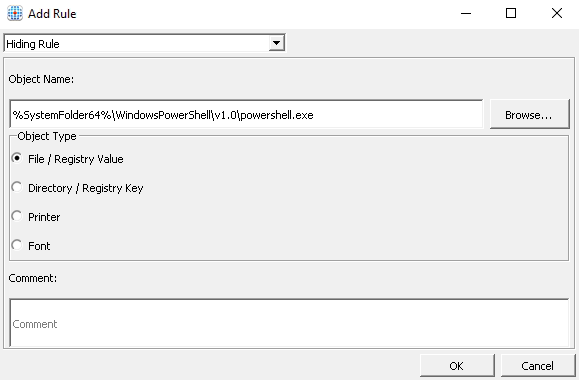
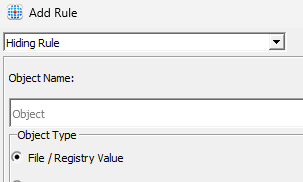
<p>Select <code class="language-plaintext highlighter-rouge">Hiding Rule</code> and click <code class="language-plaintext highlighter-rouge">Browse</code></p>

<p><img src="/assets/img/posts/2023-01-31-masking-your-base-image-with-fslogix/09.png" alt="" /></p>

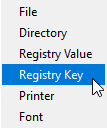
<p>Select to browse for a file</p>

<p><img src="/assets/img/posts/2023-01-31-masking-your-base-image-with-fslogix/10.png" alt="" /></p>

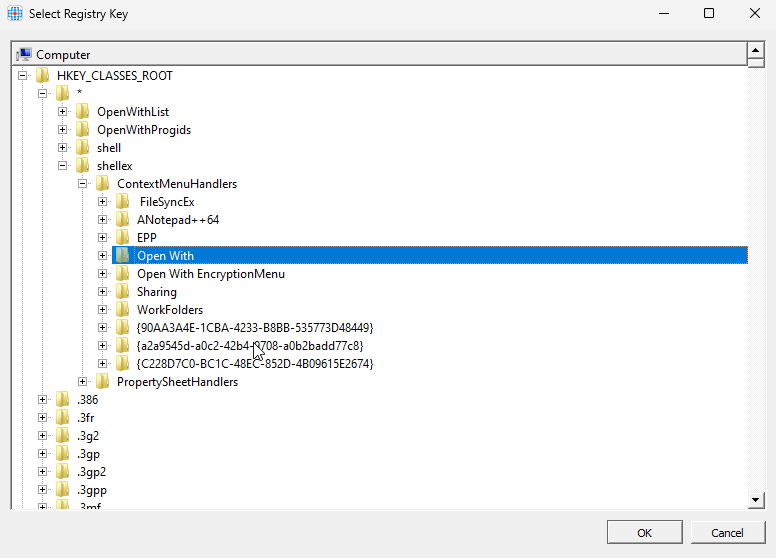
<p>Locate the PowerShell executable from the pop-up window that appears</p>

<p><img src="/assets/img/posts/2023-01-31-masking-your-base-image-with-fslogix/11.png" alt="" /></p>

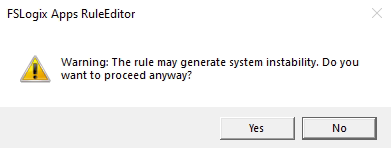
<p>Click OK and select <code class="language-plaintext highlighter-rouge">Yes</code> to the system instability warning</p>

<p><img src="/assets/img/posts/2023-01-31-masking-your-base-image-with-fslogix/12.png" alt="" /></p>

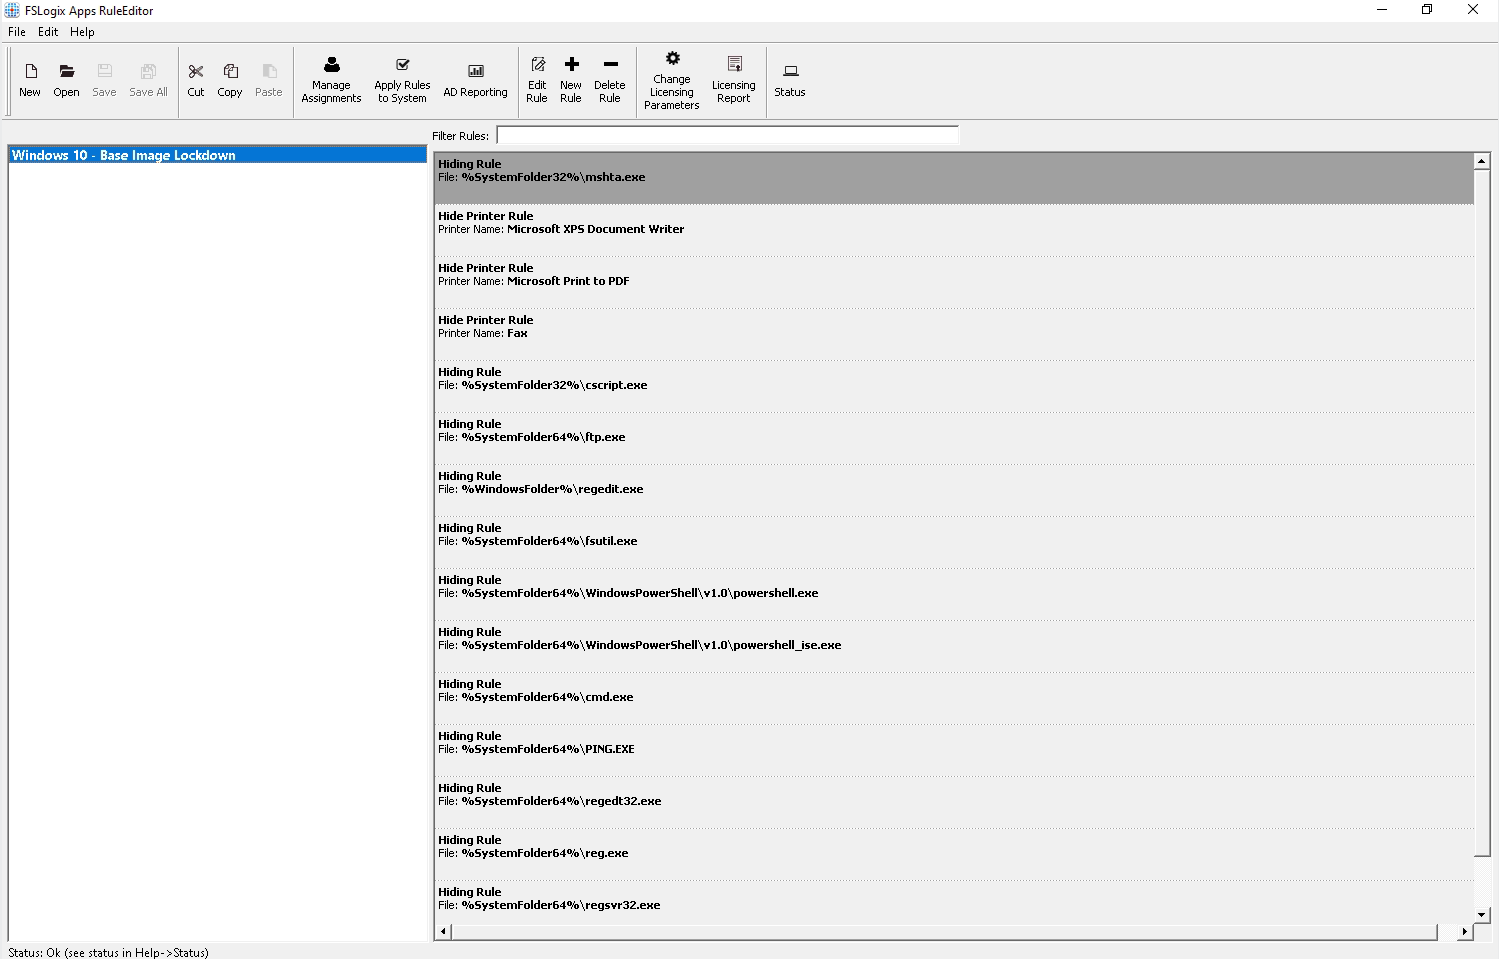
<p>Repeat this process for all the programs you want to hide from your users. Below are the programs and printers that I normally add</p>

<h4 id="hiding-rules-i-add">Hiding Rules I Add</h4>

<table>
  <thead>
    <tr>
      <th style="text-align: left">Program</th>
      <th style="text-align: left">Reasoning</th>
    </tr>
  </thead>
  <tbody>
    <tr>
      <td style="text-align: left">powershell.exe</td>
      <td style="text-align: left">PowerShell - the bain of my life with regard to security</td>
    </tr>
    <tr>
      <td style="text-align: left">powershell_ise.exe</td>
      <td style="text-align: left">See above!</td>
    </tr>
    <tr>
      <td style="text-align: left">ftp.exe</td>
      <td style="text-align: left">Can pipe commands via FTP to the command prompt</td>
    </tr>
    <tr>
      <td style="text-align: left">fsutil.exe</td>
      <td style="text-align: left">Can be used for an Applocker Bypass</td>
    </tr>
    <tr>
      <td style="text-align: left">cmd.exe</td>
      <td style="text-align: left">Not required for end users <strong>Be careful if you have login scripts</strong></td>
    </tr>
    <tr>
      <td style="text-align: left">ping.exe</td>
      <td style="text-align: left">Also not required by end users</td>
    </tr>
    <tr>
      <td style="text-align: left">reg.exe</td>
      <td style="text-align: left">Registry manipulation</td>
    </tr>
    <tr>
      <td style="text-align: left">regedt32.exe</td>
      <td style="text-align: left">More registry manipulation</td>
    </tr>
    <tr>
      <td style="text-align: left">regedit.exe</td>
      <td style="text-align: left">Yet more registry manipulation</td>
    </tr>
    <tr>
      <td style="text-align: left">regsvr32.exe</td>
      <td style="text-align: left">Not required by end users</td>
    </tr>
  </tbody>
</table>

<table>
  <thead>
    <tr>
      <th style="text-align: left">Printer</th>
      <th style="text-align: left">Reasoning</th>
    </tr>
  </thead>
  <tbody>
    <tr>
      <td style="text-align: left">Fax</td>
      <td style="text-align: left">Really !?!</td>
    </tr>
    <tr>
      <td style="text-align: left">Microsoft Print to PDF</td>
      <td style="text-align: left">Normally use other tools</td>
    </tr>
    <tr>
      <td style="text-align: left">Microsoft XPS Document Writer</td>
      <td style="text-align: left">Not required</td>
    </tr>
  </tbody>
</table>

<h4 id="hiding-rules-as-per-microsoft">Hiding Rules As Per Microsoft</h4>

<p>Now, Microsoft have been kind enough to provide a list of applications that attackers could potentially use to bypass AppLocker or Windows Defender Application Control. You can find this list below</p>

<p><a href="https://learn.microsoft.com/nb-no/windows/security/threat-protection/windows-defender-application-control/microsoft-recommended-block-rules">https://learn.microsoft.com/nb-no/windows/security/threat-protection/windows-defender-application-control/microsoft-recommended-block-rules</a></p>

<p>This is their take on it</p>

<p class="note" title="Attention">Members of the security community* continuously collaborate with Microsoft to help protect customers. With the help of their valuable reports, Microsoft has identified a list of valid applications that an attacker could also potentially use to bypass WDAC.</p>

<p>With that in mind I tend to add the relevant applications provided by Microsoft to by rule set to prevent internal users accessing these.</p>

<p class="note" title="Attention">Please note that <strong>EACH ENVIRONMENT DIFFERS</strong>, you will have to test this prior to releasing it into production, or you could break lots of your VDA’s. Check on each exe file and see if it is feasible to implement in your environment. Test, test and test some more and if you don’t, well, that’s your own fault then!</p>

<p>Once you are done you should have a fairly robust rule base as you can see below</p>

<p><img src="/assets/img/posts/2023-01-31-masking-your-base-image-with-fslogix/13.png" alt="" /></p>

<p>Next you will need to deal with the assignments, this is who this rule applies to, and also who it does not!</p>

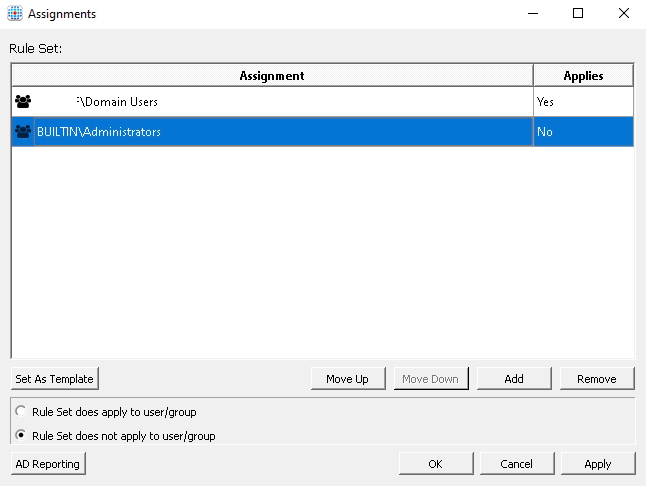
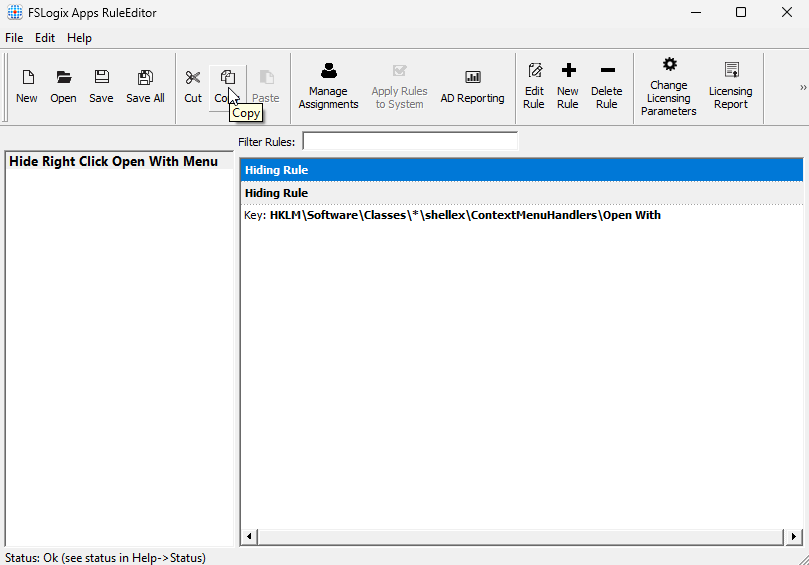
<p>Click on <code class="language-plaintext highlighter-rouge">Manage Assignments</code> and remove <code class="language-plaintext highlighter-rouge">Everyone</code> from the list.  Then add <code class="language-plaintext highlighter-rouge">Domain Users</code> and select <code class="language-plaintext highlighter-rouge">Rule set does apply to user/group</code> and also add <code class="language-plaintext highlighter-rouge">BUILTIN\Administrators</code> and select <code class="language-plaintext highlighter-rouge">Rule set does not apply to user/group</code></p>

<p><img src="/assets/img/posts/2023-01-31-masking-your-base-image-with-fslogix/14.png" alt="" /></p>

<p>Click to save the rule and close the rule editor.</p>

<h3 id="deployment">Deployment</h3>

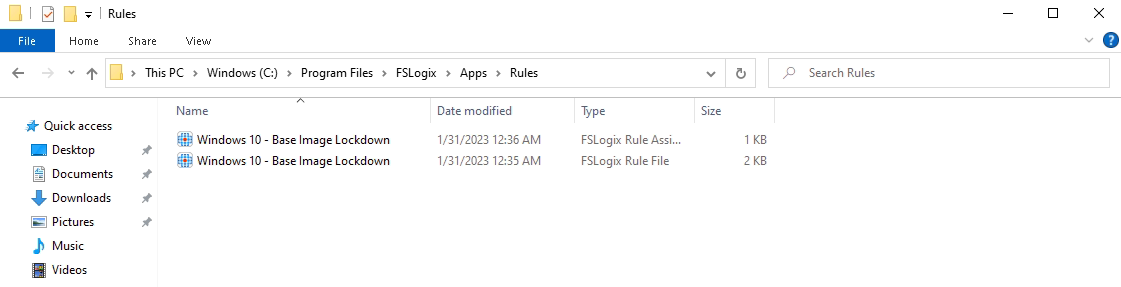
<p>To deploy your new rule you will need to copy both files to the following location on all your VDA’s</p>

<p>This can be done with a start-up script, part of the image seal process or a whole host of other options, that’s up to you.</p>

<p><img src="/assets/img/posts/2023-01-31-masking-your-base-image-with-fslogix/15.png" alt="" /></p>

<h3 id="testing">Testing</h3>

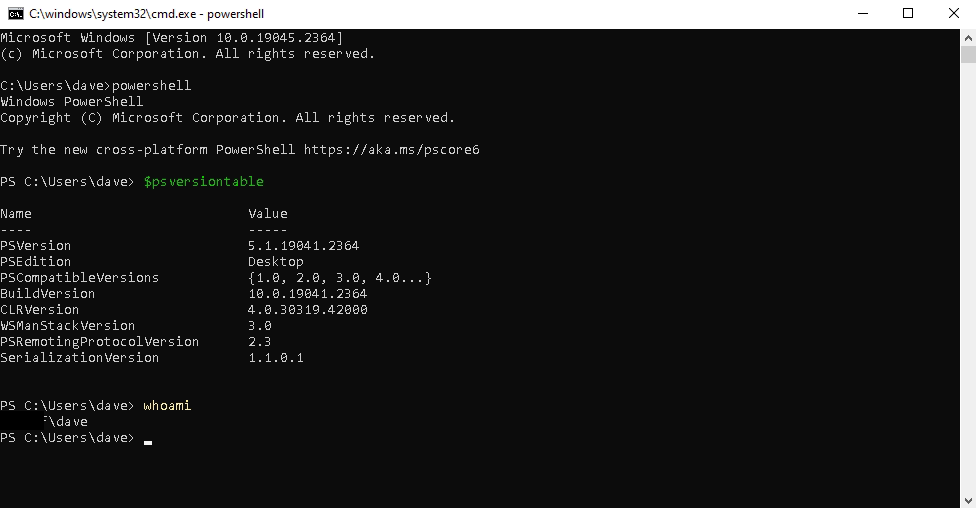
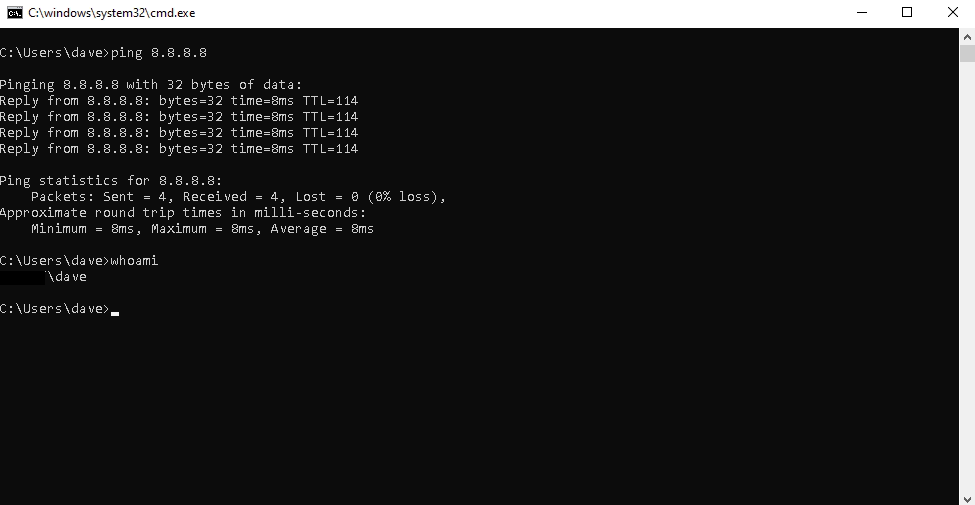
<p>First let’s test as an Administrator to make sure that everything still works as expected</p>

<p>As you can see PowerShell still works</p>

<p><img src="/assets/img/posts/2023-01-31-masking-your-base-image-with-fslogix/16.png" alt="" /></p>

<p>As does ping</p>

<p><img src="/assets/img/posts/2023-01-31-masking-your-base-image-with-fslogix/17.png" alt="" /></p>

<p>So, let’s switch to a standard user</p>

<p>You can see that Windows can’t even see that a registry editor is installed now, if you try and run it, nothing happens</p>

<p><img src="/assets/img/posts/2023-01-31-masking-your-base-image-with-fslogix/19.png" alt="" /></p>

<p>The same with Windows PowerShell</p>

<p><img src="/assets/img/posts/2023-01-31-masking-your-base-image-with-fslogix/20.png" alt="" /></p>

<p>So, let’s try and run the PowerShell file directly from the file system</p>

<p><img src="/assets/img/posts/2023-01-31-masking-your-base-image-with-fslogix/21.png" alt="" /></p>

<p>As you can see, it’s not there, FSLogix App Masking is doing its job and “masking” those files we defined earlier from the user.</p>

<h3 id="conclusion">Conclusion</h3>

<p>Now I know that there are plenty of smart people out there who may be able to bypass this with all the tools they have available to them. But, if you consider that quite a bit of breakout is done internally by your standard users this is a pretty good win.</p>

<p>It does not take a lot to set up, does not cost much and can immediately add a layer of security between your users and the base operating system you are deploying to them.</p>]]></content><author><name>Dave Brett</name><email>dave@bretty.me.uk</email></author><category term="blog" /><category term="Citrix" /><category term="VDA" /><category term="Security" /><summary type="html"><![CDATA[This post will describe the process of using FSLogix App Masking to hide the core set of tools and utilities that an attacker will try to gain access to in order to exploit your platform.]]></summary><media:thumbnail xmlns:media="http://search.yahoo.com/mrss/" url="https://www.bretty.me.uk/assets/img/posts/2023-01-31-masking-your-base-image-with-fslogix/fslogix-base-image-masking.png" /><media:content medium="image" url="https://www.bretty.me.uk/assets/img/posts/2023-01-31-masking-your-base-image-with-fslogix/fslogix-base-image-masking.png" xmlns:media="http://search.yahoo.com/mrss/" /></entry><entry><title type="html">Making Your Citrix Policy Secure - By Default</title><link href="https://www.bretty.me.uk/2023-01-28-making-your-citrix-policy-secure/" rel="alternate" type="text/html" title="Making Your Citrix Policy Secure - By Default" /><published>2023-01-28T00:00:00+00:00</published><updated>2023-01-28T00:00:00+00:00</updated><id>https://www.bretty.me.uk/making-your-citrix-policy-secure</id><content type="html" xml:base="https://www.bretty.me.uk/2023-01-28-making-your-citrix-policy-secure/"><![CDATA[<ul id="markdown-toc">
  <li><a href="#overview" id="markdown-toc-overview">Overview</a></li>
  <li><a href="#default-citrix-policies" id="markdown-toc-default-citrix-policies">Default Citrix Policies</a></li>
  <li><a href="#the-issue" id="markdown-toc-the-issue">The Issue</a></li>
  <li><a href="#the-solution" id="markdown-toc-the-solution">The Solution</a></li>
  <li><a href="#the-policy" id="markdown-toc-the-policy">The Policy</a>    <ul>
      <li><a href="#file-redirection" id="markdown-toc-file-redirection">File Redirection</a></li>
      <li><a href="#local-app-access" id="markdown-toc-local-app-access">Local App Access</a></li>
      <li><a href="#port-redirection" id="markdown-toc-port-redirection">Port Redirection</a></li>
      <li><a href="#printing" id="markdown-toc-printing">Printing</a></li>
      <li><a href="#security" id="markdown-toc-security">Security</a></li>
      <li><a href="#session-watermark" id="markdown-toc-session-watermark">Session Watermark</a></li>
      <li><a href="#usb-devices" id="markdown-toc-usb-devices">USB Devices</a></li>
    </ul>
  </li>
  <li><a href="#enabling-exceptions" id="markdown-toc-enabling-exceptions">Enabling Exceptions</a></li>
  <li><a href="#filtering" id="markdown-toc-filtering">Filtering</a>    <ul>
      <li><a href="#user-or-group" id="markdown-toc-user-or-group">User or Group</a></li>
      <li><a href="#client-ip-address" id="markdown-toc-client-ip-address">Client IP Address</a></li>
      <li><a href="#access-control" id="markdown-toc-access-control">Access Control</a></li>
    </ul>
  </li>
  <li><a href="#conclusion" id="markdown-toc-conclusion">Conclusion</a></li>
</ul>

<h3 id="overview">Overview</h3>

<p>Is your Citrix Platform Secure? Did you inherit your platform and have just built on what’s there policy wise to suit the business needs? If so, maybe it’s time to take a look at what you have policy wise and what your users can actually do!</p>

<p class="note" title="Attention">Citrix Policy by default is <strong>NOT</strong> secure, your platform will be left open and attackers <strong>WILL</strong> take advantage of this. This is done to make life easy for the installers of the platform and will make it extremely user-friendly, but, you should understand what this means for you and your business.</p>

<h3 id="default-citrix-policies">Default Citrix Policies</h3>

<p>So, let’s have a look at what Citrix will give you out of the box. This is with a default install of the product on-premises or in the cloud.</p>

<table>
  <thead>
    <tr>
      <th style="text-align: left">Policy Section</th>
      <th style="text-align: left">Default Configuration</th>
    </tr>
  </thead>
  <tbody>
    <tr>
      <td style="text-align: left">Client Drives</td>
      <td style="text-align: left">All client drives will be mapped into the Citrix session. Local, CD Drives and Network are all included here</td>
    </tr>
    <tr>
      <td style="text-align: left">Printing</td>
      <td style="text-align: left">All client printers will be mapped into the Citrix session</td>
    </tr>
    <tr>
      <td style="text-align: left">Security</td>
      <td style="text-align: left">Only Basic encryption is enabled for the ICA session</td>
    </tr>
    <tr>
      <td style="text-align: left">Session Watermarking</td>
      <td style="text-align: left">No watermarking will be in place</td>
    </tr>
    <tr>
      <td style="text-align: left">USB Drives</td>
      <td style="text-align: left">All USB client drives will be mapped into the Citrix session, even plug and play devices</td>
    </tr>
  </tbody>
</table>

<h3 id="the-issue">The Issue</h3>

<p>As you can see from the above, if you have left your Citrix policy as default you are setting yourself up for a world of pain down the line. Some of the examples that you could be left open to are:</p>

<ul>
  <li>Attackers can copy and paste all data out of the session</li>
  <li>Attackers can drag and drop files into and out of the Citrix session</li>
  <li>Attackers can insert USB drives and then copy data to them</li>
  <li>Attackers can print out any data they desire from your platform</li>
  <li>Attackers can screenshot their session then take that data elsewhere</li>
</ul>

<p>This is obviously an issue and should be addressed.  Read on…</p>

<h3 id="the-solution">The Solution</h3>

<p><strong>BE SECURE BY DEFAULT</strong>, really that’s it.  Set up a secure policy by default and grant additional access by exception.</p>

<p>Now I realize that this is not always easy and can often be met with a bunch of challenges (I had to personally fight for nearly a year to block copy and paste as it “stopped” the business working fast apparently) but its one way you can get a handle on your environment and really know what your users can and cannot do.</p>

<h3 id="the-policy">The Policy</h3>

<p>Citrix have provided you with an excellent starting point for a secure by default policy.</p>

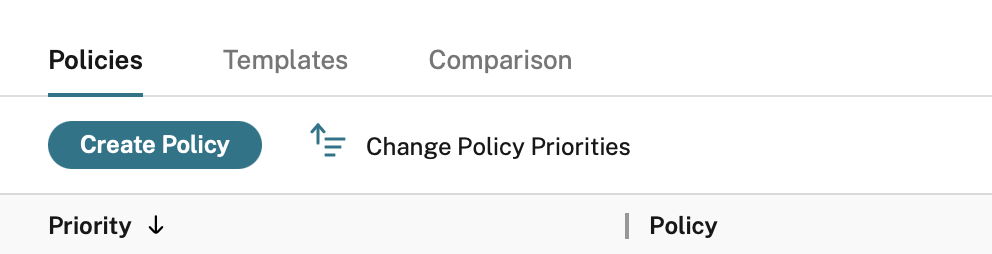
<p>If you log into Citrix Cloud (same for on-premises) and navigate to the <code class="language-plaintext highlighter-rouge">Policies</code> section</p>

<p><img src="/assets/img/posts/2023-01-28-making-your-citrix-policy-secure/01.png" alt="" /></p>

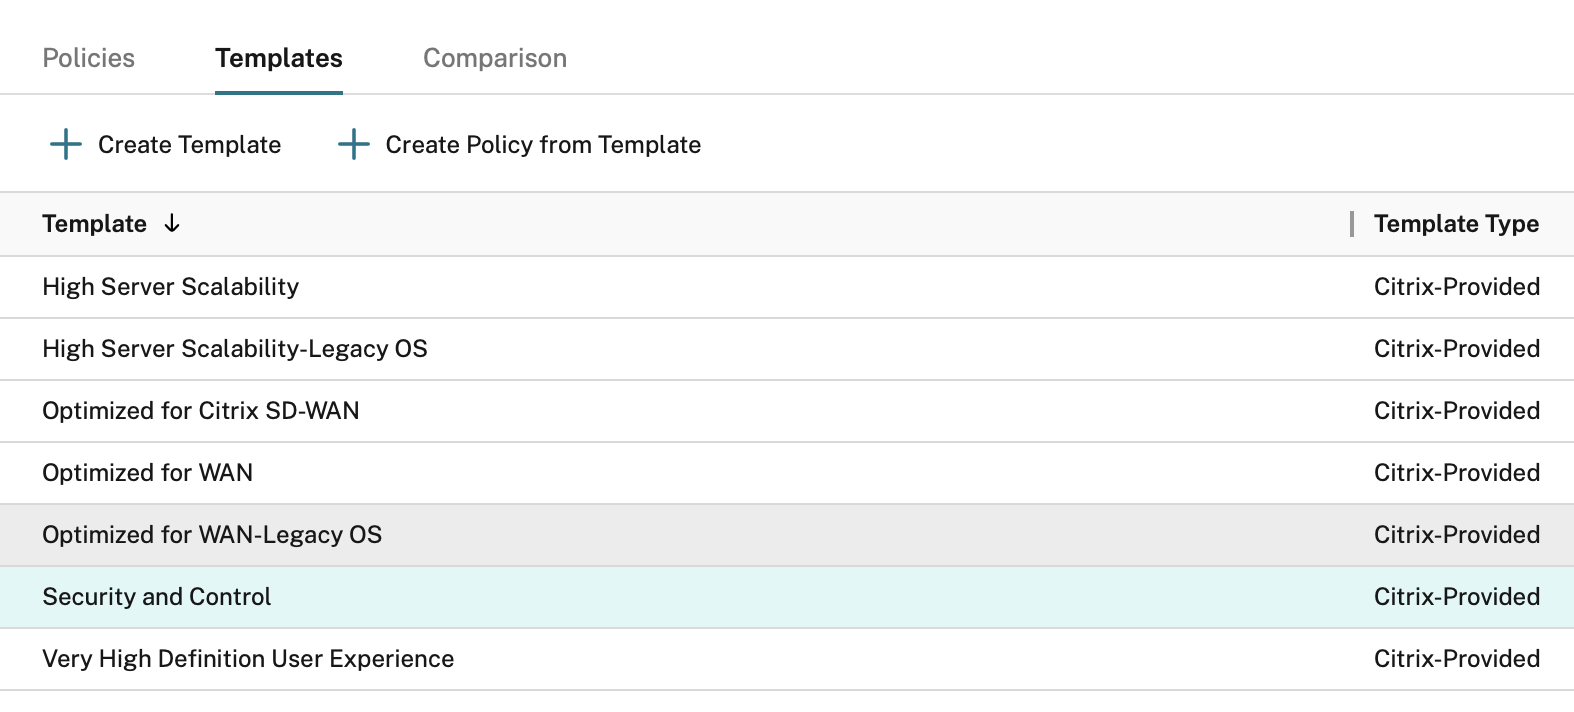
<p>Then click on <code class="language-plaintext highlighter-rouge">Templates</code></p>

<p><img src="/assets/img/posts/2023-01-28-making-your-citrix-policy-secure/02.png" alt="" /></p>

<p>You will see a template called <code class="language-plaintext highlighter-rouge">Security and Control</code></p>

<p><img src="/assets/img/posts/2023-01-28-making-your-citrix-policy-secure/03.png" alt="" /></p>

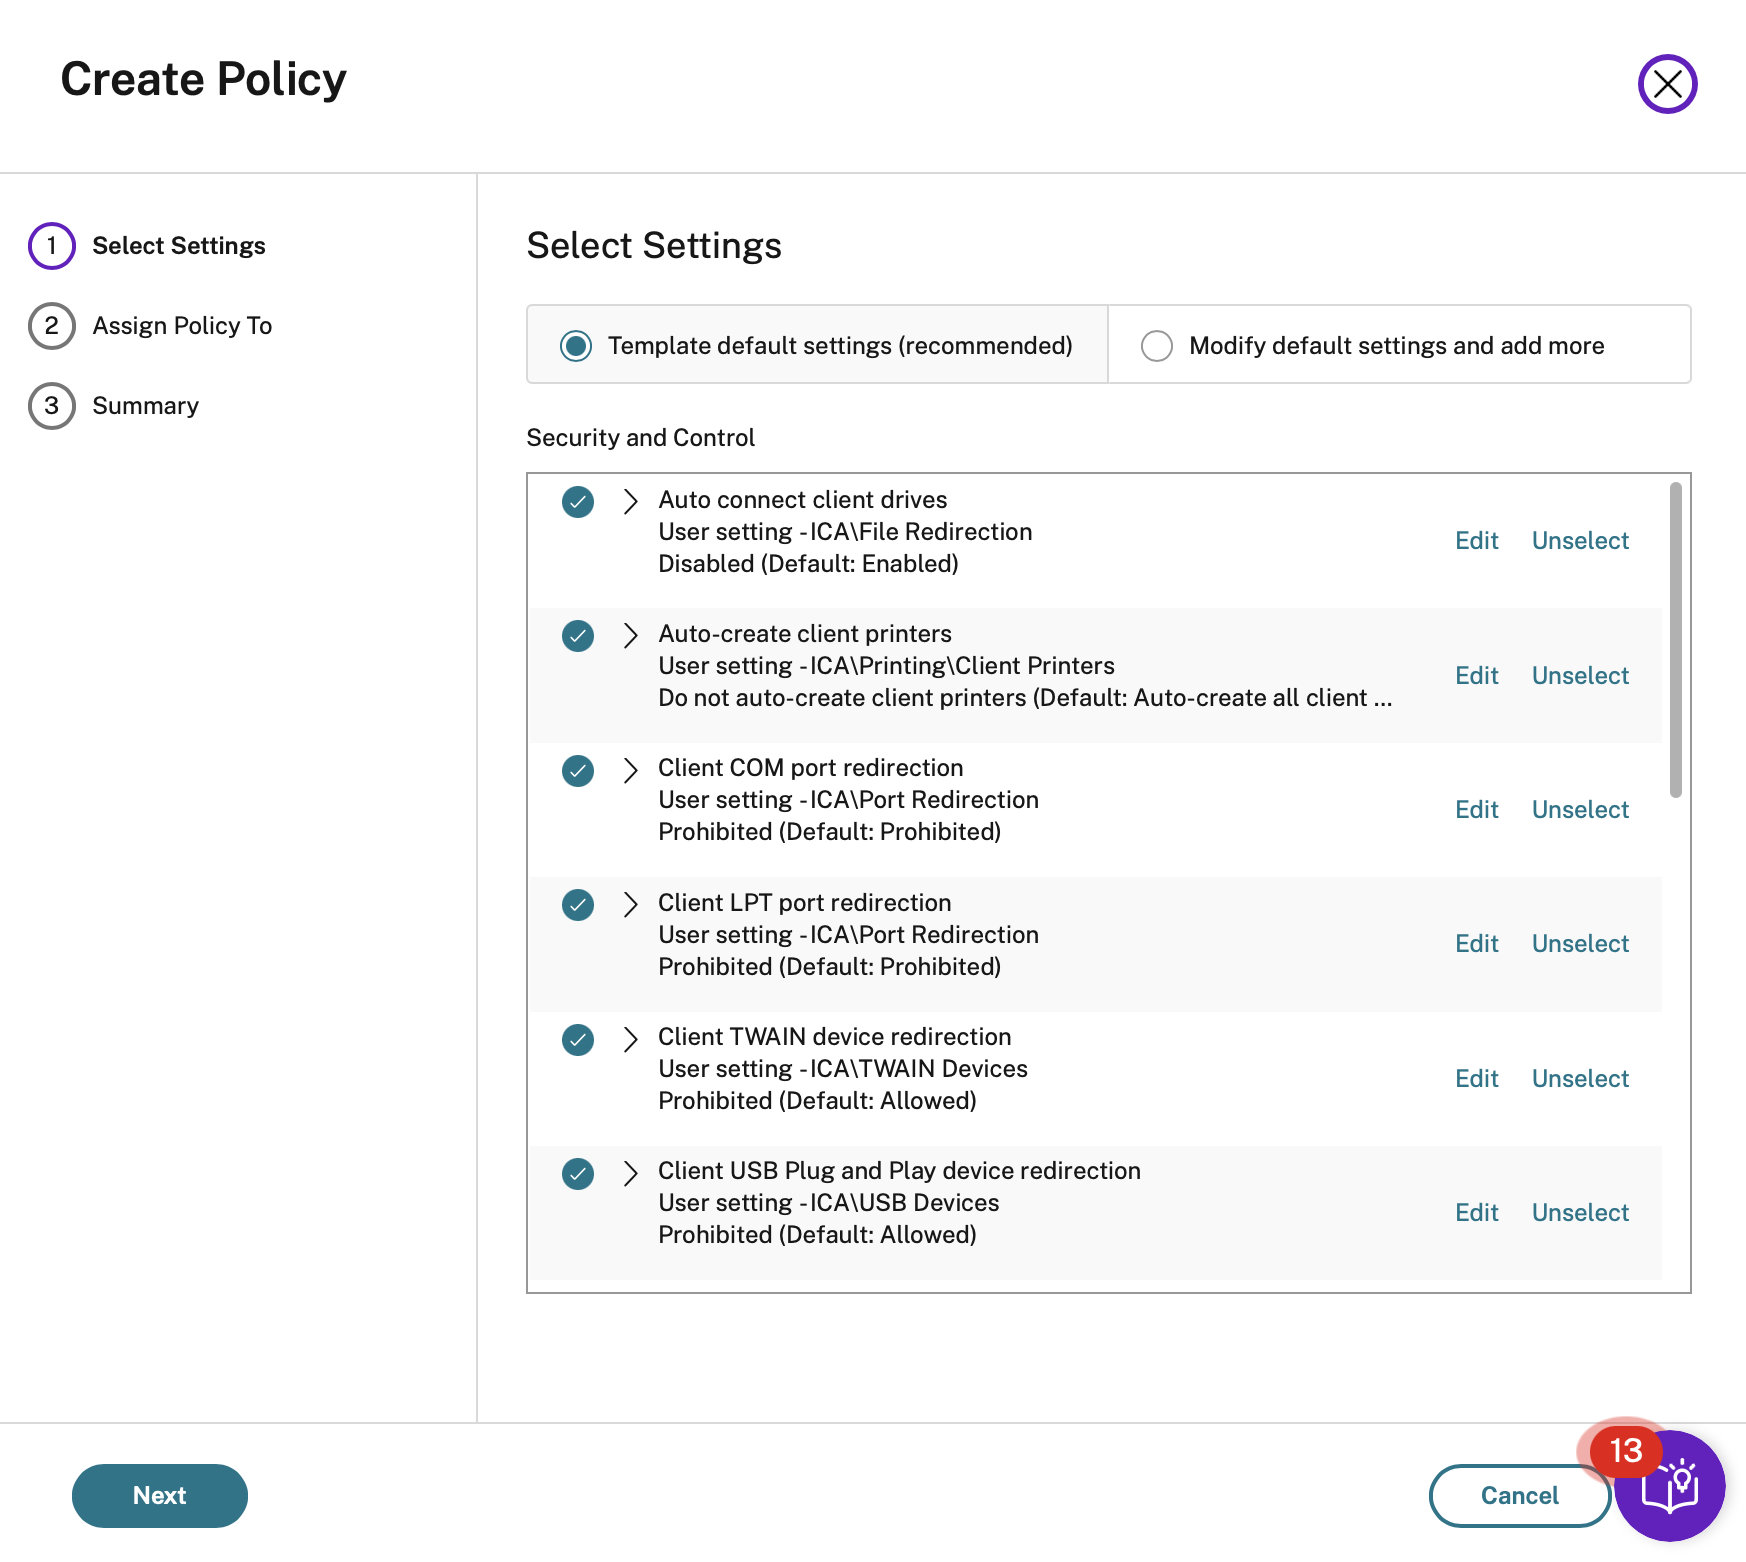
<p>Click on that and then click on <code class="language-plaintext highlighter-rouge">Create policy from template</code></p>

<p><img src="/assets/img/posts/2023-01-28-making-your-citrix-policy-secure/04.png" alt="" /></p>

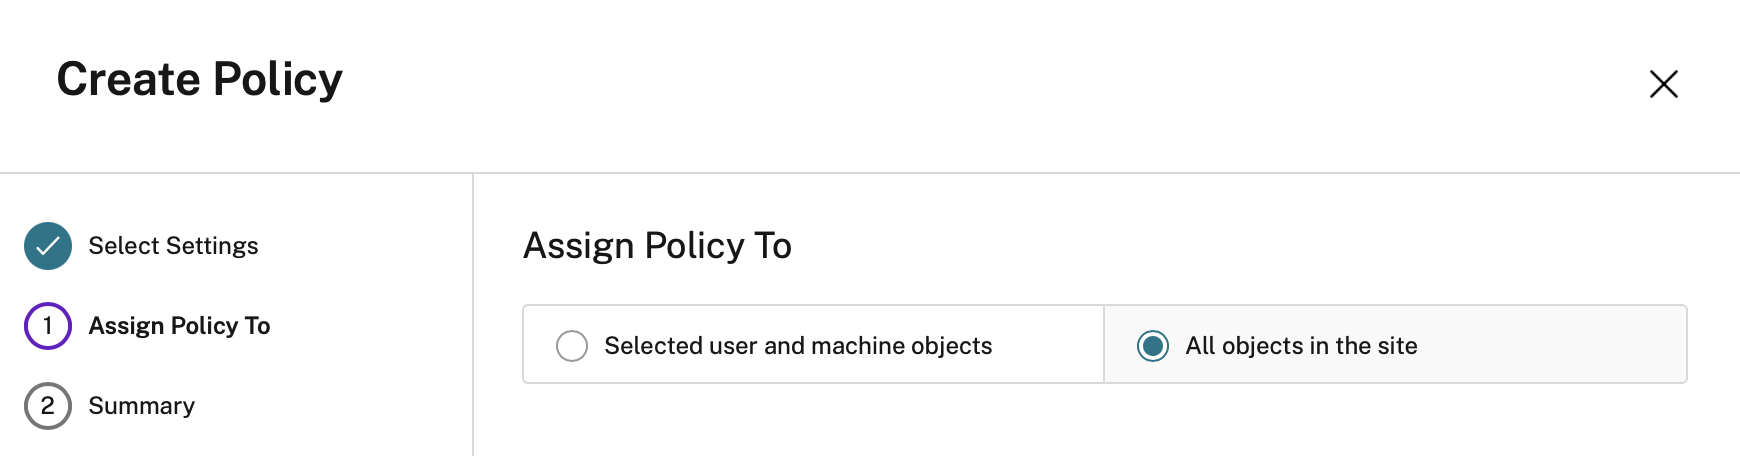
<p>Click on next accepting the <code class="language-plaintext highlighter-rouge">Template default settings</code></p>

<p>Assign it to <code class="language-plaintext highlighter-rouge">All objects in the site</code></p>

<p><img src="/assets/img/posts/2023-01-28-making-your-citrix-policy-secure/05.png" alt="" /></p>

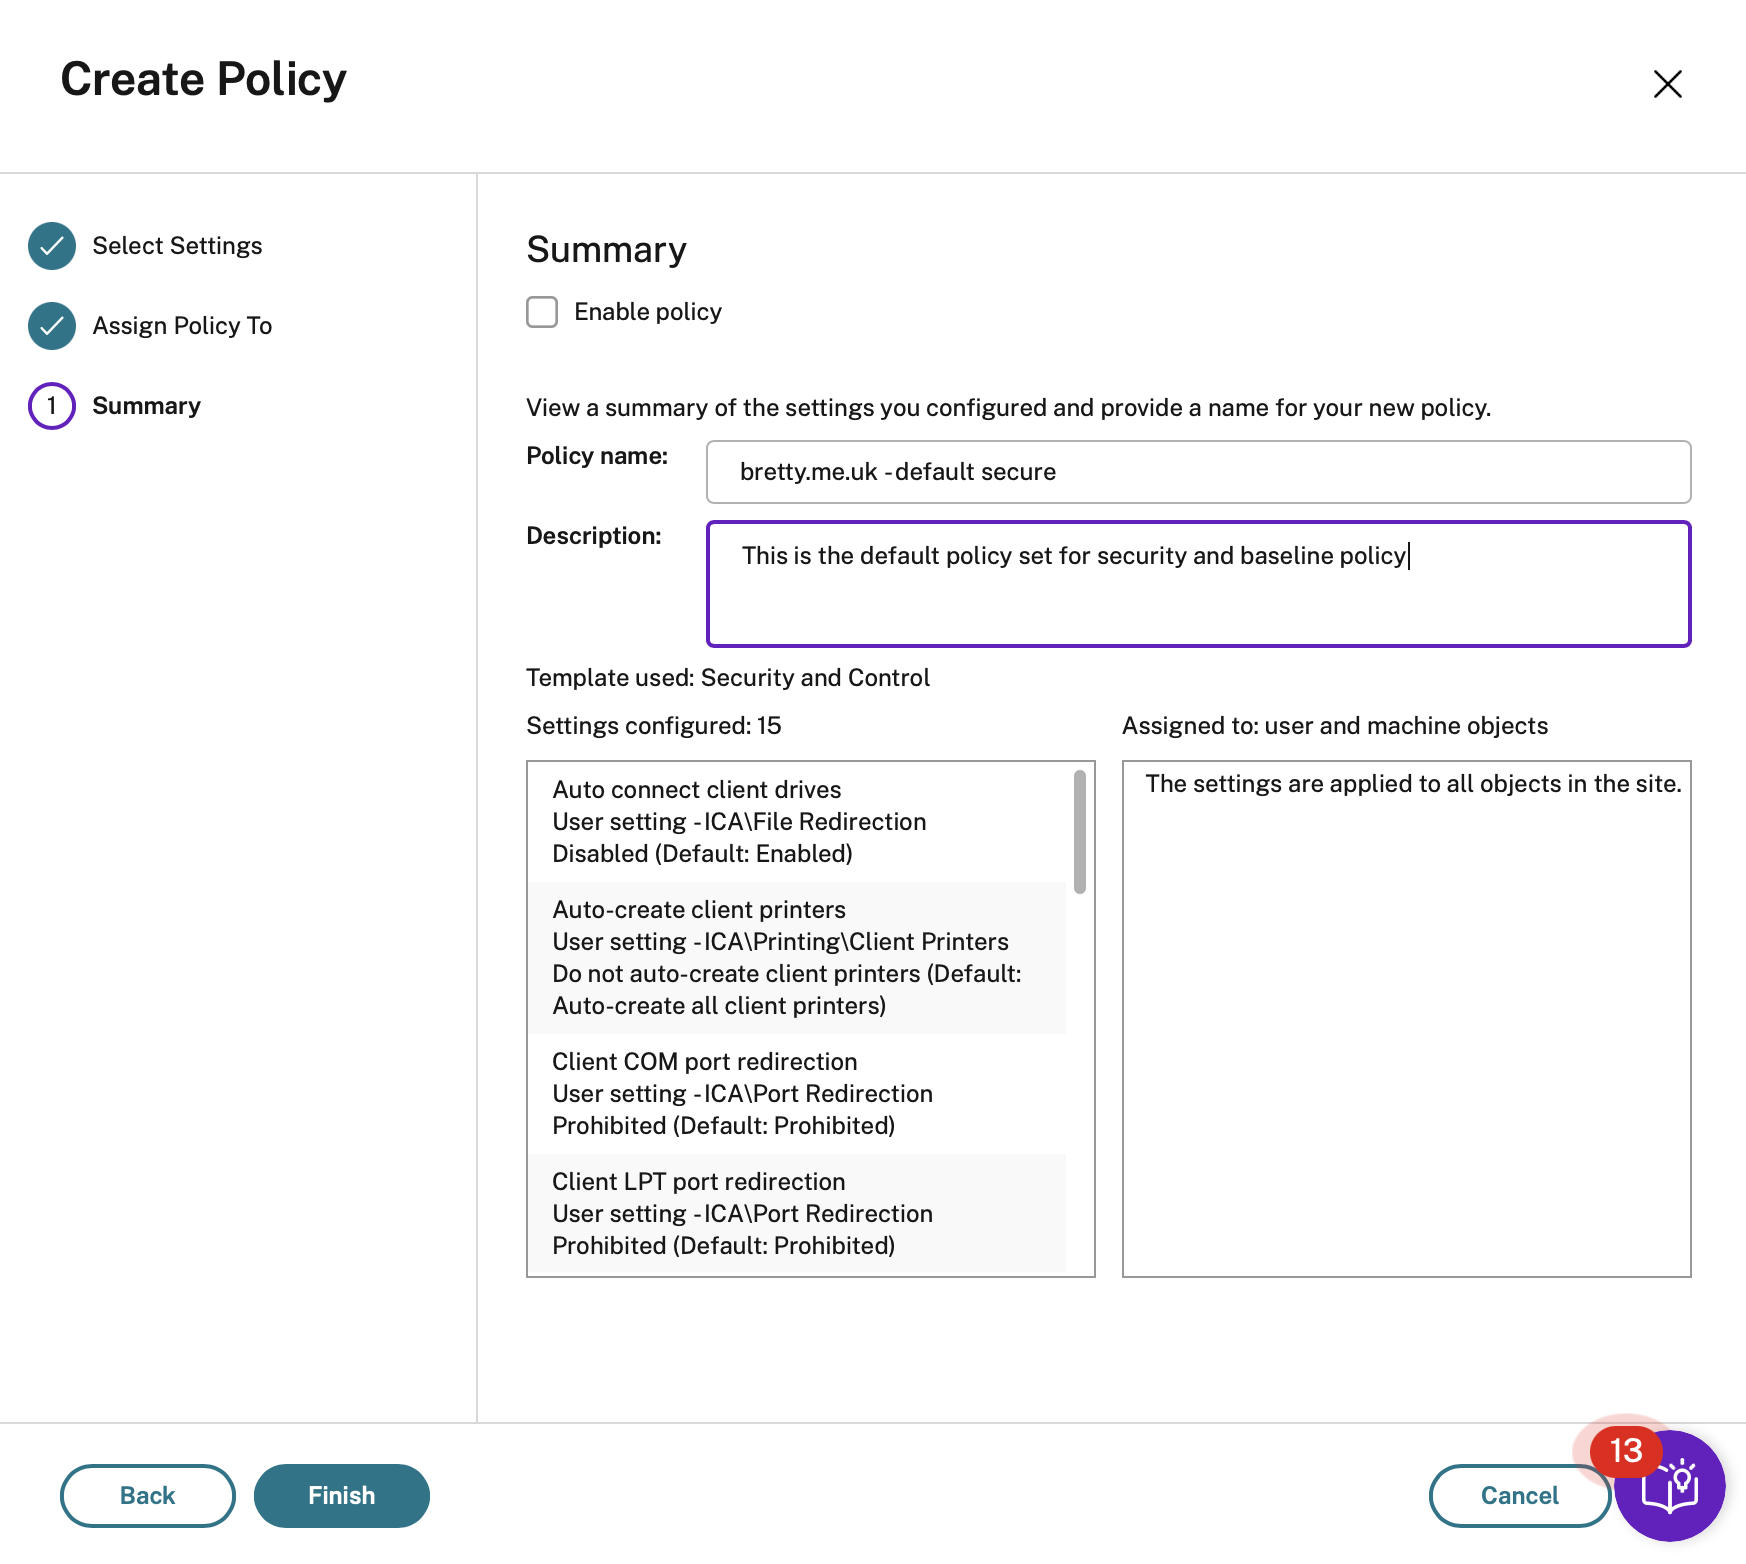
<p>Give the new template a name and a description</p>

<p><img src="/assets/img/posts/2023-01-28-making-your-citrix-policy-secure/06.png" alt="" /></p>

<p>Click on <code class="language-plaintext highlighter-rouge">Finish</code> and you will have your new template ready to edit.</p>

<p><img src="/assets/img/posts/2023-01-28-making-your-citrix-policy-secure/07.png" alt="" /></p>

<p>So, that’s a great baseline. Now click on that template and select edit and update the settings to <strong>INCLUDE</strong> the following settings. Each section has been divided up into its own table to help filter them out if you don’t want all the settings.</p>

<p class="note" title="Attention"><strong>SOME OF THESE ARE SET BY DEFAULT</strong>, however, I prefer to set them manually in case Citrix decide to change their default stance on policy settings. It means you don’t have to trawl the policy updates each release to ensure you are still secure</p>

<h4 id="file-redirection">File Redirection</h4>

<table>
  <thead>
    <tr>
      <th style="text-align: left">Policy</th>
      <th style="text-align: left">Setting</th>
    </tr>
  </thead>
  <tbody>
    <tr>
      <td style="text-align: left">Allow file transfer between desktop and client</td>
      <td style="text-align: left">Prohibited</td>
    </tr>
    <tr>
      <td style="text-align: left">Client floppy drives</td>
      <td style="text-align: left">Prohibited</td>
    </tr>
    <tr>
      <td style="text-align: left">Download file from desktop</td>
      <td style="text-align: left">Prohibited</td>
    </tr>
    <tr>
      <td style="text-align: left">Host to client redirection</td>
      <td style="text-align: left">Prohibited</td>
    </tr>
    <tr>
      <td style="text-align: left">Preserve client drive letters</td>
      <td style="text-align: left">Prohibited</td>
    </tr>
    <tr>
      <td style="text-align: left">Read-only client drive access</td>
      <td style="text-align: left">Prohibited</td>
    </tr>
    <tr>
      <td style="text-align: left">Special folder redirection</td>
      <td style="text-align: left">Prohibited</td>
    </tr>
    <tr>
      <td style="text-align: left">Upload file to desktop</td>
      <td style="text-align: left">Prohibited</td>
    </tr>
  </tbody>
</table>

<h4 id="local-app-access">Local App Access</h4>

<table>
  <thead>
    <tr>
      <th style="text-align: left">Policy</th>
      <th style="text-align: left">Setting</th>
    </tr>
  </thead>
  <tbody>
    <tr>
      <td style="text-align: left">Allow local app access</td>
      <td style="text-align: left">Prohibited</td>
    </tr>
  </tbody>
</table>

<h4 id="port-redirection">Port Redirection</h4>

<table>
  <thead>
    <tr>
      <th style="text-align: left">Policy</th>
      <th style="text-align: left">Setting</th>
    </tr>
  </thead>
  <tbody>
    <tr>
      <td style="text-align: left">Auto connect client COM ports</td>
      <td style="text-align: left">Prohibited</td>
    </tr>
    <tr>
      <td style="text-align: left">Auto connect client LPT ports</td>
      <td style="text-align: left">Prohibited</td>
    </tr>
  </tbody>
</table>

<h4 id="printing">Printing</h4>

<table>
  <thead>
    <tr>
      <th style="text-align: left">Policy</th>
      <th style="text-align: left">Setting</th>
    </tr>
  </thead>
  <tbody>
    <tr>
      <td style="text-align: left">Auto-create generic universal printer</td>
      <td style="text-align: left">Prohibited</td>
    </tr>
    <tr>
      <td style="text-align: left">Auto-create PDF Universal printer</td>
      <td style="text-align: left">Prohibited</td>
    </tr>
  </tbody>
</table>

<h4 id="security">Security</h4>

<table>
  <thead>
    <tr>
      <th style="text-align: left">Policy</th>
      <th style="text-align: left">Setting</th>
    </tr>
  </thead>
  <tbody>
    <tr>
      <td style="text-align: left">SecureICA minimum encryption level</td>
      <td style="text-align: left">RC5 128 Bit</td>
    </tr>
  </tbody>
</table>

<p class="note" title="Attention">Make sure you update your Delivery Groups to reflect this</p>

<h4 id="session-watermark">Session Watermark</h4>

<table>
  <thead>
    <tr>
      <th style="text-align: left">Policy</th>
      <th style="text-align: left">Setting</th>
    </tr>
  </thead>
  <tbody>
    <tr>
      <td style="text-align: left">Enable session watermark</td>
      <td style="text-align: left">Enabled</td>
    </tr>
    <tr>
      <td style="text-align: left">Include client IP Address</td>
      <td style="text-align: left">Enabled</td>
    </tr>
    <tr>
      <td style="text-align: left">Include logon user name</td>
      <td style="text-align: left">Enabled</td>
    </tr>
    <tr>
      <td style="text-align: left">Include VDA host name</td>
      <td style="text-align: left">Enabled</td>
    </tr>
    <tr>
      <td style="text-align: left">Include VDA IP Address</td>
      <td style="text-align: left">Enabled</td>
    </tr>
    <tr>
      <td style="text-align: left">Watermark custom text</td>
      <td style="text-align: left">Your custom text for water marking</td>
    </tr>
  </tbody>
</table>

<h4 id="usb-devices">USB Devices</h4>

<table>
  <thead>
    <tr>
      <th style="text-align: left">Policy</th>
      <th style="text-align: left">Setting</th>
    </tr>
  </thead>
  <tbody>
    <tr>
      <td style="text-align: left">Client USB device redirection</td>
      <td style="text-align: left">Prohibited</td>
    </tr>
  </tbody>
</table>

<p>Once you have set all these up save and close the policy. Enable it and set this as the default for your platform, and you will have closed a bunch of security risks with a single policy.</p>

<h3 id="enabling-exceptions">Enabling Exceptions</h3>

<p>Once your baseline policy is in place you can create separate policies for enabling the clipboard for example or enabling printing and then rank them higher and filter them on groups. This will enable you to add access by exception rather than by default.</p>

<p><img src="/assets/img/posts/2023-01-28-making-your-citrix-policy-secure/08.png" alt="" /></p>

<h3 id="filtering">Filtering</h3>

<p>To set up access over and above your default secure settings you will need to use filtering. Below are some of the filters I use the most and a brief reason why, these are by no means a comprehensive list of what you can achieve but may provide a good starting point.</p>

<h4 id="user-or-group">User or Group</h4>

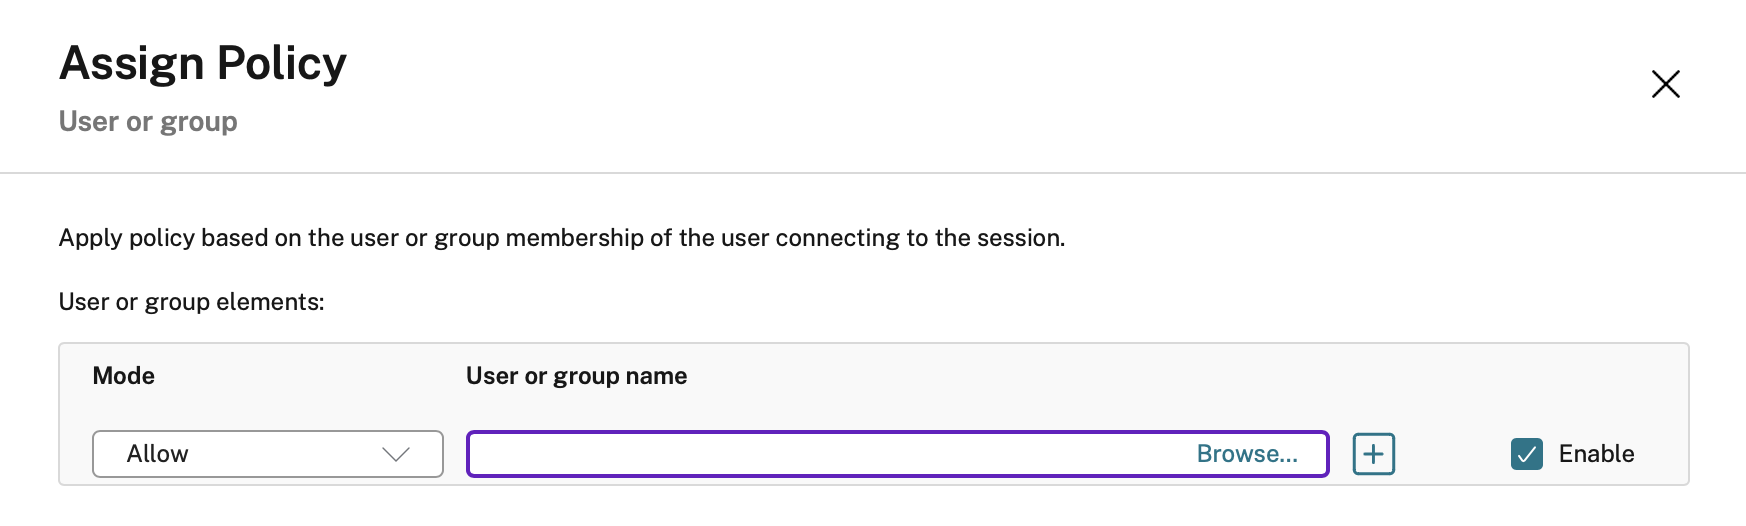
<p>This is the most common to be honest. You can assign a policy such as <code class="language-plaintext highlighter-rouge">Enable Clipboard</code> to a specific set of users in your domain. Quick note on this though, if possible control the group admin to a <strong>VERY SPECIFIC</strong> group of people using ACL’s. These groups grow fast!</p>

<p><img src="/assets/img/posts/2023-01-28-making-your-citrix-policy-secure/09.png" alt="" /></p>

<h4 id="client-ip-address">Client IP Address</h4>

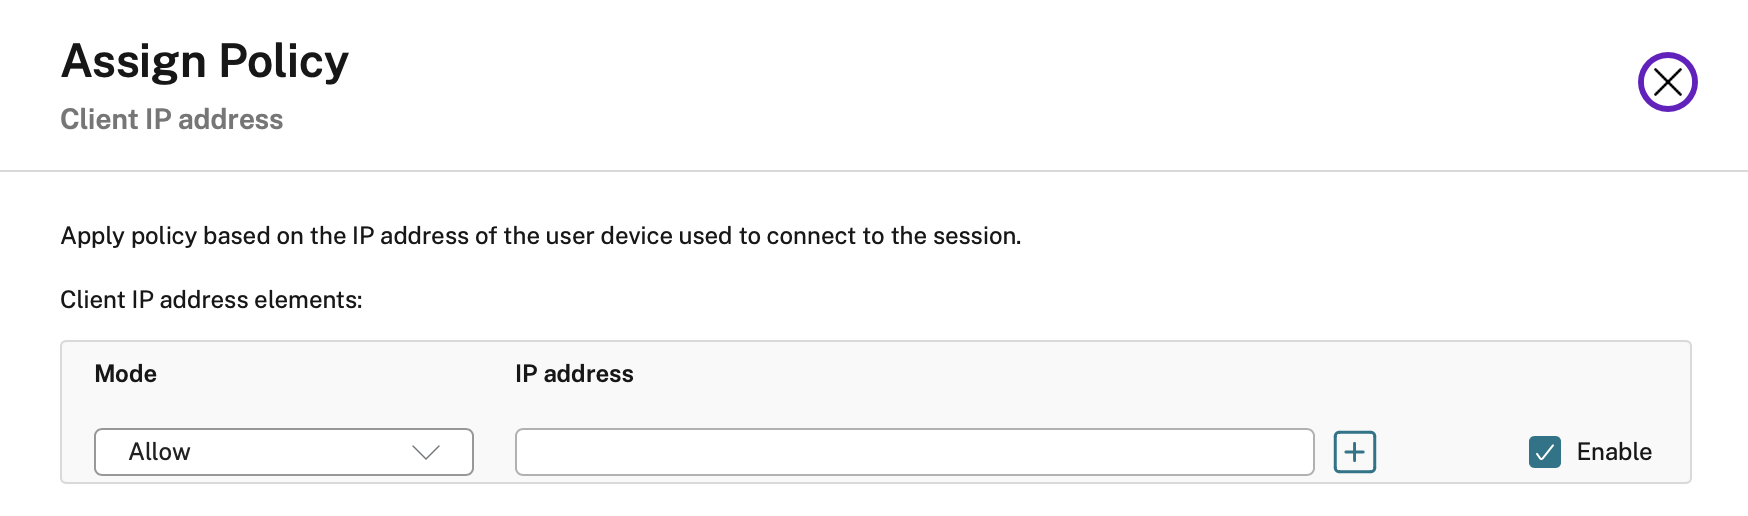
<p>This one is useful if you want to allow certain policies to internal users only but not to external users. Simply add your internal networks to this then boom, you’re done, all internal users can now copy and paste or copy files in and out but external users cannot. This is assuming you have sufficient building security and that the <strong>ONLY</strong> devices on your internal network are trusted and managed.</p>

<p><img src="/assets/img/posts/2023-01-28-making-your-citrix-policy-secure/10.png" alt="" /></p>

<h4 id="access-control">Access Control</h4>

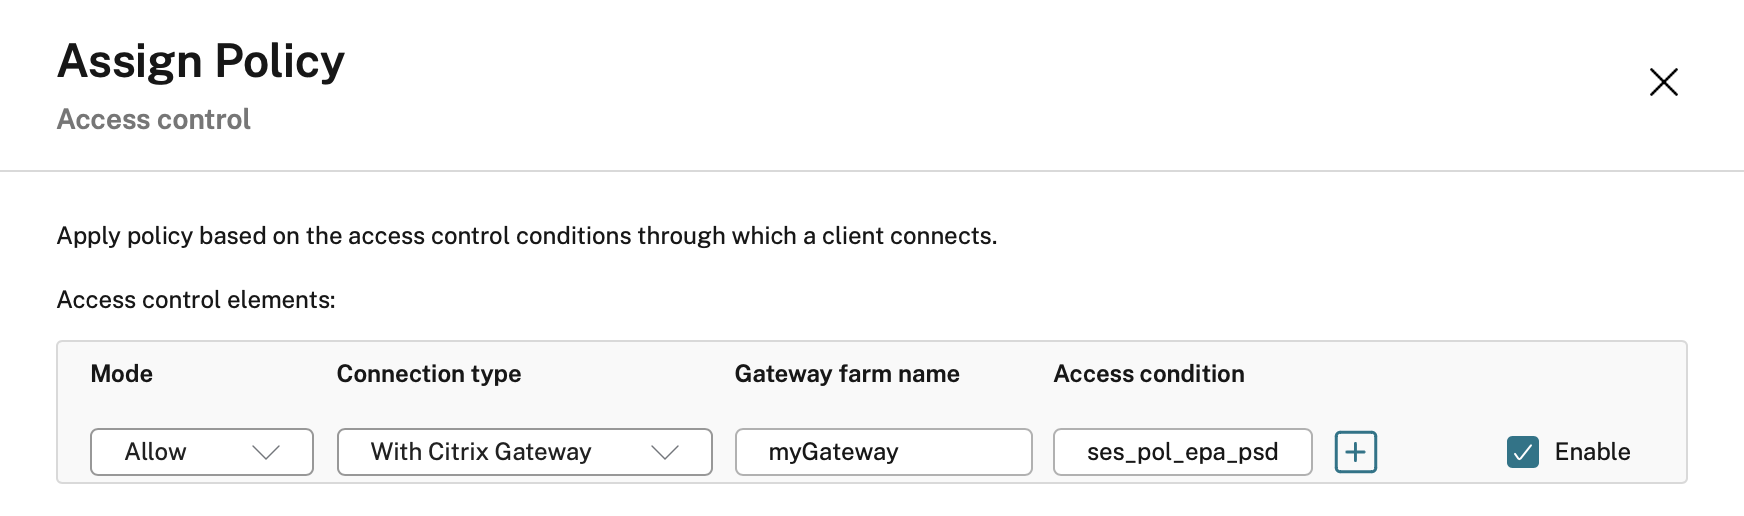
<p>I have used this one <strong>LOADS</strong> and it is so useful. If you are licensed and have a NetScaler for external access you can enable EPA and based on the result of that scan, apply applicable policies.</p>

<p>For example, a user can log in externally from their corporate laptop, pass the EPA and as the device is managed and trusted you can enable Copy and Paste. However, if that same user logs on from their own device, EPA will fail and the Copy and Paste policy will not apply. Same user, different device and context and therefore different policy.  Super powerful!</p>

<p><img src="/assets/img/posts/2023-01-28-making-your-citrix-policy-secure/11.png" alt="" /></p>

<h3 id="conclusion">Conclusion</h3>

<p>Citrix Policy is powerful! You should 100% take a look at your policies you have in place right now and check with your SecOps teams to ensure that your users cannot do things you would not want them to. Trust me, your Citrix environment is one of the first things they will go after and if your policy is not set right, it’s a quick win for the attackers!</p>]]></content><author><name>Dave Brett</name><email>dave@bretty.me.uk</email></author><category term="blog" /><category term="Citrix" /><category term="VDA" /><category term="Security" /><summary type="html"><![CDATA[This post will outline the reasons why you should take a look at your Citrix Policies that come out the box and how to secure them.]]></summary><media:thumbnail xmlns:media="http://search.yahoo.com/mrss/" url="https://www.bretty.me.uk/assets/img/posts/2023-01-28-making-your-citrix-policy-secure/citrix-policies.png" /><media:content medium="image" url="https://www.bretty.me.uk/assets/img/posts/2023-01-28-making-your-citrix-policy-secure/citrix-policies.png" xmlns:media="http://search.yahoo.com/mrss/" /></entry><entry><title type="html">Nutanix Prism Central API Call from PowerShell</title><link href="https://www.bretty.me.uk/2023-01-27-nutanix-prism-central-api-powershell-function/" rel="alternate" type="text/html" title="Nutanix Prism Central API Call from PowerShell" /><published>2023-01-27T00:00:00+00:00</published><updated>2023-01-27T00:00:00+00:00</updated><id>https://www.bretty.me.uk/nutanix-prism-central-api-powershell-function</id><content type="html" xml:base="https://www.bretty.me.uk/2023-01-27-nutanix-prism-central-api-powershell-function/"><![CDATA[<ul id="markdown-toc">
  <li><a href="#overview" id="markdown-toc-overview">Overview</a></li>
  <li><a href="#variable-descriptions" id="markdown-toc-variable-descriptions">Variable Descriptions</a></li>
  <li><a href="#powershell-code" id="markdown-toc-powershell-code">PowerShell Code</a></li>
  <li><a href="#example" id="markdown-toc-example">Example</a>    <ul>
      <li><a href="#get-list-of-subnets" id="markdown-toc-get-list-of-subnets">Get List Of Subnets</a></li>
    </ul>
  </li>
  <li><a href="#conclusion" id="markdown-toc-conclusion">Conclusion</a></li>
</ul>

<h3 id="overview">Overview</h3>

<p>I have often needed information from my Nutanix Clusters that I can use for a report or just programmatically and always use the API that Nutanix has to get this data.</p>

<p>The reason for this is that it allows me to get the information I want into a variable and then manipulate it with <code class="language-plaintext highlighter-rouge">PowerShell</code> to give people (often management) exactly the information that they require.</p>

<p>Fortunately Nutanix have great documentation of their API and you can find that <a href="https://www.nutanix.dev">here</a>.</p>

<p>For this code I am using the v3 Prism Central API. Why? Well from Prism Central you can get information about any of the clusters that you have in your organization (think VMware vCenter) and pull that back for use in the remainder of your script.</p>

<p>I have written the code so that you are able to pass in the:</p>

<ul>
  <li>API Root Version</li>
  <li>API End Point</li>
  <li>Method</li>
  <li>Payload</li>
</ul>

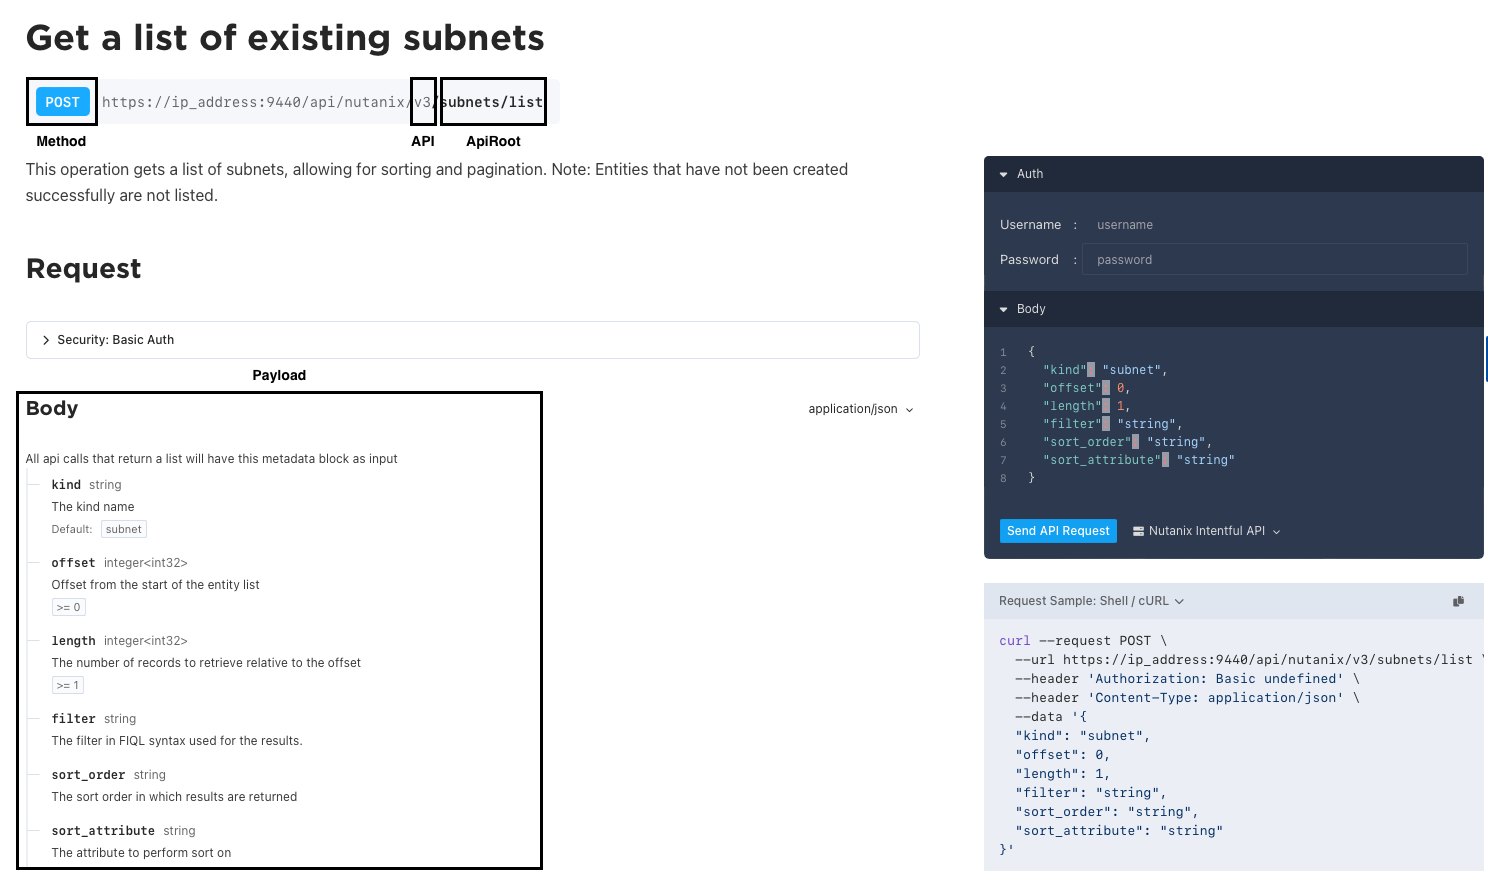
<p>So, you should be able to get pretty much any information you want from Prism Central just using this code. All you have to do is check the documentation and find out what the above variables need, as can be seen in the image below.</p>

<p><img src="/assets/img/posts/2023-01-27-nutanix-prism-central-api-powershell-function/01.png" alt="" /></p>

<p>As Nutanix change the API versions you should be able to update your code to the new version by just changing the <code class="language-plaintext highlighter-rouge">API</code> variable you pass in.</p>

<p>I would recommend putting this code inside a <code class="language-plaintext highlighter-rouge">function</code> and passing in the parameters, therefore making the code reusable, but this is just an example of the code that you can use to get the information that you require.</p>

<h3 id="variable-descriptions">Variable Descriptions</h3>

<table>
  <thead>
    <tr>
      <th style="text-align: left">Name</th>
      <th style="text-align: left">Description</th>
      <th style="text-align: left">Example</th>
    </tr>
  </thead>
  <tbody>
    <tr>
      <td style="text-align: left">IP</td>
      <td style="text-align: left">The IP Address of Prism Central</td>
      <td style="text-align: left">10.20.30.40</td>
    </tr>
    <tr>
      <td style="text-align: left">UserName</td>
      <td style="text-align: left">The username to connect to Prism Central</td>
      <td style="text-align: left">admin</td>
    </tr>
    <tr>
      <td style="text-align: left">Password</td>
      <td style="text-align: left">The password to connect to Prism Central</td>
      <td style="text-align: left">password</td>
    </tr>
    <tr>
      <td style="text-align: left">ApiRoot</td>
      <td style="text-align: left">The Root API you wish to query</td>
      <td style="text-align: left">api/nutanix/v3</td>
    </tr>
    <tr>
      <td style="text-align: left">API</td>
      <td style="text-align: left">The API you are want to query</td>
      <td style="text-align: left">subnets/list</td>
    </tr>
    <tr>
      <td style="text-align: left">Method</td>
      <td style="text-align: left">The method for the Rest call</td>
      <td style="text-align: left">post</td>
    </tr>
    <tr>
      <td style="text-align: left">Payload</td>
      <td style="text-align: left">The payload you wish to send to the API</td>
      <td style="text-align: left">{ length : 0 }</td>
    </tr>
  </tbody>
</table>

<h3 id="powershell-code">PowerShell Code</h3>

<p>Below you will find the PowerShell code used to query the Prism Central API</p>

<div class="language-powershell highlighter-rouge"><div class="highlight"><pre class="highlight"><code><span class="c"># Define Variables</span><span class="w">
</span><span class="nv">$IP</span><span class="w"> </span><span class="o">=</span><span class="w"> </span><span class="s2">"192.168.100.10"</span><span class="w">
</span><span class="nv">$UserName</span><span class="w"> </span><span class="o">=</span><span class="w"> </span><span class="s2">"admin"</span><span class="w">
</span><span class="nv">$Password</span><span class="w"> </span><span class="o">=</span><span class="w"> </span><span class="s2">"SuperSecretPassword"</span><span class="w">
</span><span class="nv">$ApiRoot</span><span class="w"> </span><span class="o">=</span><span class="w"> </span><span class="s2">"api/nutanix/v3"</span><span class="w">
</span><span class="nv">$API</span><span class="w"> </span><span class="o">=</span><span class="w"> </span><span class="s2">"subnets/list"</span><span class="w">
</span><span class="nv">$Method</span><span class="w"> </span><span class="o">=</span><span class="w"> </span><span class="s2">"POST"</span><span class="w">
</span><span class="nv">$Payload</span><span class="w"> </span><span class="o">=</span><span class="w"> </span><span class="s2">"{ }"</span><span class="w">

</span><span class="c"># Build Credential Object</span><span class="w">
</span><span class="nv">$credPair</span><span class="w"> </span><span class="o">=</span><span class="w"> </span><span class="s2">"</span><span class="si">$(</span><span class="nv">$UserName</span><span class="si">)</span><span class="s2">:</span><span class="si">$(</span><span class="nv">$Password</span><span class="si">)</span><span class="s2">"</span><span class="w">
</span><span class="nv">$encodedCredentials</span><span class="w"> </span><span class="o">=</span><span class="w"> </span><span class="p">[</span><span class="n">System.Convert</span><span class="p">]::</span><span class="n">ToBase64String</span><span class="p">([</span><span class="n">System.Text.Encoding</span><span class="p">]::</span><span class="n">ASCII.GetBytes</span><span class="p">(</span><span class="nv">$credPair</span><span class="p">))</span><span class="w">
</span><span class="nv">$headers</span><span class="w"> </span><span class="o">=</span><span class="w"> </span><span class="p">@{</span><span class="w"> </span><span class="nx">Authorization</span><span class="w"> </span><span class="o">=</span><span class="w"> </span><span class="s2">"Basic </span><span class="nv">$encodedCredentials</span><span class="s2">"</span><span class="w"> </span><span class="p">}</span><span class="w">

</span><span class="c"># Build Connection Uri</span><span class="w">
</span><span class="nv">$URL</span><span class="w"> </span><span class="o">=</span><span class="w"> </span><span class="s2">"https://</span><span class="si">$(</span><span class="nv">$IP</span><span class="si">)</span><span class="s2">:9440/</span><span class="si">$(</span><span class="nv">$ApiRoot</span><span class="si">)</span><span class="s2">/</span><span class="nv">$API</span><span class="s2">"</span><span class="w">

</span><span class="kr">try</span><span class="w"> </span><span class="p">{</span><span class="w">
    </span><span class="nv">$ApiResult</span><span class="w"> </span><span class="o">=</span><span class="w"> </span><span class="n">Invoke-RestMethod</span><span class="w"> </span><span class="nt">-Uri</span><span class="w"> </span><span class="nv">$URL</span><span class="w"> </span><span class="nt">-method</span><span class="w"> </span><span class="nv">$Method</span><span class="w"> </span><span class="nt">-ContentType</span><span class="w"> </span><span class="s1">'application/json'</span><span class="w"> </span><span class="nt">-SkipCertificateCheck</span><span class="w"> </span><span class="nt">-Headers</span><span class="w"> </span><span class="nv">$headers</span><span class="w"> </span><span class="nt">-Body</span><span class="w"> </span><span class="nv">$Payload</span><span class="w">
</span><span class="p">}</span><span class="w">
</span><span class="kr">catch</span><span class="w"> </span><span class="p">{</span><span class="w">
    </span><span class="n">Write-Error</span><span class="w"> </span><span class="s2">"Error Executing RestAPI Call"</span><span class="w">
    </span><span class="kr">Exit</span><span class="w">
</span><span class="p">}</span><span class="w">
</span></code></pre></div></div>

<h3 id="example">Example</h3>

<h4 id="get-list-of-subnets">Get List Of Subnets</h4>

<p><img src="/assets/img/posts/2023-01-27-nutanix-prism-central-api-powershell-function/02.png" alt="" /></p>

<h3 id="conclusion">Conclusion</h3>

<p>I have found this small code snippet super useful when I am getting information back from my Nutanix Cluster. It allows me to call this code within a function and just pass in the API end point that I want to query as well as a Payload and Method and pull those results directly back into PowerShell</p>]]></content><author><name>Dave Brett</name><email>dave@bretty.me.uk</email></author><category term="blog" /><category term="PowerShell" /><category term="Nutanix" /><category term="Citrix" /><summary type="html"><![CDATA[This post will show you how to gather information from the Nutanix Prism Central API using PowerShell.]]></summary><media:thumbnail xmlns:media="http://search.yahoo.com/mrss/" url="https://www.bretty.me.uk/assets/img/posts/2023-01-27-nutanix-prism-central-api-powershell-function/api.png" /><media:content medium="image" url="https://www.bretty.me.uk/assets/img/posts/2023-01-27-nutanix-prism-central-api-powershell-function/api.png" xmlns:media="http://search.yahoo.com/mrss/" /></entry><entry><title type="html">Secure File Open With Dialogue</title><link href="https://www.bretty.me.uk/2023-01-26-secure-file-open-with/" rel="alternate" type="text/html" title="Secure File Open With Dialogue" /><published>2023-01-26T00:00:00+00:00</published><updated>2023-01-26T00:00:00+00:00</updated><id>https://www.bretty.me.uk/secure-file-open-with</id><content type="html" xml:base="https://www.bretty.me.uk/2023-01-26-secure-file-open-with/"><![CDATA[<ul id="markdown-toc">
  <li><a href="#overview" id="markdown-toc-overview">Overview</a></li>
  <li><a href="#the-security-issue" id="markdown-toc-the-security-issue">The Security Issue</a></li>
  <li><a href="#registry-fix" id="markdown-toc-registry-fix">Registry Fix</a></li>
  <li><a href="#fslogix-to-the-rescue" id="markdown-toc-fslogix-to-the-rescue">FSLogix To The Rescue</a>    <ul>
      <li><a href="#history" id="markdown-toc-history">History</a></li>
      <li><a href="#fslogix-fix" id="markdown-toc-fslogix-fix">FSLogix Fix</a></li>
    </ul>
  </li>
  <li><a href="#conclusion" id="markdown-toc-conclusion">Conclusion</a></li>
</ul>

<h3 id="overview">Overview</h3>

<p>In a multi-user environment you often have several applications installed on a single Windows system and either publish applications to the user or grant them access to a desktop hiding various items from the start menu.  Whilst on the surface this may seem sufficient to stop your users accessing things they should not, I have seen attackers use the File Open dialogue to access applications on a server that they should otherwise not have access to.</p>

<p>The problem here is that if you do not have a load of master images and want that single image nirvana then you need a way to lock apps to only the users that you deem necessary as you will often have <strong>ALL</strong> the apps installed on the same, single master image.</p>

<p>There are a ton of ways to do this, and if it were me I would probably use 1, if not all of them, however for the purpose of this post I am going to show you one step in that process:</p>

<p>Hide the <strong>“Right Click, Open With”</strong> dialogue</p>

<h3 id="the-security-issue">The Security Issue</h3>

<p>First let me show you what this specific issue is meant to defend against.</p>

<p>If we log into a Windows 11 machine and open up File Explorer you can see we have 2 files there</p>

<p><img src="/assets/img/posts/2023-01-26-secure-file-open-with/01.png" alt="" /></p>

<p>Now if we right-click on the Text Document and select Open With we get the option to “Choose another app”</p>

<p><img src="/assets/img/posts/2023-01-26-secure-file-open-with/02.png" alt="" /></p>

<p>Clicking this displays a list of all the applications associated with that file extension, from here we can click on “Choose another app on your PC”</p>

<p><img src="/assets/img/posts/2023-01-26-secure-file-open-with/03.png" alt="" /></p>

<p>This will open up a File dialogue and allow us to browse the local drive for any application we deem fit.</p>

<p class="note" title="Attention">Please note that you should have your Local Drives locked down, if you want help doing this please read my article on doing so.</p>

<p><img src="/assets/img/posts/2023-01-26-secure-file-open-with/04.png" alt="" /></p>

<p>So if we now go ahead and open up the text document using Excel</p>

<p><img src="/assets/img/posts/2023-01-26-secure-file-open-with/05.png" alt="" />
<img src="/assets/img/posts/2023-01-26-secure-file-open-with/06.png" alt="" /></p>

<p>Then, once open use the Excel search bar to look for “Macros”</p>

<p><img src="/assets/img/posts/2023-01-26-secure-file-open-with/07.png" alt="" /></p>

<p>Give the Macro a name in the pop-up dialogue and click on Create</p>

<p><img src="/assets/img/posts/2023-01-26-secure-file-open-with/09.png" alt="" /></p>

<p>This will give you access to the Visual Basic editor and allow you to write and execute any code you wish, all from opening up a text document.</p>

<p><img src="/assets/img/posts/2023-01-26-secure-file-open-with/10.png" alt="" /></p>

<h3 id="registry-fix">Registry Fix</h3>

<p>Luckily there is a relatively quick fix for this but in my opinion It’s not so elegant.</p>

<p>Open up the registry editor</p>

<p><img src="/assets/img/posts/2023-01-26-secure-file-open-with/11.png" alt="" /></p>

<p>Then navigate to the following key</p>

<p><code class="language-plaintext highlighter-rouge">HKEY_CLASSES_ROOT\*\shellex\ContextMenuHandlers</code></p>

<p><img src="/assets/img/posts/2023-01-26-secure-file-open-with/12.png" alt="" /></p>

<p>Locate the <code class="language-plaintext highlighter-rouge">Open With</code> Key and delete it</p>

<p><img src="/assets/img/posts/2023-01-26-secure-file-open-with/13.png" alt="" /></p>

<p>Next time you try and use the right click open with dialogue you will see its gone!</p>

<p><img src="/assets/img/posts/2023-01-26-secure-file-open-with/15.png" alt="" /></p>

<h3 id="fslogix-to-the-rescue">FSLogix To The Rescue</h3>

<p>The above method is good, and it works, however, what if:</p>
<ul>
  <li>As an Administrator you still want the functionality</li>
  <li>You “forget” to implement the fix on a single VDA</li>
</ul>

<p>This will leave you open to attack and not be something you want.</p>

<p>Let’s have a look at how FSLogix can help.</p>

<h4 id="history">History</h4>

<p>FSLogix was bought by Microsoft and It’s pretty much available now to everyone who is using Virtual Desktops. Whilst this is great and a big win for profiles there is another component to FSLogix that can help us here, its called “App Masking”</p>

<p>This gives us the ability to hide applications, files and registry keys based on group membership. With this in mind we can hide the right click open with key from all users except the Administrators. This means that as an Admin you can still use the functionality but if you are a regular user (as I hope your users are!) you won’t see the key as its masked.</p>

<p>To learn more about installing FSLogix click <a href="https://learn.microsoft.com/en-us/fslogix/install-ht">here</a></p>

<h4 id="fslogix-fix">FSLogix Fix</h4>

<p>Start by opening the FSLogix Rule Editor from one of your VDA’s</p>

<p><img src="/assets/img/posts/2023-01-26-secure-file-open-with/16.png" alt="" /></p>

<p>Select a location to save the new rule set</p>

<p><img src="/assets/img/posts/2023-01-26-secure-file-open-with/17.png" alt="" /></p>

<p>Select the option for a “Blank Rule Set”</p>

<p><img src="/assets/img/posts/2023-01-26-secure-file-open-with/18.png" alt="" /></p>

<p>Right click in the pane to the right and select “New Rule”</p>

<p><img src="/assets/img/posts/2023-01-26-secure-file-open-with/19.png" alt="" /></p>

<p>Select “Hiding Rule” from the drop-down and click Browse</p>

<p><img src="/assets/img/posts/2023-01-26-secure-file-open-with/21.png" alt="" /></p>

<p>Select “Registry Key”</p>

<p><img src="/assets/img/posts/2023-01-26-secure-file-open-with/22.png" alt="" /></p>

<p>Browse to the following registry key</p>

<p><code class="language-plaintext highlighter-rouge">HKEY_CLASSES_ROOT\*\shellex\ContextMenuHandlers</code></p>

<p><img src="/assets/img/posts/2023-01-26-secure-file-open-with/23.png" alt="" /></p>

<p>Select OK and accept any changes that FSLogix Apps Masking suggests</p>

<p><img src="/assets/img/posts/2023-01-26-secure-file-open-with/24.png" alt="" /></p>

<p>Click Manage Assignments</p>

<p><img src="/assets/img/posts/2023-01-26-secure-file-open-with/26.png" alt="" /></p>

<p>Select to “Rule set does apply to user/group” for Everyone and add Administrators as a group, selecting “Rule set does not apply to user/group”.</p>

<p>Save and copy the FSLogix rules according to the installation guide for FSLogix above and test as a regular user.</p>

<p><img src="/assets/img/posts/2023-01-26-secure-file-open-with/15.png" alt="" /></p>

<p>You will see that FSLogix is “Masking” the registry key from the user and therefore not showing it.</p>

<h3 id="conclusion">Conclusion</h3>

<p>This is a quick win and a simple one to implement. As with everything like this is it not foolproof and also is not a complete win-win, but it will help to go some way down the path to securing your VDA’s and stopping your users getting access to things they should not have access to.</p>]]></content><author><name>Dave Brett</name><email>dave@bretty.me.uk</email></author><category term="blog" /><category term="Security" /><category term="VDA" /><category term="Citrix" /><summary type="html"><![CDATA[This post will show you how to secure the File Open-With dialogue box that will potentially allow an attacker to access areas of your virtual desktop that you would otherwise not want them to.]]></summary><media:thumbnail xmlns:media="http://search.yahoo.com/mrss/" url="https://www.bretty.me.uk/assets/img/posts/2023-01-26-secure-file-open-with/secure-file-open-with.png" /><media:content medium="image" url="https://www.bretty.me.uk/assets/img/posts/2023-01-26-secure-file-open-with/secure-file-open-with.png" xmlns:media="http://search.yahoo.com/mrss/" /></entry><entry><title type="html">Secure NetScaler Services Using Geo IP</title><link href="https://www.bretty.me.uk/2023-01-25-secure-netscaler-gateway-using-geo-ip/" rel="alternate" type="text/html" title="Secure NetScaler Services Using Geo IP" /><published>2023-01-25T00:00:00+00:00</published><updated>2023-01-25T00:00:00+00:00</updated><id>https://www.bretty.me.uk/secure-netscaler-gateway-using-geo-ip</id><content type="html" xml:base="https://www.bretty.me.uk/2023-01-25-secure-netscaler-gateway-using-geo-ip/"><![CDATA[<ul id="markdown-toc">
  <li><a href="#overview" id="markdown-toc-overview">Overview</a></li>
  <li><a href="#geo-ip-database" id="markdown-toc-geo-ip-database">Geo IP Database</a></li>
  <li><a href="#citrix-application-firewall" id="markdown-toc-citrix-application-firewall">Citrix Application Firewall</a></li>
  <li><a href="#citrix-gateway-and-responder-policies" id="markdown-toc-citrix-gateway-and-responder-policies">Citrix Gateway and Responder Policies</a></li>
  <li><a href="#conclusion" id="markdown-toc-conclusion">Conclusion</a></li>
</ul>

<h3 id="overview">Overview</h3>
<p>Continuing down the ethical hacking journey I was recently asked to provide a geographical security baseline to a Citrix NetScaler setup. The request was something flexible enough to provide security quickly and easily but also something that was simple to manage.</p>

<p>I have known about using the Geo IP Database on Citrix NetScalers for a while but when I was asked about this there were a couple of requests.</p>

<ul>
  <li>Have the ability to globally lock out certain regions from ANY service that resides on the ADC</li>
  <li>Have a more granular control of specific services that are running on the ADC</li>
  <li>Have the ability to quickly lock out a region from accessing ALL or INDIVIDUAL services immediately</li>
</ul>

<p>The rest of this post will address how to achieve this on a Citrix NetScaler as well as walking you through configuring this for use within your own environment.</p>

<p class="note" title="Attention">If licensed I would put this in as a default setting even with ALL regions allowed. This means that the framework would already be in place for you to quickly and easily lock out regions should your security team request it from you.</p>

<p>First lets cover off the technologies we will be using to achieve this:</p>

<p>Geo IP Database
Citrix Application Firewall
Citrix Gateway and Responder Policies
Geo IP Database
I will start with this as this is fundamental to the remaining policies working correctly.</p>

<h3 id="geo-ip-database">Geo IP Database</h3>

<p>Navigate to <code class="language-plaintext highlighter-rouge">AppExpert -&gt; Location -&gt; Static Databases</code> and click Add</p>

<p>Then navigate to <code class="language-plaintext highlighter-rouge">/var/netscaler/inbuilt_db</code></p>

<p><img src="/assets/img/posts/2023-01-25-secure-netscaler-gateway-using-geo-ip/01.png" alt="" /></p>

<p>Here you will see the in build Geo IP Databases included with Citrix NetScaler, you can go ahead and select the relevant one and click Open</p>

<p><img src="/assets/img/posts/2023-01-25-secure-netscaler-gateway-using-geo-ip/02.png" alt="" /></p>

<p>You will now see that your Geo IP Database is there and (almost) ready to use</p>

<p><img src="/assets/img/posts/2023-01-25-secure-netscaler-gateway-using-geo-ip/03.png" alt="" /></p>

<p>If you are using a firmware version after 11.1 Build 53.11 you will need to enable wildcard search. Open up a putty session to your ADC and enter the following command</p>

<p><code class="language-plaintext highlighter-rouge">set locationParameter -matchWildcardtoany YES</code></p>

<p><img src="/assets/img/posts/2023-01-25-secure-netscaler-gateway-using-geo-ip/04.png" alt="" /></p>

<p>So now you are ready to test that your Geo IP database is imported correctly and working as expected.</p>

<p>From the putty session type the following</p>

<p><code class="language-plaintext highlighter-rouge">show locationparameter</code></p>

<p><img src="/assets/img/posts/2023-01-25-secure-netscaler-gateway-using-geo-ip/05.png" alt="" /></p>

<p>Here you can see the Wildcard qualifier is all set up and the Geo IP database is ready to go. Let’s just test that it’s getting the right data back from the database.</p>

<p>Type in the following then enter any public IP (I am using my public IP my ISP has assigned me)</p>

<div class="language-plaintext highlighter-rouge"><div class="highlight"><pre class="highlight"><code>shell
nsmap -d –t
</code></pre></div></div>
<p><img src="/assets/img/posts/2023-01-25-secure-netscaler-gateway-using-geo-ip/06.png" alt="" /></p>

<p>Here you can see the NetScaler knows that I am in Europe, I am in Great Britain and in England.</p>

<p>Great, that’s the Geo IP Database installed and working, lets move onto locking your NetScaler down.</p>

<h3 id="citrix-application-firewall">Citrix Application Firewall</h3>

<p>First thing I want to do is lock down access globally to all but the 2 regions that the business operates from. In this case its:</p>

<ul>
  <li>United Kingdom</li>
  <li>United States of America</li>
</ul>

<p>Access from ALL other regions will need to be blocked, however, I want to have the ability to easily onboard another location should the need arise.</p>

<p>Before I get into this I want to point out an invaluable resource. It’s called the ISO 3166 Country Codes, and it has ALL the country codes that the Geo IP database is built on. You can find it <a href="https://en.wikipedia.org/wiki/List_of_ISO_3166_country_codes">here</a></p>

<p>So, looking into this I can see that I want to allow access from the following 2 codes.</p>

<ul>
  <li>US for United Stated</li>
  <li>GB for United Kingdom.</li>
</ul>

<p>Head over to <code class="language-plaintext highlighter-rouge">Security -&gt; Citrix Web App Firewall -&gt; Policies -&gt; Firewall</code> and click on Add</p>

<p>Give your new profile a name and select the built-in <code class="language-plaintext highlighter-rouge">APPFW_DROP</code> profile. In the expression you want to put the following</p>

<p><code class="language-plaintext highlighter-rouge">CLIENT.IP.SRC.MATCHES_LOCATION("*.GB.*.*.*.*").NOT &amp;&amp; CLIENT.IP.SRC.MATCHES_LOCATION("*.US.*.*.*.*").NOT</code></p>

<p>What this does is; block ALL traffic except GB and US public IP’s. You may think there should be an OR statement here (so did I) but trial and error showed that you need the and (&amp;&amp;) to make both work.</p>

<p>Click OK and create your new policy</p>

<p><img src="/assets/img/posts/2023-01-25-secure-netscaler-gateway-using-geo-ip/07.png" alt="" /></p>

<p>Then click on the policy manager button at the top of the page</p>

<p><img src="/assets/img/posts/2023-01-25-secure-netscaler-gateway-using-geo-ip/07.1.png" alt="" /></p>

<p>Click to continue through override global</p>

<p><img src="/assets/img/posts/2023-01-25-secure-netscaler-gateway-using-geo-ip/08.png" alt="" /></p>

<p>Click on Add Binding and select your new policy from the list provided</p>

<p><img src="/assets/img/posts/2023-01-25-secure-netscaler-gateway-using-geo-ip/09.png" alt="" /></p>

<p>Click on Done and that’s it. You have just blocked all traffic to your NetScaler except GB and US traffic. Go ahead and try getting to your Citrix Gateway – It should still work fine.</p>

<p><img src="/assets/img/posts/2023-01-25-secure-netscaler-gateway-using-geo-ip/10.png" alt="" /></p>

<p>So for the purpose of testing this I am going to remove the GB expression and retest to ensure that my traffic is blocked</p>

<p><img src="/assets/img/posts/2023-01-25-secure-netscaler-gateway-using-geo-ip/11.png" alt="" />
<img src="/assets/img/posts/2023-01-25-secure-netscaler-gateway-using-geo-ip/12.png" alt="" /></p>

<p>There it is. Blocked.</p>

<p>So you now have the ability to easily block or allow FULL NetScaler access to any region, just update the app firewall expression, and you are good to go.</p>

<h3 id="citrix-gateway-and-responder-policies">Citrix Gateway and Responder Policies</h3>

<p>We have access to the NetScaler from the US and GB regions, but we have been asked to lock down the Citrix Gateway to <strong>ONLY</strong> be accessed via the GB region as the US use other Virtual Servers on the NetScaler and not the gateway.</p>

<p>We can achieve this via Responder policies. But first let’s think of the error page.</p>

<p>I know this sounds weird but when we block via Responder we are going to want to display a nice page stating they are denied access rather than a “Page Cannot Be Displayed”</p>

<p>Head over to <code class="language-plaintext highlighter-rouge">AppExpert -&gt; Responder -&gt; HTML Page Imports</code> and click add to create a new HTML Page.</p>

<p class="note" title="Attention">You cannot put links to images in your page here, if you want to put an image in your HTML page you will need to convert the image to a Base64 string first and reference that in the HTML. This can take a bit of time to get right but stick with it until you get this right – your users will appreciate the effort you put in!</p>

<p><img src="/assets/img/posts/2023-01-25-secure-netscaler-gateway-using-geo-ip/13.png" alt="" /></p>

<p>Here is my error page HTML and below what it looks like for real</p>

<p><img src="/assets/img/posts/2023-01-25-secure-netscaler-gateway-using-geo-ip/14.png" alt="" /></p>

<p>You have your HTML error page done, now head over to <code class="language-plaintext highlighter-rouge">AppExpert -&gt; Responder -&gt; Actions</code> and click new to create an action. Give the action a name, select Respond With HTML and select your new HTML page from the list</p>

<p><img src="/assets/img/posts/2023-01-25-secure-netscaler-gateway-using-geo-ip/15.png" alt="" /></p>

<p>Click ok then head over to <code class="language-plaintext highlighter-rouge">AppExpert -&gt; Responder -&gt; Policies</code> and click Add to create a new Policy. Give your policy a name, select your new Action and put the following into the expression</p>

<p><code class="language-plaintext highlighter-rouge">CLIENT.IP.SRC.MATCHES_LOCATION("*.GB.*.*.*.*").NOT</code></p>

<p>This states that you want to display your error page to ALL traffic except from the GB region. Remember the App Firewall policies earlier. In essence ONLY US and GB traffic can get through, but ONLY GB traffic can access the gateway</p>

<p><img src="/assets/img/posts/2023-01-25-secure-netscaler-gateway-using-geo-ip/16.png" alt="" /></p>

<p>Click ok then bind this new policy to your Citrix Gateway as a REQUEST type.</p>

<p><img src="/assets/img/posts/2023-01-25-secure-netscaler-gateway-using-geo-ip/17.png" alt="" /></p>

<p>Let’s test – first try the gateway from my machine here in the UK</p>

<p><img src="/assets/img/posts/2023-01-25-secure-netscaler-gateway-using-geo-ip/18.png" alt="" /></p>

<p>Works fine – now to test from the US. Thanks here to my buddy Jarian Gibson for testing this.</p>

<p><img src="/assets/img/posts/2023-01-25-secure-netscaler-gateway-using-geo-ip/19.png" alt="" /></p>

<p>There we go.</p>

<h3 id="conclusion">Conclusion</h3>

<p>So we have locked down global access to our NetScaler using Citrix App Firewall and specific access to our Gateways using Responder.</p>

<p>We can quickly lock out regions globally by removing them from the App Firewall Policy or grant new regions by adding them. Finally, we can edit specific access to the Citrix Gateways by editing the responder policies assigned.</p>

<p>Hope this gives you a quick insight into how you can use Geo IP and NetScaler to secure your remote access by region.</p>]]></content><author><name>Dave Brett</name><email>dave@bretty.me.uk</email></author><category term="blog" /><category term="Security" /><category term="NetScaler" /><category term="Citrix" /><summary type="html"><![CDATA[This post will walk you through securing your Citrix NetScaler services using the Geo IP capabilities built into the NetScaler.]]></summary><media:thumbnail xmlns:media="http://search.yahoo.com/mrss/" url="https://www.bretty.me.uk/assets/img/posts/2023-01-25-secure-netscaler-gateway-using-geo-ip/geoip.png" /><media:content medium="image" url="https://www.bretty.me.uk/assets/img/posts/2023-01-25-secure-netscaler-gateway-using-geo-ip/geoip.png" xmlns:media="http://search.yahoo.com/mrss/" /></entry><entry><title type="html">Secure Lateral Movement</title><link href="https://www.bretty.me.uk/2022-07-19-secure-lateral-movement/" rel="alternate" type="text/html" title="Secure Lateral Movement" /><published>2022-07-19T00:00:00+00:00</published><updated>2022-07-19T00:00:00+00:00</updated><id>https://www.bretty.me.uk/secure-lateral-movement</id><content type="html" xml:base="https://www.bretty.me.uk/2022-07-19-secure-lateral-movement/"><![CDATA[<ul id="markdown-toc">
  <li><a href="#overview" id="markdown-toc-overview">Overview</a></li>
  <li><a href="#secure-lateral-movement" id="markdown-toc-secure-lateral-movement">Secure Lateral Movement</a>    <ul>
      <li><a href="#administrator-groups" id="markdown-toc-administrator-groups">Administrator Groups</a></li>
      <li><a href="#direct-access-users" id="markdown-toc-direct-access-users">Direct Access Users</a></li>
      <li><a href="#group-policy" id="markdown-toc-group-policy">Group Policy</a></li>
    </ul>
  </li>
  <li><a href="#why-no-domain-admins" id="markdown-toc-why-no-domain-admins">Why No Domain Admins?</a></li>
  <li><a href="#what-about-other-groups" id="markdown-toc-what-about-other-groups">What about “Other” Groups?</a></li>
  <li><a href="#group-security" id="markdown-toc-group-security">Group Security</a></li>
  <li><a href="#conclusion" id="markdown-toc-conclusion">Conclusion</a></li>
</ul>

<h3 id="overview">Overview</h3>

<p>This is another lesson I have learned from a recent “Ethical Hack” – lateral movement can get you in trouble fast! First let’s take a look at what lateral movement is.</p>

<p><img src="/assets/img/posts/2022-07-19-secure-lateral-movement/01.png" alt="" /></p>

<p>In essence, it means moving sideways or to the side. In terms of an attack on your EUC platform it can have devastating consequences and really fast.</p>

<p>What an attacker will do is get a foothold in your network, and this can be anywhere. Take note of this as its important – it can be in another part of your organization that you do not own! Think “Domain Admins” – then move sideways (or laterally) around your network and into your EUC stack, from the inside.</p>

<p>This is clearly an issue and one that needs addressing as best you can whilst still maintaining usability and administration ability of your platform.</p>

<p>As with anything when dealing with security – it’s a long road. This article is again, just a starting point, but one that should give you some control of who and what can access your EUC environment.</p>

<p>Please note, whilst I am going to use Citrix Virtual Apps and Desktops in this post as an example, these principles apply to ALL EUC platforms. Just break the platform down into individual components and go from there.</p>

<h2 id="secure-lateral-movement">Secure Lateral Movement</h2>

<h3 id="administrator-groups">Administrator Groups</h3>

<p>I am going to start out with a “Simple” environment and then go into how I would minimize lateral movement around that platform.</p>

<p><img src="/assets/img/posts/2022-07-19-secure-lateral-movement/02.png" alt="" /></p>

<p>As you can see from the above we have the following components in our environment:</p>

<ul>
  <li>Hypervisor</li>
  <li>Citrix NetScalers</li>
  <li>StoreFront</li>
  <li>Director</li>
  <li>Licensing</li>
  <li>Controllers</li>
  <li>FAS</li>
  <li>VDA’s</li>
</ul>

<p>Now, one of the issues that I see a lot is the good old “Citrix Admins” group. This is the group that you create right at the start of the project to configure your initial site and this gets “inherited” from there on out. At best, I normally see NetScaler, Hypervisor and Citrix Admins.</p>

<p>The problem with this is illustrated below</p>

<p><img src="/assets/img/posts/2022-07-19-secure-lateral-movement/03.png" alt="" /></p>

<p>The red lines above illustrate what an admin enabled user can get to in the event that they can glean those all important credentials. This would be the scope of their lateral movement around your platform only, this does not take into account where they can go from there once they get that foothold.</p>

<p>Now there are hundreds of ways to minimize this risk, but I want to start small, so with that in mind, the below is what we are trying to achieve and with GPO and Group Design only.</p>

<p><img src="/assets/img/posts/2022-07-19-secure-lateral-movement/04.png" alt="" /></p>

<p>So how to we achieve this. First we can create groups <strong>FOR EACH COMPONENT</strong> of the platform. not an overall admin group for the platform as a whole. This will mean a little more group admin in the long run, but it will allow you more security on your platform.</p>

<p><img src="/assets/img/posts/2022-07-19-secure-lateral-movement/05.png" alt="" /></p>

<p>Next we will set up a good OU structure to be able to apply the Group Policy to in order to achieve the desired lock down.</p>

<p><img src="/assets/img/posts/2022-07-19-secure-lateral-movement/06.png" alt="" /></p>

<p>You may notice that NetScaler is not listed above – this is because the way we apply restricted admins to the NetScaler is not via GPO but with an auth policy on the NetScaler itself.</p>

<p>Finally, create a new Group Policy Object and link it to the top level OU for your platform.</p>

<p><img src="/assets/img/posts/2022-07-19-secure-lateral-movement/07.png" alt="" /></p>

<p>So – lets start to build out the Group Policy to restrict access to the components of our estate.</p>

<h3 id="direct-access-users">Direct Access Users</h3>

<p>What’s this? Well this is a group that you will need to be in if you are NOT an administrator to be able to remote desktop to the server via a non-brokered connection.</p>

<p class="note" title="Attention">Users DO NOT need to be in this group if they connect to the VDA via Citrix StoreFront and Virtual Apps and Desktops as this is a brokered connection. However – if they want to connect to the server directly over RDP they will need to be an Administrator or a member of this group.</p>

<p>For this reason, I like to lock this group down and ensure that it is empty.</p>

<p>Edit your new GPO and go to <code class="language-plaintext highlighter-rouge">Computer Configuration -&gt; Preferences -&gt; Control Panel Settings -&gt; Local Users and Groups</code></p>

<p>Right click and select New -&gt; Local Group</p>

<p>Select Replace, name the group “Direct Access Users” and select to remove all users and groups from this local group</p>

<p><img src="/assets/img/posts/2022-07-19-secure-lateral-movement/08.png" alt="" /></p>

<p>That’s Direct Access Users taken care of, so lets move on with the rest of the platform.</p>

<h3 id="group-policy">Group Policy</h3>

<p>We will deal with StoreFront initially. Right Click and create a new Local Group. Select “Replace” for the action, pick “Administrators (built-in) as the Group Name. Tick the box “Delete all member groups” and add your new StoreFront group to the Members section.</p>

<p><img src="/assets/img/posts/2022-07-19-secure-lateral-movement/09.png" alt="" /></p>

<p>Click on Apply then select the “Common” tab at the top, put a tick in “Item Level Targeting” and select the Targeting button</p>

<p><img src="/assets/img/posts/2022-07-19-secure-lateral-movement/10.png" alt="" /></p>

<p>Select “New Item” then select “Organizational Unit” from the drop-down</p>

<p><img src="/assets/img/posts/2022-07-19-secure-lateral-movement/11.png" alt="" /></p>

<p>When the search box pops up locate the OU that you will be putting your StoreFront servers in and click OK</p>

<p><img src="/assets/img/posts/2022-07-19-secure-lateral-movement/12.png" alt="" /></p>

<p>Click on Apply then OK.</p>

<p class="note" title="Attention">Repeat this task for ALL of your EUC components only selecting the different group name and different OU in the item level targeting. Once done you will end up with a seperate Administrators group for each of your components but filtered on the specific OU.</p>

<p class="note" title="Attention">There are certain components that will require additional groups in the local Administrators (StoreFront Configuration Replication etc), make sure to add these as well as your new custom group.</p>

<p><img src="/assets/img/posts/2022-07-19-secure-lateral-movement/13.png" alt="" /></p>

<p>So, now you can go and test that this part is applying correctly. Log into your StoreFront server and refresh group policy using gpupdate /force (make sure you have added your account to the NEW admin group!)</p>

<p><img src="/assets/img/posts/2022-07-19-secure-lateral-movement/14.png" alt="" /></p>

<p>As you can see the Administrators group now only has the LOCAL Administrator account (I will deal with managing this account in a later post) and your new Admin group. We can also know that the “Direct Access Users” group is empty as we are enforcing that via GPO.</p>

<p><img src="/assets/img/posts/2022-07-19-secure-lateral-movement/15.png" alt="" /></p>

<h2 id="why-no-domain-admins">Why No Domain Admins?</h2>

<p>Well, like I said earlier in this article, this is about lateral movement around your estate and this includes way more that your EUC environment. You likely have a whole host of other infrastructure in your environment and how can you be sure that they are all as secure as you are “trying” to be.</p>

<p>I remove “Domain Admins” so that is someone manages to get into that group somewhere else in the environment then that doesn’t necessarily make them an admin on the EUC platform.</p>

<p class="note" title="Attention">I am sure that there are ways to circumvent this but like I said at the start, this is meant to be a starting point!</p>

<h2 id="what-about-other-groups">What about “Other” Groups?</h2>
<p>This is true, there are other groups on your infrastructure that will give a user more than normal rights to the server. I also tend to strip these out via Group Policy unless specifically required.</p>

<p>Do the same as you did for “Direct Access Users” for:</p>

<ul>
  <li>Backup Operators</li>
  <li>Power Users</li>
  <li>Device Owners</li>
  <li>Hypervisor and NetScaler</li>
</ul>

<p>Make sure you secure these also by adding your new group to the Hypervisor Administrators and also creating a LDAPS Filtered policy for Administrator access to the Citrix ADC’s (link below)</p>

<p><a href="https://support.citrix.com/article/CTX212422">https://support.citrix.com/article/CTX212422</a></p>

<h2 id="group-security">Group Security</h2>
<p>Once all this is set up, and you have validated the group members I would highly recommend locking down the ability to add and remove users from your new admin groups and pull changes to these under a change control process. I have used Change Auditor for this in the past, and it works great!</p>

<h2 id="conclusion">Conclusion</h2>

<p>So, with this in mind we should have gone some way in preventing lateral movement across your EUC platform by ensuring that users need to be specific admins for specific components and preventing the overall “Citrix Admins” group.</p>

<p>Hope this helped some of you out.</p>]]></content><author><name>Dave Brett</name><email>dave@bretty.me.uk</email></author><category term="blog" /><category term="Security" /><category term="VDA" /><category term="Citrix" /><summary type="html"><![CDATA[This post will walk you through securing lateral movement in your EUC environment.]]></summary><media:thumbnail xmlns:media="http://search.yahoo.com/mrss/" url="https://www.bretty.me.uk/assets/img/posts/2022-07-19-secure-lateral-movement/lateral-movement.png" /><media:content medium="image" url="https://www.bretty.me.uk/assets/img/posts/2022-07-19-secure-lateral-movement/lateral-movement.png" xmlns:media="http://search.yahoo.com/mrss/" /></entry><entry><title type="html">Secure Local Drive Access</title><link href="https://www.bretty.me.uk/2022-06-14-secure-local-drives/" rel="alternate" type="text/html" title="Secure Local Drive Access" /><published>2022-06-14T00:00:00+00:00</published><updated>2022-06-14T00:00:00+00:00</updated><id>https://www.bretty.me.uk/secure-local-drives</id><content type="html" xml:base="https://www.bretty.me.uk/2022-06-14-secure-local-drives/"><![CDATA[<ul id="markdown-toc">
  <li><a href="#overview" id="markdown-toc-overview">Overview</a></li>
  <li><a href="#standard-drive-lock-down" id="markdown-toc-standard-drive-lock-down">Standard Drive Lock Down</a></li>
  <li><a href="#unc-paths-and-the-pitfalls" id="markdown-toc-unc-paths-and-the-pitfalls">UNC Paths and the Pitfalls</a></li>
  <li><a href="#loopback-execute-rights" id="markdown-toc-loopback-execute-rights">Loopback Execute Rights</a></li>
  <li><a href="#google-chrome" id="markdown-toc-google-chrome">Google Chrome</a></li>
  <li><a href="#admin-shares" id="markdown-toc-admin-shares">Admin Shares</a></li>
  <li><a href="#conclusion" id="markdown-toc-conclusion">Conclusion</a></li>
</ul>

<h3 id="overview">Overview</h3>

<p>Securing local drive access in an End User Computing environment is essential to ensure that your users do not gain access to applications and tools that they are not entitled to. The purpose of this article is to show you how to lock down that access so that you can be sure your endpoints are secure.</p>

<h3 id="standard-drive-lock-down">Standard Drive Lock Down</h3>
<p>This is fairly simple and a quick one to implement – it’s a simple GPO settings that I’m sure most of you already have in play today.</p>

<p>Go ahead and create a new Group Policy Object and link it to your VDA’s. First thing you are going to want to do is disable this applying to the “VDA Administrators” Group as you will want to be able to access the local drives as an admin.</p>

<p>Click on the <code class="language-plaintext highlighter-rouge">GPO -&gt; Delegation</code> then click the Advanced button. Add your VDA Admin group in there and select “Deny” to apply the group policy. That’s it – this will not apply to your Administrators now.</p>

<p><img src="/assets/img/posts/2022-06-14-secure-local-drives/01.png" alt="" /></p>

<p>Next open up the new GPO and go to <code class="language-plaintext highlighter-rouge">User Configuration -&gt; Policies -&gt; Administrative Templates -&gt; WIndows Components -&gt; File Explorer</code>. Open up the setting for “Hide these specified drives in My Computer” and Enable that setting with the specific drives</p>

<p><img src="/assets/img/posts/2022-06-14-secure-local-drives/02.png" alt="" /></p>

<p>Click on OK then open up the setting “Prevent access to drives from My Computer”, enable that and set the same drives as you did in the previous setting</p>

<p><img src="/assets/img/posts/2022-06-14-secure-local-drives/03.png" alt="" /></p>

<p>That’s it! Stage one is done – simple right? Be assured though that we still have a long way to go.</p>

<p>Jump onto a VDA and refresh group policy using <code class="language-plaintext highlighter-rouge">gpupdate /force</code> and check that the drives have been disabled.</p>

<p>NOTE: If this policy is not working as expected make sure you have Loopback processing turned on for the OU that the VDA’s reside in.</p>

<p><img src="/assets/img/posts/2022-06-14-secure-local-drives/04.png" alt="" /></p>

<p>As you can see here – no local drives. Happy days. However, in the address bar type in <code class="language-plaintext highlighter-rouge">\\localhost\c$</code> and see what it does…</p>

<h3 id="unc-paths-and-the-pitfalls">UNC Paths and the Pitfalls</h3>

<p><img src="/assets/img/posts/2022-06-14-secure-local-drives/05.png" alt="" /></p>

<p>There it is – your back into the C Drive. So not we need to go about locking this down and closing it out for the users.</p>

<p>Open up your GPO and go to <code class="language-plaintext highlighter-rouge">User Configuration -&gt; Policies -&gt; Administrative Templates -&gt; Start Menu and Taskbar</code>. Then open up the “Remove Run menu from Start Menu” setting and enable it</p>

<p><img src="/assets/img/posts/2022-06-14-secure-local-drives/06.png" alt="" /></p>

<p>Log out and back into your VDA to apply the policy and retest getting to <code class="language-plaintext highlighter-rouge">\\localhost\c$</code></p>

<p><img src="/assets/img/posts/2022-06-14-secure-local-drives/07.png" alt="" /></p>

<p>There you go – another door closed. However, this is a pretty brutal way of doing this as there are legitimate business reasons you would want to enable UNC paths, for example, what if you want to allow access to a “real” network path via the explorer menu bar?</p>

<p><img src="/assets/img/posts/2022-06-14-secure-local-drives/08.png" alt="" /></p>

<p>That’s also disabled and this is a pretty poor user experience. So this is the pitfall in my opinion of enabling this setting. Go ahead and set that back to “Not Configured” and we can try to approach this a different way</p>

<h3 id="loopback-execute-rights">Loopback Execute Rights</h3>

<p>Lets approach this a different way. Open up the GPO and go to <code class="language-plaintext highlighter-rouge">Computer Configuration -&gt; Policies -&gt; Windows Settings -&gt; Security Settings -&gt; Application Control Policies -&gt; Applocker -&gt; Executable Rules</code>.</p>

<p>Make sure you have created the default rules to allow Windows to operate then right click and create a new rule. Click next and select “Deny” for everyone</p>

<p><img src="/assets/img/posts/2022-06-14-secure-local-drives/09.png" alt="" /></p>

<p>Click next and select “Path</p>

<p><img src="/assets/img/posts/2022-06-14-secure-local-drives/10.png" alt="" /></p>

<p>Click next again and in the path put <code class="language-plaintext highlighter-rouge">\\localhost\*</code></p>

<p><img src="/assets/img/posts/2022-06-14-secure-local-drives/11.png" alt="" /></p>

<p>Click on Create.</p>

<p>Then do exactly the same again but instead of localhost for the path enter <code class="language-plaintext highlighter-rouge">\\127.0.0.1\*</code></p>

<p><img src="/assets/img/posts/2022-06-14-secure-local-drives/12.png" alt="" /></p>

<p>Once done you should have 2 new rules created in your GPO to Deny access to applications launched from the localhost and loopback addresses</p>

<p><img src="/assets/img/posts/2022-06-14-secure-local-drives/13.png" alt="" /></p>

<p>So let’s test it out. Jump back onto your VDA and update the group policy. Open up explorer and get to the loopback address for localhost and try to start an application up</p>

<p><img src="/assets/img/posts/2022-06-14-secure-local-drives/14.png" alt="" /></p>

<p>As you can see the ability to run applications from the localhost locally has been disabled, let’s try this using the loopback address to make sure that this is also disabled as expected</p>

<p><img src="/assets/img/posts/2022-06-14-secure-local-drives/15.png" alt="" /></p>

<p>Perfect – so your users can now no longer run applications if they use localhost or loopback. Let’s just make sure that UNC paths still work for valid network shared via explorer</p>

<p><img src="/assets/img/posts/2022-06-14-secure-local-drives/16.png" alt="" /></p>

<p>Great – so we now have the drives locked and also the loopback addresses locked down.</p>

<h3 id="google-chrome">Google Chrome</h3>

<p>Why on earth am I writing about Google Chrome in an article that deals with Local Drive Access?</p>

<p>Well, one of the first things that “Ethical Hackers” will do is open up Google Chrome and type in C: in the address bar</p>

<p><img src="/assets/img/posts/2022-06-14-secure-local-drives/17.png" alt="" /></p>

<p>There you have it – all that good work undone in 2 seconds with Chrome.</p>

<p>Open up your GPO and make sure you have added the Google Chrome ADMX templates. Navigate to <code class="language-plaintext highlighter-rouge">Computer Configuration -&gt; Policies -&gt; Administrative Templates -&gt; Google Chrome</code> and open up the setting “Block access to a list of URL’s”. Enable that and click the “Show” button to add the URL’s</p>

<p><img src="/assets/img/posts/2022-06-14-secure-local-drives/18.png" alt="" /></p>

<p>Add the URL (copied directly from Chrome in your VDA) to the list and be sure to add any others you want to restrict access to</p>

<p><img src="/assets/img/posts/2022-06-14-secure-local-drives/19.png" alt="" /></p>

<p>OK and apply that and then test again by logging out and back into your VDA</p>

<p><img src="/assets/img/posts/2022-06-14-secure-local-drives/20.png" alt="" /></p>

<p>Excellent – that’s closed. Now let’s try to localhost and loopback and make sure you can’t get to then via Chrome</p>

<p><img src="/assets/img/posts/2022-06-14-secure-local-drives/21.png" alt="" /></p>

<p>Damn, same problem as before. Open up your GPO and add the Chrome Loopback into the URL restriction list</p>

<p><img src="/assets/img/posts/2022-06-14-secure-local-drives/22.png" alt="" /></p>

<p>Then jump back onto the VDA, refresh GPO and retest</p>

<p><img src="/assets/img/posts/2022-06-14-secure-local-drives/23.png" alt="" /></p>

<p>OK, so it’s not worked. Looking in the registry you can see that the policy has applied to the VDA</p>

<p><img src="/assets/img/posts/2022-06-14-secure-local-drives/24.png" alt="" /></p>

<p>In short, this was something that I could not block using the Chrome URL Blacklist. I am not sure why it’s not working as local drives work fine but the loopback address and localhost would always allow to be to get to the local drives.</p>

<p>Time for another approach!</p>

<h3 id="admin-shares">Admin Shares</h3>
<p>So, the reason for logged-in users being able to access loopback and localhost is that the administrative shares default behavior was changed when moving from Windows Server 2003 to 2008. The change that was made was to allow the “Active Logon Account” access to all the administrative shares.</p>

<p>This is what is causing us our issues as any user on the VDA is essentially an “Active Logged On User” and can therefore access all the admin shares. Not good for us!</p>

<p>There is a fix for this detailed below, but first…</p>

<p class="note" title="Attention">Please TEST this in development FIRST as this may affect some of your admin tools accessing the VDA. I have not personally seen anything break when applying this but TEST before you put it into production. I don’t accept responsibility etc etc</p>

<p class="note" title="Attention">This does require a reboot so if you are using non-persistent devices you will need this in your master image.</p>

<div class="language-plaintext highlighter-rouge"><div class="highlight"><pre class="highlight"><code>[HKEY_LOCAL_MACHINE\SYSTEM\CurrentControlSet\Services\lanmanserver\DefaultSecurity]
"SrvsvcShareAdminConnect"=hex:01,00,04,80,64,00,00,00,70,00,00,00,00,00,00
00,\
14,00,00,00,02,00,50,00,03,00,00,00,00,00,18,00,03,00,0f,00,01,02,00,00,00\
00,00,05,20,00,00,00,20,02,00,00,00,00,18,00,03,00,0f,00,01,02,00,00,00,00\
00,05,20,00,00,00,25,02,00,00,00,00,18,00,03,00,0f,00,01,02,00,00,00,00,00\
05,20,00,00,00,27,02,00,00,01,01,00,00,00,00,00,05,12,00,00,00,01,01,00,00\
00,00,00,05,12,00,00,00
</code></pre></div></div>

<p>Once the VDA has booted log back in and test getting to your loopback address using Chrome</p>

<p><img src="/assets/img/posts/2022-06-14-secure-local-drives/25.png" alt="" /></p>

<p>You can also test with \localhost</p>

<p><img src="/assets/img/posts/2022-06-14-secure-local-drives/26.png" alt="" /></p>

<p>What you will also notice is that if you try to access the loopback address now as a normal user you will be prompted for admin credentials, so another win there.</p>

<p><img src="/assets/img/posts/2022-06-14-secure-local-drives/27.png" alt="" /></p>

<h3 id="conclusion">Conclusion</h3>

<p>So there you have it, my take on how to lock down local drive access in your EUC estate.</p>

<p>Hope some of you found this useful.</p>]]></content><author><name>Dave Brett</name><email>dave@bretty.me.uk</email></author><category term="blog" /><category term="Security" /><category term="VDA" /><category term="Citrix" /><summary type="html"><![CDATA[This post will walk you through securing your local drive access on your end points.]]></summary><media:thumbnail xmlns:media="http://search.yahoo.com/mrss/" url="https://www.bretty.me.uk/assets/img/posts/2022-06-14-secure-local-drives/secure-local-drives.png" /><media:content medium="image" url="https://www.bretty.me.uk/assets/img/posts/2022-06-14-secure-local-drives/secure-local-drives.png" xmlns:media="http://search.yahoo.com/mrss/" /></entry></feed>