Secure NetScaler Services Using Geo IP

This post will walk you through securing your Citrix NetScaler services using the Geo IP capabilities built into the NetScaler.
Overview
Continuing down the ethical hacking journey I was recently asked to provide a geographical security baseline to a Citrix NetScaler setup. The request was something flexible enough to provide security quickly and easily but also something that was simple to manage.
I have known about using the Geo IP Database on Citrix NetScalers for a while but when I was asked about this there were a couple of requests.
- Have the ability to globally lock out certain regions from ANY service that resides on the ADC
- Have a more granular control of specific services that are running on the ADC
- Have the ability to quickly lock out a region from accessing ALL or INDIVIDUAL services immediately
The rest of this post will address how to achieve this on a Citrix NetScaler as well as walking you through configuring this for use within your own environment.
If licensed I would put this in as a default setting even with ALL regions allowed. This means that the framework would already be in place for you to quickly and easily lock out regions should your security team request it from you.
First lets cover off the technologies we will be using to achieve this:
Geo IP Database Citrix Application Firewall Citrix Gateway and Responder Policies Geo IP Database I will start with this as this is fundamental to the remaining policies working correctly.
Geo IP Database
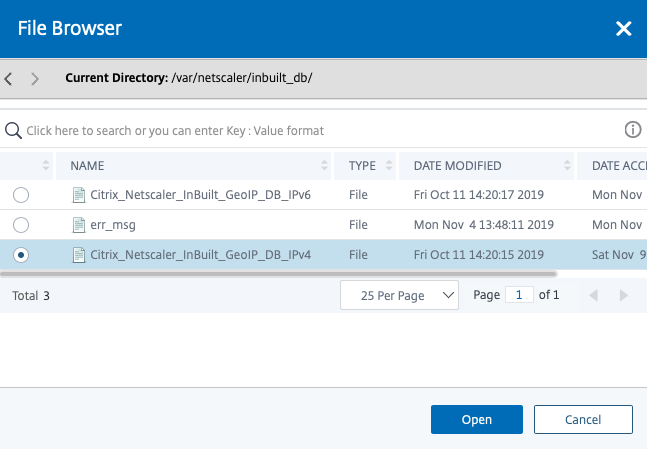
Navigate to AppExpert -> Location -> Static Databases and click Add
Then navigate to /var/netscaler/inbuilt_db
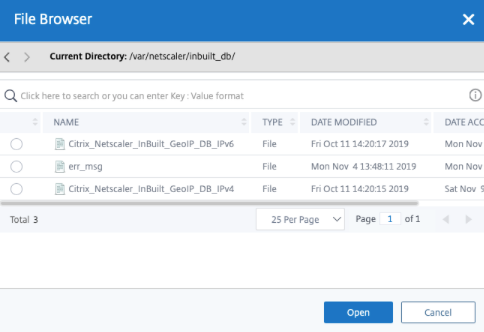
Here you will see the in build Geo IP Databases included with Citrix NetScaler, you can go ahead and select the relevant one and click Open
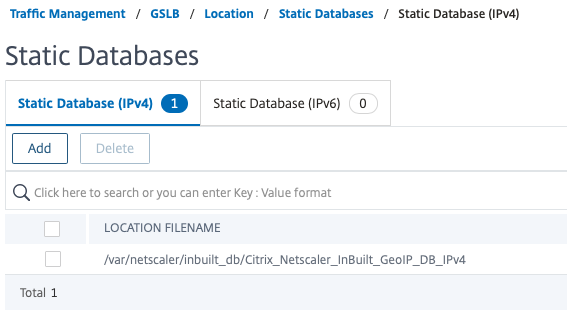
You will now see that your Geo IP Database is there and (almost) ready to use
If you are using a firmware version after 11.1 Build 53.11 you will need to enable wildcard search. Open up a putty session to your ADC and enter the following command
set locationParameter -matchWildcardtoany YES

So now you are ready to test that your Geo IP database is imported correctly and working as expected.
From the putty session type the following
show locationparameter
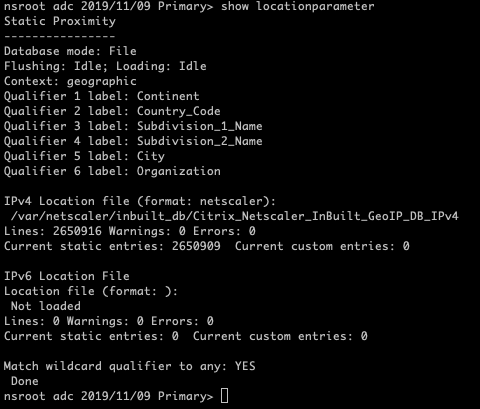
Here you can see the Wildcard qualifier is all set up and the Geo IP database is ready to go. Let’s just test that it’s getting the right data back from the database.
Type in the following then enter any public IP (I am using my public IP my ISP has assigned me)
shell
nsmap -d –t

Here you can see the NetScaler knows that I am in Europe, I am in Great Britain and in England.
Great, that’s the Geo IP Database installed and working, lets move onto locking your NetScaler down.
Citrix Application Firewall
First thing I want to do is lock down access globally to all but the 2 regions that the business operates from. In this case its:
- United Kingdom
- United States of America
Access from ALL other regions will need to be blocked, however, I want to have the ability to easily onboard another location should the need arise.
Before I get into this I want to point out an invaluable resource. It’s called the ISO 3166 Country Codes, and it has ALL the country codes that the Geo IP database is built on. You can find it here
So, looking into this I can see that I want to allow access from the following 2 codes.
- US for United Stated
- GB for United Kingdom.
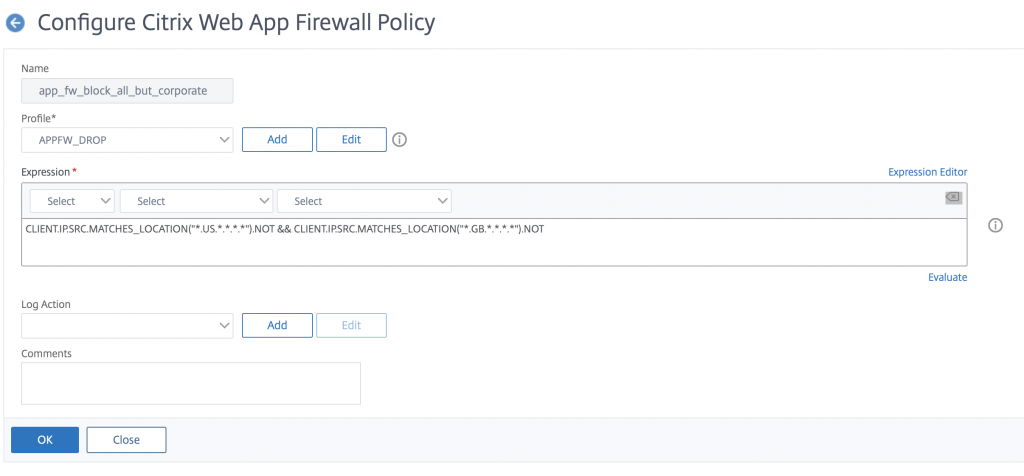
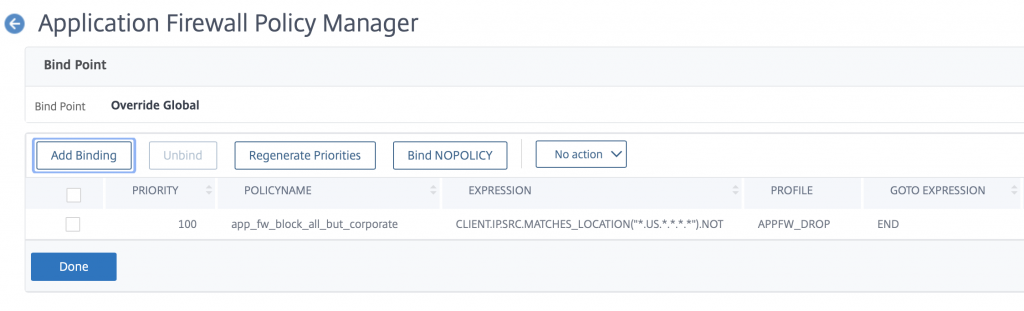
Head over to Security -> Citrix Web App Firewall -> Policies -> Firewall and click on Add
Give your new profile a name and select the built-in APPFW_DROP profile. In the expression you want to put the following
CLIENT.IP.SRC.MATCHES_LOCATION("*.GB.*.*.*.*").NOT && CLIENT.IP.SRC.MATCHES_LOCATION("*.US.*.*.*.*").NOT
What this does is; block ALL traffic except GB and US public IP’s. You may think there should be an OR statement here (so did I) but trial and error showed that you need the and (&&) to make both work.
Click OK and create your new policy
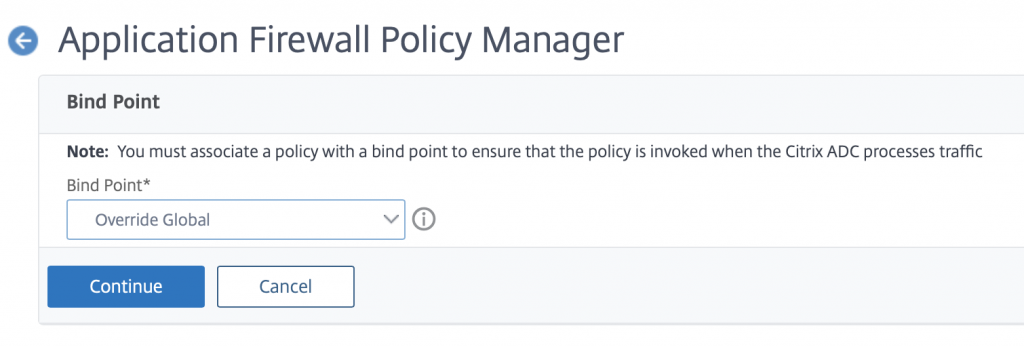
Then click on the policy manager button at the top of the page

Click to continue through override global
Click on Add Binding and select your new policy from the list provided
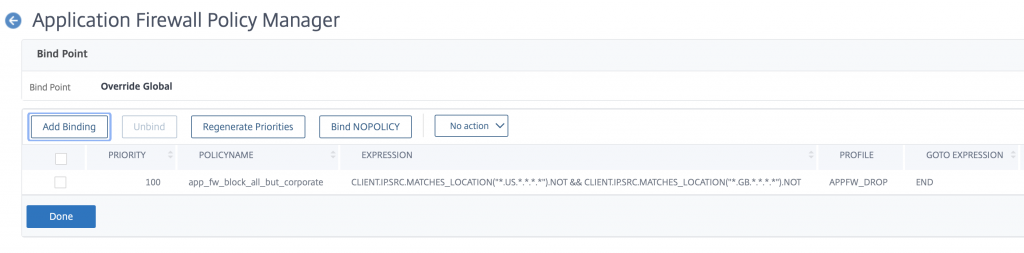
Click on Done and that’s it. You have just blocked all traffic to your NetScaler except GB and US traffic. Go ahead and try getting to your Citrix Gateway – It should still work fine.
So for the purpose of testing this I am going to remove the GB expression and retest to ensure that my traffic is blocked
There it is. Blocked.
So you now have the ability to easily block or allow FULL NetScaler access to any region, just update the app firewall expression, and you are good to go.
Citrix Gateway and Responder Policies
We have access to the NetScaler from the US and GB regions, but we have been asked to lock down the Citrix Gateway to ONLY be accessed via the GB region as the US use other Virtual Servers on the NetScaler and not the gateway.
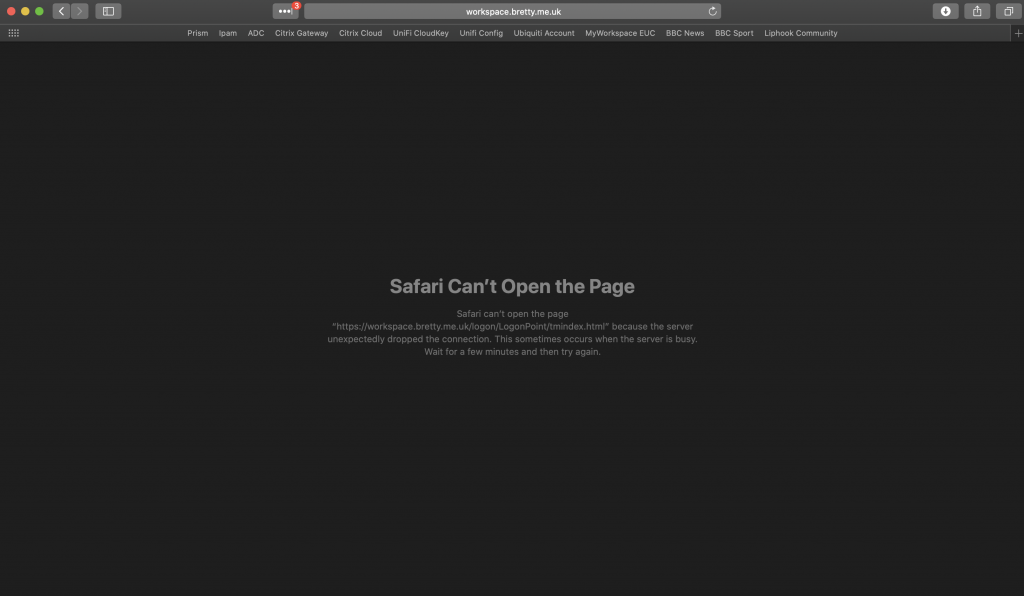
We can achieve this via Responder policies. But first let’s think of the error page.
I know this sounds weird but when we block via Responder we are going to want to display a nice page stating they are denied access rather than a “Page Cannot Be Displayed”
Head over to AppExpert -> Responder -> HTML Page Imports and click add to create a new HTML Page.
You cannot put links to images in your page here, if you want to put an image in your HTML page you will need to convert the image to a Base64 string first and reference that in the HTML. This can take a bit of time to get right but stick with it until you get this right – your users will appreciate the effort you put in!
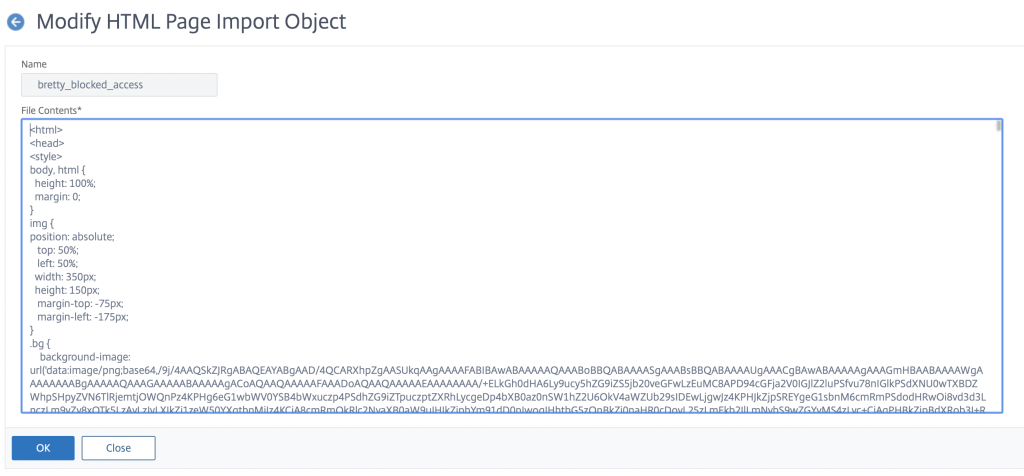
Here is my error page HTML and below what it looks like for real
You have your HTML error page done, now head over to AppExpert -> Responder -> Actions and click new to create an action. Give the action a name, select Respond With HTML and select your new HTML page from the list
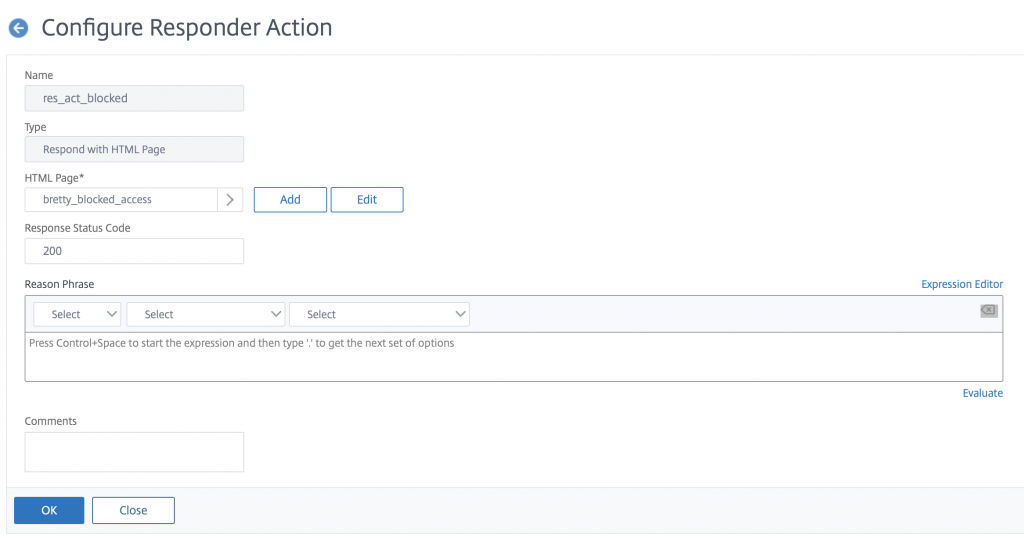
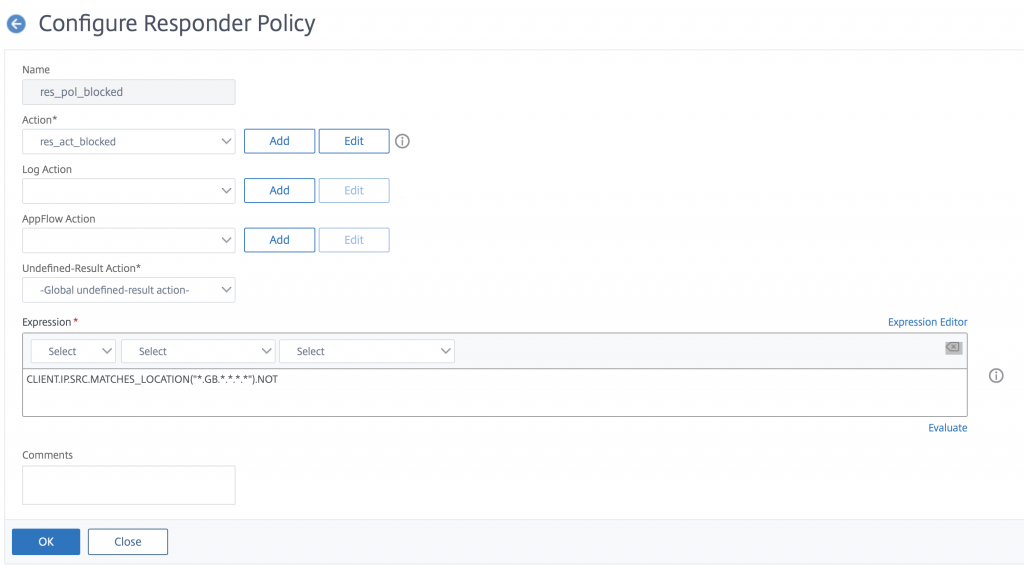
Click ok then head over to AppExpert -> Responder -> Policies and click Add to create a new Policy. Give your policy a name, select your new Action and put the following into the expression
CLIENT.IP.SRC.MATCHES_LOCATION("*.GB.*.*.*.*").NOT
This states that you want to display your error page to ALL traffic except from the GB region. Remember the App Firewall policies earlier. In essence ONLY US and GB traffic can get through, but ONLY GB traffic can access the gateway
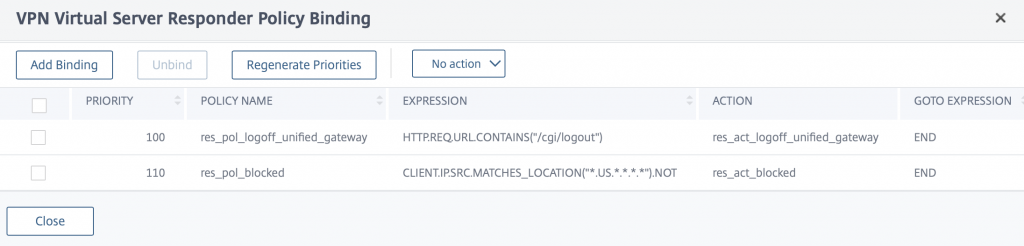
Click ok then bind this new policy to your Citrix Gateway as a REQUEST type.
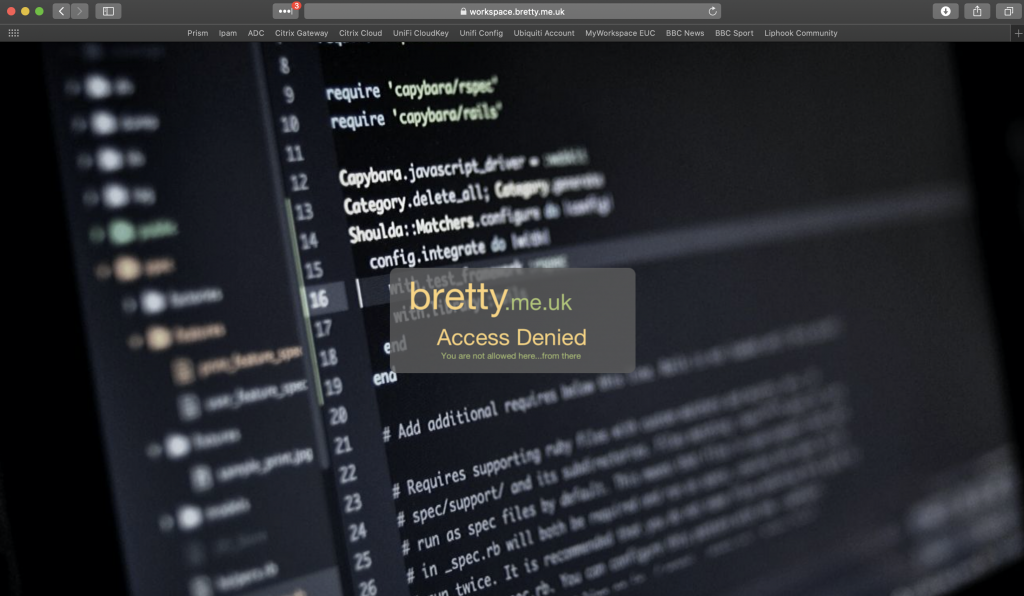
Let’s test – first try the gateway from my machine here in the UK

Works fine – now to test from the US. Thanks here to my buddy Jarian Gibson for testing this.
There we go.
Conclusion
So we have locked down global access to our NetScaler using Citrix App Firewall and specific access to our Gateways using Responder.
We can quickly lock out regions globally by removing them from the App Firewall Policy or grant new regions by adding them. Finally, we can edit specific access to the Citrix Gateways by editing the responder policies assigned.
Hope this gives you a quick insight into how you can use Geo IP and NetScaler to secure your remote access by region.